Ever tried painting a foam ball to make a globe for a science project, only to end up with lopsided continents and smudged oceans? You’re not alone. Handcrafting a physical Earth model with traditional methods is time-consuming, imprecise, and frustrating. Today, there’s a better way. 3D printing an Earth model allows you to transform accurate, real-world geographic data into a stunning, tangible globe with details you can feel. Whether you’re an educator, a hobbyist, or a professional exhibit designer, this guide provides the complete, step-by-end process to go from a digital idea to a polished, professional-grade model on your desk.
Introduction
A globe is more than decor; it’s a fundamental tool for understanding our world. It represents spatial relationships, topography, and geography in a way flat maps simply cannot. 3D printing technology has democratized the creation of these models. No longer limited to mass-produced, generically detailed globes, you can now produce a custom, data-accurate Earth model that highlights specific features—from the depths of the Mariana Trench to the peaks of the Himalayas. This process integrates digital design, additive manufacturing, and artistic finishing to create something both educational and visually impressive. Let’s build yours.
What Exactly is a 3D Printed Earth Model?
At its core, a 3D printed Earth model is a physical, three-dimensional representation of Earth, fabricated layer by layer by a 3D printer. Unlike injection-molded commercial globes, which often smooth over topographic details for cost, a 3D printed version can be generated directly from satellite elevation data (DEMs) and bathymetric datasets, capturing the true variance of the planet’s surface. The result is a model where you can literally run your finger over the Rocky Mountains or feel the basin of the Atlantic Ocean.
How Does It Differ from a Store-Bought Globe?
The key difference lies in customization and fidelity. A store-bought globe is a generic product. A 3D printed model is a tailored creation. Consider this comparison:
| Feature | Mass-Produced Globe | 3D Printed Earth Model |
|---|---|---|
| Topographic Detail | Often smooth; raised relief is generalized and exaggerated. | Can be true-to-data; scaled elevation reveals actual mountain heights and ocean depths. |
| Customization | None. You get standard political or physical maps. | Fully customizable. You can highlight tectonic plates, strip away water to show ocean floor, or create a “climate change” series showing glacial retreat. |
| Scale & Size | Limited to common retail sizes (typically 12″ diameter). | Any scale your printer can build. From a 2″ desktop charm to a multi-part, 3-foot diameter museum exhibit. |
| Production Method | Printed vinyl on a molded sphere. | Additive manufacturing from digital data, allowing for complex internal structures (e.g., a hollow, lightweight model). |
What Do You Need to Get Started? The Essential Toolkit
Before you hit “print,” you’ll need to assemble both digital and physical tools. Think of this as your project foundation.
1. Sourcing Geographic Data: The Digital Blueprint
Your model’s accuracy starts with the data. Fortunately, high-resolution, free geographic data is publicly available.
- NASA’s SRTM (Shuttle Radar Topography Mission): Provides 90-meter resolution elevation data for most of the world. It’s the gold standard for beginner-to-intermediate projects.
- ETOPO Global Relief Model: A bedrock and ice surface model from NOAA that includes bathymetry (ocean floor data), essential for a complete model.
- USGS Earth Explorer: A portal for even more specific datasets, including higher-resolution LiDAR data for certain regions.
2. 3D Modeling & Slicing Software: The Translation Layer
You need software to turn raw data into a printable 3D object.
- For Generating the 3D Model:
- Beginner-Friendly: Use TouchTerrain (a web app) or Blender with the 3D Print Add-on. These tools can directly convert DEM files (like GeoTIFFs) into a 3D mesh.
- For Advanced Control: QGIS (open-source GIS software) paired with the DEMto3D plugin gives you granular control over vertical exaggeration, base thickness, and model cropping.
- For Slicing (Preparing for Print):
- Ultimaker Cura or PrusaSlicer are excellent, free options. They convert your 3D model (STL file) into printer-specific instructions (G-code).
3. Choosing Your 3D Printing Technology
Your choice dictates the model’s detail, size, and finish.
| Printing Technology | Best For This Project Because… | Key Consideration |
|---|---|---|
| FDM (Fused Deposition Modeling) | Cost-effectiveness for larger models, good structural strength, and wide material choice (like color-changing or wood-fill PLA). | Visible layer lines will require more post-processing (sanding) to achieve a smooth sphere. |
| SLA/DLP (Resin Printing) | Unmatched surface detail and smoothness. Perfect for smaller models (under 8 inches) where you want to see fine island chains and sharp ridges. | Higher cost per print, smaller build volumes, and resin requires careful handling and curing. |
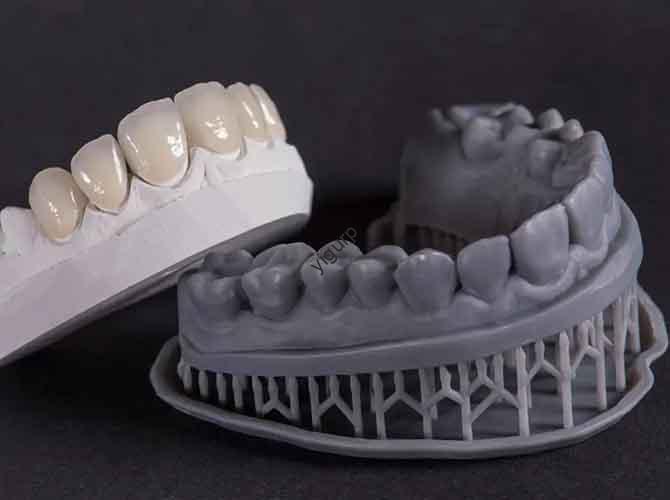
| Material Jetting (Professional) | Full-color, photorealistic prints in a single process. Ideal for museum-ready models without painting. | Prohibitively expensive for consumer use; typically a service from companies like Yigu Rapid Prototyping. |
Case Study: A School Project vs. A Museum Exhibit
- Scenario A: A high school teacher needs ten 6-inch diameter globes for a geography class. FDM printing with white PLA is the clear choice. It’s affordable (∼$3 per model in material), durable enough for handling, and can be painted by students as a learning activity.
- Scenario B: A science museum needs a single, highly detailed 12-inch globe showing seafloor topography for a permanent oceanography exhibit. SLA printing with a tough engineering resin, followed by professional airbrushing, would deliver the required durability and visual impact. Alternatively, outsourcing to a full-color material jetting service would provide a “wow factor” finished product.
The Step-by-Step Workflow: From Data to Display
Follow this linear process to minimize errors and ensure a successful print.
Step 1: Prepare and Generate Your 3D Model
- Download Data: Get a DEM file for your area of interest (e.g., the whole Earth from NASA SRTM).
- Adjust Vertical Exaggeration: Earth’s topography, at true scale, is surprisingly smooth relative to the planet’s size. To make features recognizable on a small model, you need vertical exaggeration (typically 20x to 40x). This is a crucial artistic and educational decision.
- Create the 3D Mesh: Import your DEM into your chosen software (e.g., TouchTerrain). Set your desired diameter and export as an STL file. For a two-part hemisphere model, you’ll generate two files.
Step 2: Slice and Prepare for Print
- Import and Orient: Open your STL in your slicer. Orient the model to minimize overhangs. For a full sphere, this often means slicing it in half and printing each hemisphere with the flat side down.
- Set Critical Parameters:
- Layer Height: 0.15mm for a great balance of detail and time (FDM), or 0.05mm for resin.
- Infill: 15-20% (gyroid or cubic pattern for strength) is sufficient for a decorative model.
- Supports: Necessary for the curved underside of hemispheres. Use tree supports (in Cura) as they are easier to remove and leave less scarring.
- Brim: Add a 5-10mm brim to prevent the hemispherical shell from warping off the build plate.
Step 3: Print, Assemble, and Post-Process
- Monitor the First Layer: This is critical for adhesion. A good “squish” ensures the hemisphere doesn’t detach during the long print.
- Remove Supports Carefully: Use flush cutters and needle-nose pliers. Patience here prevents damage to the fine coastal details.
- Assemble Hemispheres: If printed in halves, glue them together using PLA-specific cement or a strong cyanoacrylate (super glue). Use a rubber band to hold them aligned while curing.
- Sanding and Priming: Start with 120-grit sandpaper to remove layer lines and support scars, progressing to 400-grit for smoothness. Apply a filler primer spray, sand again, and repeat until the surface is perfectly smooth.
- Painting and Finishing:
- Base Coat: Apply a uniform light blue or white primer coat.
- Landmasses: For accuracy, use a projector or a detailed reference map to pencil in continental outlines. Paint landmasses with acrylics, using topographic maps as a guide for color (green for lowlands, brown/tan for mountains).
- Final Seal: Protect your artwork with 2-3 light coats of matte or satin clear acrylic sealer. For a classic globe look, a high-gloss coat over the oceans adds a beautiful wet look.
Solving Common 3D Printed Globe Problems
- Problem:The Model is Not Perfectly Round (Egg-shaped).
- Cause & Fix: This is often a Z-axis calibration issue on FDM printers. The printer is not moving vertically the exact amount it thinks it is. Calibrate your Z-steps/mm. It can also be caused by axial wobble in the lead screw; check for bends or misalignment.
- Problem:Fine Details (Small Islands) are Missing or Blobby.
- Cause & Fix: Your nozzle diameter may be too large relative to the feature size in your model. For a 6-inch globe, a 0.4mm nozzle might struggle with tiny Pacific atolls. Switch to a 0.25mm nozzle for that print. In slicing, ensure you have “Print Thin Walls” enabled.
- Problem:The Hemispheres Don’t Align Perfectly When Glued.
- Cause & Fix: This is usually a warping issue. Even slight lifting of the printed hemisphere edges can ruin the roundness. Print with a brim, ensure a clean, level bed, and use an enclosure to maintain a consistent ambient temperature. Lightly sand the mating edges flat before gluing.
Advanced Applications: Beyond the Basic Globe
The real power of 3D printing is customization for specific educational or professional narratives.
- Tectonic Plate Model: Print a globe, then carefully slice it apart along major tectonic plate boundaries using 3D software before printing. This creates a powerful physical puzzle for geology classes.
- Sea-Level Rise Series: Model and print a sequence of globes showing coastlines with 1m, 5m, and 10m of sea-level rise, based on GIS data. This creates a striking visual for climate change discussions.
- Historical Earth Models: Use paleogeographic data from resources like the Paleomap Project to print Earth as it looked during the Cretaceous period or the last Ice Age.
Conclusion
3D printing an Earth model is a profoundly satisfying project that merges technology, science, and art. It moves you from being a passive consumer of educational tools to an active creator of precise, meaningful physical objects. By mastering the workflow—from sourcing authoritative data, through informed printing choices, to patient post-processing—you gain the ability to produce globes of unmatched personal or professional value. This process not only results in a beautiful object but also deepens your understanding of the planet it represents.
FAQ:
Q: What is the best 3D printer for making Earth models?
A: There’s no single “best,” but for most hobbyists and educators, a reliable FDM printer with a 200x200mm or larger build volume (like a Prusa i3 MK3S+ or a well-tuned Creality model) is ideal. It offers the size and material flexibility needed. For pure, small-scale detail, a medium-format resin printer like the Anycubic Photon M3 Premium excels.
Q: How long does it take to 3D print a globe?
A: Time is a function of size, technology, and detail. A 6-inch (150mm) diameter FDM hemisphere printed at 0.15mm layers may take 12-18 hours each (24-36 hours total). The same size in resin at 0.05mm layers could take 8-12 hours per hemisphere. Post-processing (sanding, painting) adds several more hours.
Q: Can I 3D print a globe without painting it?
A: Yes, through a few methods: 1) Use a multi-material FDM printer (like a Prusa MMU) to print land in one color and oceans in another. 2) Print in a single, attractive material like marble or sandstone-fill PLA and finish with a clear coat, embracing a monochromatic, topographic look. 3) Outsource to a full-color material jetting service, which is the only way to get a photorealistic, painted result directly from the printer.
Q: Where can I find ready-to-print STL files of Earth?
A: Reputable sources include NASA’s 3D Resources page, Thingiverse, and Cults3D. However, these are often generic. For a truly customized model tied to specific data, learning the basic workflow with TouchTerrain is highly recommended and more powerful.
Q: How do I add a stand or make my globe rotate?
A: Design or source a meridian stand (the classic half-circle bracket) as a separate print. You can incorporate precision bearings into the design at the poles for smooth rotation. Ensure the inner diameter of the bearing is a press-fit for a strong, printed axial pin at the model’s North and South poles.
Discuss Your Projects with Yigu Rapid Prototyping
Do you envision a high-detail, full-color Earth model for a corporate lobby, a custom topographic series for a research presentation, or durable educational models for a classroom set? Yigu Rapid Prototyping specializes in turning complex digital concepts into flawless physical realities. Our industrial-grade ColorJet and MultiJet Fusion technology can produce stunning, fully colored globes in a single print, no painting required. Our engineering team can help you optimize your design for durability, assembly, and visual impact. Contact us for a consultation and let’s build a model that brings your vision of the world to life.