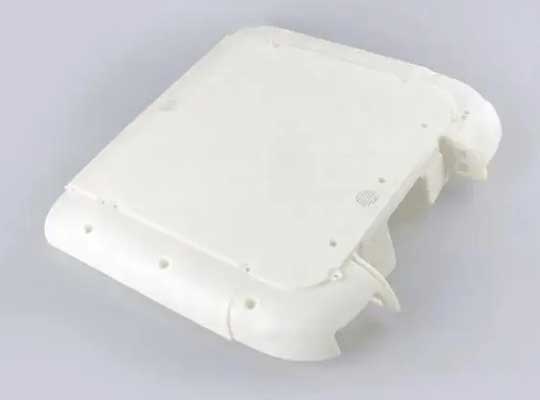
The home appliance market in 2026 is a battlefield of innovation, driven by smart connectivity, sustainable design, and hyper-personalization. For engineers and product managers, the pressure to move from concept to market-ready product has never been greater, with development cycles shrinking and consumer expectations soaring. In this high-stakes environment, 3D printing has evolved from a niche prototyping tool into the central nervous system of appliance development. It enables teams to translate complex CAD models into tangible, testable prototypes in a matter of hours, bypassing the weeks-long delays and prohibitive costs of traditional injection molding. This guide provides a comprehensive, step-by-step blueprint for harnessing 3D printing to create functional, aesthetic, and user-validated prototypes for everything from smart coffee makers to next-generation air purifiers.
What Are the Foundational Steps Before You Start Printing?
Success in 3D printing is determined long before the first layer is deposited. A meticulous pre-processing phase is critical to avoid costly reprints and ensure the prototype serves its intended purpose.
How Do You Define the Prototype’s Core Objective?
The first and most critical question is: What are you testing? A prototype for a new food processor bowl has vastly different requirements than one for a robotic vacuum’s aesthetic shell. Clearly define your goal using this framework:
- Form and Fit Validation: Is the primary goal to check ergonomics, aesthetics, and assembly compatibility? (e.g., Does the handle fit comfortably in the hand? Does the water tank lid snap securely into place?).
- Functional Testing: Does the part need to withstand mechanical stress, heat, or fluid contact? (e.g., Will the blender’s blade coupler withstand high torque? Can the steam iron’s nozzle housing resist heat and moisture?).
- User Experience (UX) Testing: Will real users interact with it to provide feedback on usability and intuitiveness? (e.g., Is the control panel button layout logical? Is the oven door handle easy for all users to grip?).
Pro Tip: At Yigu, we use a simple matrix with our clients to score each prototype objective from 1-5 for priority. This forces clarity and ensures the chosen printing technology and material align with the highest-priority test.
Which 3D Printing Technology is the Right Engine for Your Prototype?
Not all 3D printing is created equal. Selecting the optimal technology is a strategic decision based on your prototype’s goals, required material properties, and necessary fidelity.
A 2026 Guide to Selecting 3D Printing Technology for Appliances:
| Technology | Best For Prototype Goal | Key Material Options | Strengths | Considerations |
|---|---|---|---|---|
| FDM (FDM) | Functional & Mechanical Testing; Large, durable parts. | ABS, ASA, PETG, Nylon, PC | Low cost; Excellent strength & thermal resistance; Wide material selection. | Visible layer lines; Lower detail resolution. |
| SLA/DLP (Vat Polymerization) | High-Detail Aesthetic Models; Smooth surfaces; Clear parts. | Standard, Tough, & Castable Resins | Exceptional surface finish; High accuracy; Ideal for visual prototypes & master patterns. | Parts can be brittle; Limited UV/heat stability. |
| MJF/SLS (Powder Bed Fusion) | Complex, Integrated Assemblies; Functional parts with moving features. | Nylon PA11/12, TPU | No support structures needed; Isotropic strength; Excellent for snap-fits & hinges. | Higher machine cost; Grainy surface texture. |
Case in Point: A client developing a high-end stand mixer needed to test the planetary gear action inside the head. Using FDM would have required assembling multiple printed gears. Instead, we recommended SLS to print the entire complex gear train as a single, moving part, allowing for immediate functional testing of the mechanism.
How Do You Select a Material That Survives the Real World?
Appliance prototypes must endure the environments they’re designed for. Material science has advanced significantly, offering properties that closely mimic production-grade plastics.
- For Heat & Chemical Resistance: ASA (Acrylonitrile Styrene Acrylate) is now the successor to ABS for any exterior part, offering superior UV and weather resistance for outdoor appliances or those near windows.
- For Food Contact & Durability: PETG remains a superstar for its balance of strength, clarity, and food safety, ideal for water reservoirs, blender jars, and transparent covers. For更高端 applications, Copolyester (CPE) resins for SLA offer similar benefits with a glass-like finish.
- For Flexible & Sealing Components: Thermoplastic Polyurethane (TPU) is indispensable for printing gaskets, seals, soft-touch buttons, and anti-vibration feet directly.
- For High-Temperature Applications: Polycarbonate (PC) and Peek (for advanced FDM systems) can be used to prototype parts near heating elements, such as toaster internals or hair dryer nozzles, withstanding temperatures well above 100°C.
What is the Step-by-Step Guide to Processing and Printing?
With planning complete, the focus shifts to execution. This phase transforms a digital file into a physical asset.
How Do You Optimize the 3D Model for Printing (Design for Additive Manufacturing – DfAM)?
This is where engineering meets artistry. Effective DfAM for appliances involves:
- Optimizing Wall Thickness: Ensure walls are thick enough to be printable and functional but not so thick as to cause warping or excessive weight. For most appliance housings, a 2.5-3mm wall is a robust starting point.
- Incorporating Draft Angles & Radii: Just like for injection molding, adding slight draft angles (1-2 degrees) to vertical walls and filleting sharp internal corners dramatically improves printability, reduces stress concentrations, and makes post-processing easier.
- Designing for Part Consolidation: One of 3D printing’s superpowers. Can you combine multiple components (e.g., a bracket, clip, and guide) into a single printed part? This simplifies assembly and testing.
- Adding Functional Textures: Instead of painting, consider designing the texture directly into the CAD model—a diamond grip pattern on a handle or a leather-grain finish on a side panel can be printed directly with SLA or finely tuned FDM.
What Are the Critical Slicer Settings for Reliable Results?
The slicer software is your command center. Key settings for appliance prototypes include:
- Layer Height: Use 0.15-0.20mm for high-detail visible parts (SLA or fine FDM). Use 0.25-0.30mm for strong, functional parts where speed is prioritized.
- Infill Pattern and Density: For structural parts, a gyroid or cubic infill at 30-50% provides excellent strength-to-weight ratio. For purely visual models, 15-20% is sufficient.
- Support Strategy: Use tree supports for complex geometries to minimize contact points and material use. Critical: Always orient the part to minimize supports on cosmetic surfaces.
Real-World Example: For a prototype air fryer basket that needed both strength and fine mesh-like features, we used a dual-setting approach in the slicer: high density (50%) and small layer height (0.1mm) for the mesh, and standard settings for the structural frame, all printed as one piece.
How Do You Transform a Raw Print into a Production-Ready Prototype?
Post-processing is what turns a “3D printed part” into a “convincing prototype.” It’s a multi-stage craft.
What is the Essential Post-Processing Workflow?
Follow this sequence for professional results:
- Support Removal & Initial Cleaning: Carefully remove supports. For SLA resins, this involves an isopropyl alcohol (IPA) wash in a dedicated washing station, followed by UV curing to achieve final material properties.
- Surface Finishing:
- Sanding: Start with coarse grit (~120) to remove layer lines and progress to fine grit (~400-600) for smoothness. Wet sanding prevents clogging and overheating.
- Gap Filling & Priming: Use a modeling putty or spray filler primer to eliminate layer lines and minor imperfections. Sand again after priming.
- Painting and Coating:
- Primer: Always use a plastic-adhesion promoter primer.
- Paint: Use high-quality automotive or appliance-grade spray paints for a durable, realistic finish. Consider hydro-dipping for complex graphic patterns.
- Clear Coat: A matte, satin, or gloss clear coat protects the paint and gives the final OEM finish.
- Assembly and Final Detailing: Assemble printed components with appropriate hardware. Add decals, screen-printed overlays, or soft-touch pads to complete the prototype’s authentic feel.
How Do You Rigorously Test and Iterate Your Design?
The prototype’s value is unlocked through systematic testing, turning subjective impressions into actionable data.
What Does a Comprehensive Appliance Prototype Test Plan Look Like?
Create a test matrix that aligns with your initial objectives:
Sample Prototype Validation Matrix for a Smart Kettle:
| Test Category | Specific Test | Acceptance Criteria | Prototype Iteration Impact |
|---|---|---|---|
| Ergonomic & UX | 50-user handling study | ≥90% report comfortable grip and intuitive button press. | Modified handle contour and button tactile feedback. |
| Functional | 500-cycle lid open/close test. | Hinge shows no fatigue; seal remains intact. | Reinforced hinge pin diameter and adjusted seal geometry. |
| Thermal | Surface temperature measurement during boil. | External handle temperature remains <45°C. | Added internal air gap insulation in handle design. |
| Fit & Assembly | Integration with off-the-shelf heating element & PCB. | All components fit with ≤0.5mm tolerance. | Adjusted internal chassis mounting points in CAD. |
The Iteration Loop: Based on test results, modifications are made in the CAD model. The beauty of 3D printing is the speed of this loop. A failed hinge test on Monday can lead to a modified, stronger design printed and ready for re-testing by Wednesday.
What Are the Advanced Applications and Future Trends for 2026?
Looking ahead, 3D printing’s role is expanding beyond prototyping into pilot production and customization.
- Bridge to Production: 3D printed injection molds (with conformal cooling channels) are now used to produce hundreds to thousands of final-quality parts for market testing, pilot runs, or limited-edition appliances, drastically reducing the risk and cost of hard tooling.
- Embedded Electronics and Smart Features: Prototypes now integrate cavities and channels for wiring, sensors, and even 3D printed conductive traces, allowing for functional testing of smart appliance logic and IoT features in a form factor identical to the final product.
- Sustainability-Driven Design: Prototyping is used to optimize designs for material efficiency and disassembly. We helped a vacuum cleaner manufacturer use topology-optimized, 3D-printed structural components that reduced plastic use by 22% in the final product.
Conclusion
Mastering the 3D printing of home appliance prototypes in 2026 is no longer a luxury—it is a fundamental competency for any team serious about innovation and speed. The process, from strategic pre-processing and technology selection through to professional post-processing and rigorous testing, forms a seamless digital thread from idea to validation. By embracing this end-to-end workflow, companies can de-risk development, deeply understand user needs, and bring superior, well-engineered appliances to market at a pace that traditional methods cannot match. The future of appliance design is iterative, user-centric, and digital, with 3D printing as its indispensable engine.
Frequently Asked Questions (FAQ)
Can 3D printed prototypes be used for mandatory safety and certification testing (e.g., UL, CE)?
For final certification, testing laboratories typically require parts made from the production-intent material and process (e.g., injection-molded ABS). However, 3D printed prototypes are invaluable for pre-compliance testing. You can identify and rectify potential failure points (like thin walls near electrical components or insufficient venting) early, saving enormous cost and time by ensuring your design is robust before you commit to expensive production tooling and formal certification submits.
What is the realistic cost and time comparison for a typical enclosure prototype?
For a medium-sized enclosure (e.g., for a coffee grinder, approx. 150x100x100mm):
- Injection Molding (Aluminum Tool): $8,000 – $15,000 and 6-8 weeks for the first sample.
- 3D Printing (SLA/FDM): $150 – $400 and 2-3 days for a finished, painted prototype.
This dramatic difference makes 3D printing the unequivocal choice for the first 90% of the design iteration process.
How do you handle the challenge of achieving specific color matches with 3D printed prototypes?
For exact PMS or RAL color matching, the most reliable method is professional painting and finishing of a primed, sanded prototype. While some filaments and resins come in a wide range of colors, they cannot match the exact pigment formulation and finish of production plastics. The post-processing stage is crucial here. We maintain a library of appliance-specific paint codes to achieve a near-perfect visual match for client review boards.
Is it possible to 3D print transparent parts for appliances, like a water level window?
Yes, with excellent results. SLA/DLP printing with clear or transparent resins can produce parts that, after careful post-processing (sanding through increasingly fine grits, followed by polishing and a clear coat), achieve near-optical clarity. This is perfect for prototyping water reservoir windows, indicator lenses, or glass-like covers. The key is in the meticulous, multi-step finishing process.
Discuss Your Appliance Prototyping Projects with Yigu Rapid Prototyping
At Yigu Rapid Prototyping, we specialize in turning complex appliance concepts into convincing, functional, and test-ready prototypes. We understand that a prototype is more than a model; it’s a critical decision-making tool. Our team of engineers provides Design for Additive Manufacturing (DfAM) consultancy to optimize your models for strength, aesthetics, and printability from the outset. With a full suite of industrial FDM, SLA, and SLS printers, we can select the perfect technology-material combination for your specific need, whether it’s a heat-resistant hair dryer nozzle in PC or a smooth, painted refrigerator door panel from SLA.
We go beyond printing. Our in-house finishing workshop handles everything from professional sanding and priming to color-matched painting, assembly, and even light functional testing. We act as an extension of your R&D team, helping you iterate faster, communicate ideas more effectively, and derisk your path to production.
Contact Yigu today to discuss your next home appliance project. Let’s build the tangible future of your product, together.