Metal 3D printed prototypes let you test complex designs fast. This guide shows you how. We detail the full workflow from design to testing. You’ll learn how to pick the right metal for your needs, like stainless steel or titanium. We show real-world cases from aerospace, medical, and auto fields. Understand the clear benefits over old methods: more design freedom, less waste, and faster time to market. Learn how to avoid common pitfalls and make your prototype a success.
Introduction
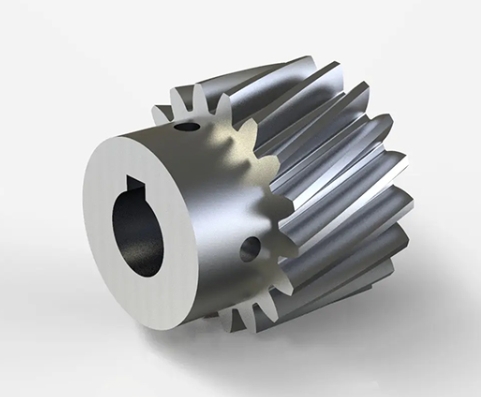
What if you could hold a functional metal part in your hands just days after designing it? Metal 3D printing makes this possible for prototyping. It’s a radical shift from waiting weeks for machined parts. This technology builds parts layer by layer from metal powder, using a laser or electron beam.
This guide is for engineers, product designers, and project managers. We move beyond the hype to the practical steps. You’ll learn how to navigate the process, choose materials wisely, and use prototypes to de-risk your projects. We’ll show you how metal 3D printing turns complex designs into testable reality faster than ever before.
What is the Metal 3D Printing Prototype Process?
Creating a metal prototype is a precise, multi-stage journey. Skipping a step risks part failure or poor data.
How Do You Design for Metal AM?
Designing for metal additive manufacturing (DFAM) is different. You must think about how the part will be built in the machine, not just its final shape.
- Orientation is Key: How you place the part on the build plate affects strength, surface finish, and support needs. Orient features to minimize overhangs over 45 degrees.
- Design for Supports: Supports are needed to anchor overhangs and conduct heat away. They are made of the same metal and must be removed later. Design to minimize support contact on critical surfaces.
- Consider Post-Processing: Will the part need machining on certain faces? Add extra stock material (0.5-1mm) to those areas in your design.
- Hollowing and Lightweighting: To save cost and weight, you can design internal lattice structures or hollow sections. But you must add drainage holes for unused powder.
What Happens in Build Preparation?
Once the design is ready, the slicing and nesting phase begins. The CAD model is sliced into thin layers. For multiple parts, they are nested efficiently on the virtual build plate. The machine operator sets laser power, scan speed, and layer thickness (typically 30-60 microns). This file drives the printer.
What Are the Main Printing Technologies?
Two technologies dominate metal prototype printing:
- Laser Powder Bed Fusion (LPBF): A laser melts fine metal powder in a thin layer. The build plate lowers, a new powder layer is spread, and the process repeats. It offers the highest detail and complexity.
- Binder Jetting: A print head deposits a liquid binder onto a powder bed, “gluing” the shape. The “green” part is then sintered in a furnace. It can be faster and cheaper for less dense parts.
Why is Post-Processing Critical?
A part fresh out of the machine is not ready. Post-processing is mandatory and can be 30-50% of the total cost and time.
- Powder Removal: The part is encased in unused powder. This powder is carefully removed, often with brushes and air, and recycled.
- Stress Relief & Heat Treatment: The rapid heating and cooling creates internal stress. Parts undergo stress relief heat treatment to prevent cracking or distortion.
- Support Removal: Supports are cut away using bandsaws, EDM wire cutting, or manual tools. This is a skilled task to avoid damaging the part.
- Surface Finishing: The as-printed surface is rough. Common finishing includes sandblasting, machining, polishing, or HIP (Hot Isostatic Pressing) to improve surface quality and mechanical properties.
How Do You Validate the Prototype?
Finally, the part is measured and tested. Use 3D scanning (CMM) to check critical dimensions against the CAD model. Then, perform functional tests—apply load, test in a fluid system, or check thermal performance. The goal is to gather data to iterate the design.
Which Metal Should You Choose for Your Prototype?
The choice depends on your testing goals. See the table below for a comparison.
| Metal | Best For Prototyping | Key Prototype Benefit | Cost & Note |
|---|---|---|---|
| Stainless Steel (316L, 17-4PH) | General functional testing, corrosive environments | Excellent strength & corrosion resistance; versatile “workhorse”. | Mid-cost. Most available. Good for most mechanical tests. |
| Aluminum (AlSi10Mg, Scalmalloy) | Lightweight structures, heat sinks, automotive parts | High strength-to-weight ratio, good thermal properties. | Lower cost than Ti. Easier to machine post-print. |
| Titanium (Ti6Al4V) | Aerospace brackets, biomedical implants, high-performance parts | Best strength-to-weight, biocompatible. | High cost. Requires special handling (flammable powder). |
| Inconel (625, 718) | Extreme temperature testing (turbine parts, exhaust systems) | Superior heat and creep resistance. | Very high cost. Difficult to machine. For specialized needs. |
| Cobalt Chrome (CoCr) | Wear-resistant components, dental/medical prototypes | High hardness and wear resistance. | High cost. Often used for medical device certification. |
Case Study – Medical Implant: A company developing a spinal fusion cage needed a prototype for biomechanical testing and surgeon feedback. They chose Titanium Ti6Al4V because its strength and biocompatibility matched the final product. The 3D printed prototype allowed them to test a complex lattice structure designed to promote bone growth—a feature impossible to machine. This test data was crucial for FDA submission.
What Are the Key Benefits for Prototyping?
Why go through this process? The advantages are compelling.
- Complexity is Free: The biggest benefit. You can prototype internal channels, organic shapes, and consolidated assemblies at little to no extra cost. This allows you to test optimized designs you could never machine.
- Speed to First Article: From finalized CAD to part in hand can be as little as 3-5 days for urgent prototypes, versus weeks for machining quotes and production.
- Cost-Effective for Complexity: For a simple bracket, machining may be cheaper. But for a complex manifold with integrated channels, 3D printing avoids expensive multi-axis machining or assembly of multiple parts.
- Material Fidelity: You can prototype in the exact same high-performance alloy you plan to use for production (e.g., Inconel 718). This gives you the most accurate functional test data.
- Risk Reduction: By testing a form, fit, and function prototype early, you find design flaws before committing to production tooling. This can save hundreds of thousands of dollars.
How Are Metal Prototypes Used in Industry?
Accelerating Aerospace Innovation
Aerospace firms use metal prototypes to test lightweight, load-bearing components. One company prototyped a titanium engine mount bracket. The 3D printed design was 40% lighter than the forged part while meeting all strength requirements. They could test it in a engine mock-up years before final production tooling was made.
Validating Medical Device Designs
In the medical field, prototypes are used for surgeon training, custom surgical guides, and implant testing. A team developed a patient-specific cranial implant. They 3D printed it in titanium directly from a CT scan. Surgeons could physically plan the operation, and the prototype served as the pattern for the final implant.
Streamlining Automotive Development
Auto engineers prototype heat exchangers, brake components, and lightweight brackets. An EV manufacturer tested several designs of an aluminum cooling jacket for their battery pack. 3D printing let them iterate on internal fin structures weekly, optimizing thermal performance in a way that casting tooling would not allow until much later.
What Are the Common Pitfalls and How to Avoid Them?
- Pitfall: Designing walls too thin, causing print failure.
- Solution: Follow the minimum wall thickness guidelines from your service provider (often ~0.5mm for LPBF).
- Pitfall: Ignoring support needs, leading to warping or failed overhangs.
- Solution: Consult with a metal AM engineer during the design phase. Use generative design software that accounts for supports.
- Pitfall: Expecting a machined surface finish straight from the printer.
- Solution: Plan and budget for necessary post-processing (machining, grinding) on critical interfaces.
- Pitfall: Not accounting for material shrinkage/ distortion.
- Solution: Use simulation software (like Autodesk Netfabb or Ansys Additive) to predict warpage and pre-compensate your CAD model.
What is the Future of Metal Prototyping?
The future is faster, smarter, and more integrated. New technologies like Binder Jetting promise lower costs and higher throughput for prototypes. AI-driven build simulation will predict and correct issues in real-time. Perhaps most importantly, metal 3D printing is becoming a standard tool in the digital thread, seamlessly connecting prototype data to simulation and final production.
Conclusion
Metal 3D printed prototypes are a powerful validation tool in the modern engineer’s toolkit. They close the gap between digital design and physical reality for complex, high-performance parts. The process demands a new design mindset and respect for post-processing, but the rewards are substantial: unprecedented design freedom, accelerated development cycles, and reduced project risk.
Start by clearly defining what you need to learn from your prototype. Then, engage with experts early to design for the process. By doing so, you can leverage this technology not just to make a part, but to de-risk your entire project and innovate with confidence.
FAQ
Q: How accurate and strong are metal 3D printed prototypes compared to final parts?
A: Dimensional accuracy can be very high, typically within ±0.1% of the dimension (with a ±0.1mm minimum) for LPBF. Mechanical properties like tensile strength can meet or exceed cast material standards, especially after proper heat treatment. However, fatigue strength may be lower than wrought material due to internal pores, which is why post-processing like HIP is used for critical parts.
Q: Is it cheaper to machine or 3D print a metal prototype?
A: It depends entirely on the geometry. For a simple, solid blocky part, CNC machining is almost always cheaper and faster. For a complex part with internal features, thin walls, or organic shapes, 3D printing becomes cost-competitive or cheaper because it avoids complex machining setups and high material waste.
Q: Can I get a metal prototype that is both strong and lightweight?
A: Absolutely. This is one of the key strengths of metal AM. You can design and print topologically optimized structures or internal lattice networks that remove material only where it is not needed for strength. This results in a part that is significantly lighter than a solid machined version while maintaining stiffness and strength, which is ideal for aerospace and automotive applications.
Discuss Your Metal Prototype Project with Yigu Rapid Prototyping
Are you developing a complex component that needs to be tested in metal? At Yigu Rapid Prototyping, we specialize in guiding teams through the metal additive manufacturing process. From DFAM consulting and material selection to precision printing and professional post-processing, we provide an end-to-end service to deliver functional, high-quality metal prototypes. Let us help you validate your design faster.
For more information on our capabilities, please visit our Metal 3D Printing Prototype Services page.