In high-end industries like aerospace, automotive, and medical devices, the race to innovate depends on speed and precision. Traditional methods often fall short when a design requires intricate details or ultra-tight tolerances. This is where Laser CNC machining prototype modeling enters the frame as a game-changing solution.
By blending the focused power of laser technology with the automated control of Computer Numerical Control (CNC), this process turns digital concepts into physical parts with unmatched efficiency. Whether you are an engineer testing a new turbine blade or a procurement specialist sourcing medical instrument handles, understanding this workflow is essential. This guide explores the entire process, from the first line of code to the final quality check, to help you make informed manufacturing decisions.
Why Is Design the Foundation of Laser Precision?
The success of a Laser CNC machining prototype model is decided long before the laser fires. The design and programming phase translates your vision into a digital map that the machine must follow with zero room for error.
3D Model Creation
Everything starts with CAD (Computer-Aided Design) software. Engineers use tools like SolidWorks or AutoCAD to build a detailed 3D model. This is more than just a shape; it includes critical data on weight distribution, grip textures, and assembly fit. For instance, if you are designing a surgical tool, the CAD model must define the exact ergonomics required for a surgeon’s hand.
CNC Program Development
Once the model is ready, it must be “translated” for the machine. CAM (Computer-Aided Manufacturing) software converts the 3D model into G-code. This program dictates:
- The Laser Path: The exact route the beam travels.
- Power and Speed: How hot and fast the laser cuts.
- Depth: Ensuring the beam penetrates the material without melting surrounding areas.
Expert Insight: Always validate your model for Design for Manufacturability (DFM). Avoid sharp internal corners in brittle plastics, as they can crack under the heat of a laser. According to a 2024 survey by the Manufacturing Technology Association (MTA), rigorous DFM checks can reduce rework rates by up to 30%.
How Do You Select the Right Equipment?
Not all lasers are created equal. Choosing the right machine depends on your material and how much detail you need.
Common Laser CNC Equipment Types
| Equipment Type | Ideal Materials | Typical Applications | Precision Level |
| Laser Cutting | Aluminum, Stainless Steel | Automotive panels, brackets | ±0.02 mm |
| Laser Engraving | Glass, Acrylic, Leather | Medical logos, serial numbers | ±0.01 mm |
| Laser Drilling | Titanium, Carbon Fiber | Fuel injector holes, circuit vias | ±0.005 mm |
Preparation and Calibration
Before starting, technicians must perform a calibration check. Using laser alignment tools, they ensure the beam is perfectly centered. Even a tiny 0.1° tilt can cause a 0.5 mm error on a larger part, which could ruin an aerospace component. Furthermore, cleaning the lens is vital; a dusty lens can reduce cutting efficiency by 20% to 30%.
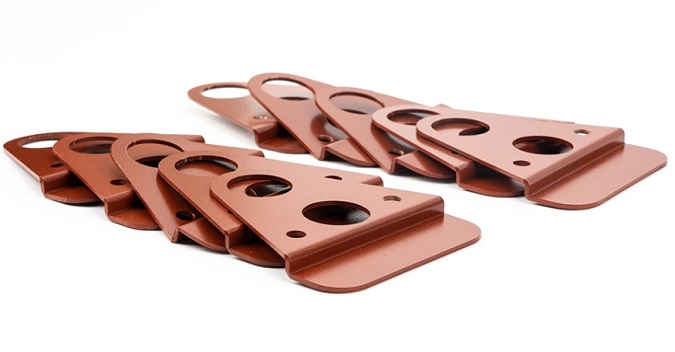
Which Materials and Fixation Methods Work Best?
Selecting the right material is the first step in ensuring your prototype performs like the final product.
Top Materials for Laser CNC Modeling
- Metals (Aluminum 6061, 304 Stainless): These offer high strength and are the go-to for aerospace turbine blades.
- Plastics (ABS, Polycarbonate): Lightweight and low-cost, these are perfect for medical device housings.
- Composites (Carbon Fiber): Used in racing and drones for their incredible strength-to-weight ratio.
Securing the Workpiece
If the material moves during the cut, the prototype is scrap. Depending on the part, we use three main methods:
- Mechanical Clamps: Best for thick metal blocks.
- Vacuum Tables: These use suction to hold thin plastic sheets flat, preventing them from warping under heat.
- Double-Sided Tape: A quick fix for very small electronic connectors (under 50 mm) where clamps might get in the way of the laser.
How Do Roughing and Finishing Differ?
The machining process is a two-act play: first comes the “muscle” (roughing), then the “finesse” (finishing).
Step 1: Laser Roughing
The goal of roughing is to remove bulk material as fast as possible. If we are making an automotive interior bracket, roughing cuts the basic shape out of a larger sheet.
- Parameters: High power (80-90%) and high speed (100-200 mm/s).
- Result: A “near-net-shape” part that is ready for detail work.
Step 2: Laser Finishing
Finishing refines the dimensions to meet your exact specs. For a medical syringe plunger, finishing ensures the surface is smooth enough to create a vacuum-tight seal.
- Parameters: Lower power (30-50%) and slower speed (20-50 mm/s).
- Result: This minimizes the Heat-Affected Zone (HAZ), which is critical for titanium parts. Too much heat can make titanium brittle and prone to snapping.
What Happens After the Laser Stops?
Once the machine finishes its program, the part enters post-treatment and a final inspection gauntlet.
Common Post-Treatment Methods
- Sandblasting: Removes burrs and creates a professional matte look on aluminum.
- Anodizing: Adds a protective, colored layer to aerospace parts to prevent rust.
- Polishing: Used on brass or steel to achieve a mirror-like shine (Ra < 0.4 μm).
The Quality Inspection Checklist
To ensure the prototype is “flight-ready” or “surgery-ready,” we use:
- CMM (Coordinate Measuring Machine): Verifies that a blade’s thickness matches the 3D model within ±0.03 mm.
- Digital Microscopy: Checks for microscopic cracks or burrs at 100x magnification.
- Functional Testing: For moving parts like hinges, we may open and close them 10,000 times to ensure no loss of tension.
Real-World Success Stories
Case 1: Aerospace Turbine Blades
A client needed a titanium turbine blade with 0.5 mm thin walls for engine tests. Using traditional milling would have taken 7 days and risked bending the thin walls. By switching to Laser CNC machining, we completed the prototype in just 48 hours. The precision was ±0.02 mm, and the part passed all ISO 9001 standards.
Case 2: Medical Surgical Handles
A medical tech firm developed an ergonomic forceps handle made of ABS plastic. We used laser engraving to add a “non-slip” grip texture and laser cutting for the complex handle shape. The prototype passed ISO 10993 biocompatibility tests and was ready for clinical trials in 3 days, cutting their typical development time by 50%.
What are the Pros and Cons?
While powerful, Laser CNC machining is a specialized tool that requires a specific set of circumstances to be the “right” choice.
Key Advantages
- High Precision: Reaches ±0.005 mm, which is essential for tiny electronic sensors.
- Fast Turnaround: You can go from a CAD file to a finished part in 24 to 72 hours.
- Versatility: One machine can often handle metal, wood, and plastic with only a change in settings.
Main Challenges
- Equipment Cost: Industrial-grade machines are expensive (ranging from $50,000 to $200,000).
- Operator Skill: This isn’t a “plug and play” system. Operators need advanced training in laser safety and G-code.
Yigu Technology’s Perspective
At Yigu Technology, we view Laser CNC machining prototype modeling as the heart of modern rapid innovation. We don’t just “cut parts”—we integrate advanced laser systems with AI-driven programming to minimize setup times. Our approach has helped aerospace clients reduce their time-to-market by up to 50%. For us, the goal is always to balance cost with extreme quality, ensuring every prototype you receive is ready for the most demanding real-world tests.
FAQ
How long does it take to make a laser CNC prototype?
Most simple parts take 24-48 hours. Complex designs with exotic materials like titanium usually take 48-72 hours from start to finish.
What is the maximum thickness a laser can cut?
It depends on the laser’s power. Generally, we can cut up to 25 mm of stainless steel, 50 mm of aluminum, and up to 100 mm for certain plastics like ABS.
Is laser CNC more expensive than traditional milling?
For small batches (1-10 pieces), laser CNC is actually 10-20% cheaper because the setup time is much lower. However, for massive production runs of 1,000+ parts, traditional milling often becomes more cost-effective.
Does laser cutting leave a “burnt” edge on plastic?
If the settings are wrong, yes. However, by using a lower power and slower speed during the finishing pass, we can achieve a clean, polished edge without discoloration.
Can you use laser CNC for carbon fiber?
Yes. Laser drilling is one of the best ways to create clean holes in Carbon Fiber Reinforced Plastic (CFRP) without causing the layers to peel or delaminate.
Discuss Your Projects with Yigu Rapid Prototyping
Are you ready to accelerate your product development? At Yigu Technology, we specialize in high-precision Laser CNC machining prototype modeling. Our expert engineers are ready to help you optimize your designs for the laser, select the perfect materials, and deliver world-class prototypes in record time.
Would you like a free design-for-manufacturability (DFM) review for your next project? Contact us today, and let’s turn your vision into a reality.