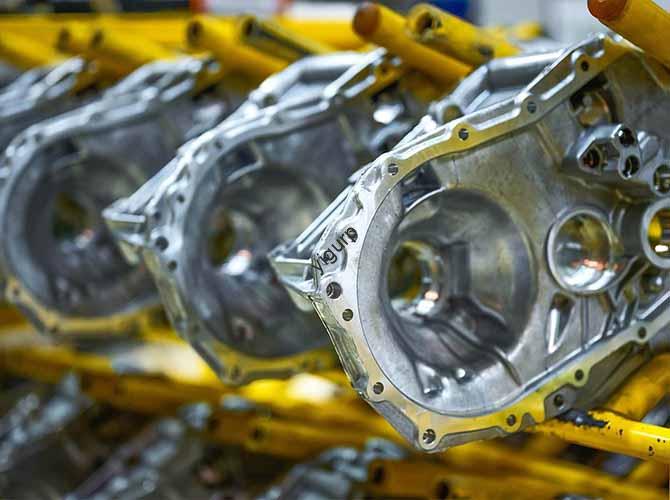
Creating a high-quality prototype is a high-stakes game. You need speed to hit market deadlines, but you cannot sacrifice accuracy. This is where the precision walking machine—often referred to as a sliding-head or Swiss-style lathe—becomes the “secret weapon” of the manufacturing world. These machines are not just lathes; they are versatile, multi-functional powerhouses that combine turning, milling, and drilling in a single setup.
When you are building automotive test components or intricate medical device models, every micron counts. A single mistake in the setup can lead to a parts bin full of scrap. This guide provides a detailed, step-by-step roadmap for mastering the machining process. We will walk through everything from tool selection to the final surface finish, ensuring your prototype is functional, accurate, and cost-effective.
Which Machine Tool Fits Your Prototype?
The foundation of any successful project is the equipment you choose. Not all walking machines are built for the same tasks. Selecting the wrong one can lead to poor rigidity, excessive vibration, and missed tolerances. You must match the machine’s capabilities to your prototype’s size and complexity.
Compare Different Machine Types
Different machines excel in different “environments.” For example, a CNC walking lathe is a king for small, cylindrical parts. If your part is irregular, you might need a milling-focused machine.
| Machine Type | Key Features | Ideal Prototype Scenarios |
| CNC Walking Lathe | 2-4 axes; compact footprint. | Small shafts, gears, and pins. |
| CNC Milling Machine | 3-5 axes; high 3D capacity. | Automotive brackets, irregular implants. |
| Hybrid Walking Machine | Multi-axis; mill-turn integration. | Aerospace parts with complex flats/curves. |
| Grinding-Equipped | Ultra-precise spindle; fine finish. | Bearing prototypes and mirror finishes. |
Prioritize Accuracy and Rigidity
When shopping for a shop or selecting internal equipment, look at the positional accuracy. For high-stakes prototyping, you want a machine with accuracy $\leq \pm 0.003 mm$. Rigidity is also key. A heavy-duty cast-iron base reduces the “chatter” that ruins surface quality. If you are working on a final validation prototype that needs a $\pm 0.002 mm$ tolerance, a hybrid machine with high damping is your best bet.
How to Plan the Machining Process?
A “winging it” approach is a recipe for disaster in precision machining. A well-thought-out process plan can cut your production time by 30% and stop rework before it starts. The goal is to remove material efficiently while keeping the part stable.
Follow the Rule of Three
Always organize your operations into three distinct stages:
- Rough Machining: Remove roughly 80% of the excess material as fast as possible.
- Semi-Finish Machining: Leave about 0.1 mm to 0.2 mm of material. This acts as a “buffer.”
- Finish Machining: Use light passes to hit the final, exact dimensions.
Use Modern Simulation Software
Never send code directly to the machine without testing it first. Software like Mastercam or Siemens NX allows you to run a digital “test drive.” This catches tool collisions (where the tool hits the fixture) and identifies “air cutting”—the wasted time when the tool moves but isn’t touching the part.
Case Study: Automotive Sensor Prototype
A design team was struggling with a 45-minute cycle time for a sensor housing. By using process simulation, they realized the tool was taking an inefficient path around the central boss. After optimizing the path and combining three drilling steps into one, the cycle time dropped to 32 minutes. This saved the client nearly 25% in labor costs.
Can You Guarantee ±0.005mm Tolerance?
Precision is the soul of prototype machining. In the medical or aerospace fields, being off by the thickness of a human hair means the part is useless. Controlling this precision requires a mix of hardware calibration and environmental awareness.
Control Positioning and Repeatability
You must calibrate your walking machine weekly. Check for axis backlash—the tiny “play” in the gears. If it exceeds 0.002 mm, your part dimensions will drift. Use a laser interferometer to verify that when the machine thinks it moved 10 mm, it actually moved 10 mm.
Solving Thermal Deformation Problems
Did you know that a machine’s metal body expands as it gets hot? This is called thermal deformation. If the machine runs for five hours, the spindle might shift by 0.01 mm just from heat.
- Preheat the machine: Run the spindle for 30 minutes before cutting any real parts.
- Active Cooling: Use a chiller for the spindle oil to keep temperatures stable.
- Time Management: Perform your critical finish machining in the morning when the shop floor is cooler.
Which Materials Balance Cost and Quality?
The material you choose determines how the machine “feels” the part. Some materials cut like butter, while others will destroy a carbide tool in minutes. You must balance the physical needs of the prototype with the cost of machining.
Common Material Machining Tips
| Material Type | Examples | Walking Machine Tips |
| Soft Metals | Aluminum 6061 | Use high speeds (3000 rpm) to prevent “gummy” chips. |
| Hard Alloys | Titanium Ti-6Al-4V | Lower the feed rate to prevent tool overheating. |
| Engineered Plastics | PEEK, ABS | Use compressed air instead of liquid coolant to avoid melting. |
| Composites | Carbon Fiber (CFRP) | Use diamond-coated tools to prevent fiber fraying. |
Avoid the “Titanium Trap”
Engineers often want the strongest material for every prototype. However, machining Titanium costs roughly five times more than Aluminum. For an early-stage “fit and feel” prototype, stick to Aluminum unless you are doing actual stress or heat testing. This saves your budget for the final validation stages.
Is Your Fixture Design Stable Enough?
The best machine and the sharpest tool are useless if the part moves. A fixture must hold the part with “Goldilocks” force: tight enough to stay still, but gentle enough not to crush the part.
Principles of Stability and Precision
A high-quality fixture should follow the 3-5x rule: the fixture’s weight should be three to five times the part’s weight to dampen vibration. For precision prototypes, the positioning error of your fixture must be less than 1/3 of your part’s tolerance. If you need $\pm 0.006 mm$ accuracy, your fixture cannot move more than $\pm 0.002 mm$.
Choose the Right Fixture Type
- Vise Fixtures: Best for square or rectangular bracket models. Use soft jaws made of aluminum to avoid marking the surface of your part.
- Chuck Fixtures: Best for cylindrical prototypes. A 3-jaw chuck is fast, but a 4-jaw chuck is necessary for irregular shapes.
- Custom Fixtures: If you are making a complex aerospace curve, a custom-designed fixture is worth the investment.
How to Optimize Cutting Tool Paths?
Think of a tool path as a flight plan. An inefficient path wastes fuel (time) and risks a crash (tool breakage). You generate these paths via CAM (Computer-Aided Manufacturing) software.
Zigzag vs. Contour Paths
For rough machining, use a zigzag path. It covers large areas very quickly. However, for finish machining, you must switch to a contour-parallel path. This path follows the exact shape of your part, ensuring that the tool pressure stays constant. Constant pressure equals a consistent tolerance.
Pro-Tips for Path Efficiency
- Minimize Rapid Moves: Every time the tool lifts and moves to a new spot, it’s not cutting. Arrange your path so the tool stays “in the cut” as much as possible.
- Smooth Your Corners: Sharp turns cause the machine to slow down and vibrate. Replace 90-degree turns with a small fillet radius ($\geq 1 mm$) to keep the motion fluid.
- Batch Processing: If you are making 15 prototypes, program the machine to do all the drilling on all 15 parts before switching tools to start milling. This cuts out 14 tool changes.
How to Achieve the Perfect Surface?
Surface finish is often the first thing a client notices. But as an engineer, you know it’s about more than looks. A rough surface on a medical implant can trap bacteria, and a rough surface on a gear increases friction and heat.
Understanding Ra Values
We measure surface roughness using the Ra value.
- Functional Prototypes (Ra 1.6-6.3 $\mu$m): Standard finish; some tool marks visible.
- Appearance Prototypes (Ra 0.8-1.6 $\mu$m): High-speed finish; feels smooth to the touch.
- Precision Prototypes (Ra 0.02-0.8 $\mu$m): Requires grinding or polishing after machining.
Post-Processing Techniques
If the machine finish isn’t enough, you have options. Sandblasting creates a beautiful, uniform matte finish that hides minor tool marks. For aluminum, anodizing adds a hard protective layer and can introduce color. For plastic parts, a clear coat or light hand-polishing can produce a high-gloss, “retail-ready” look.
Yigu Technology’s View
At Yigu Technology, we don’t just see a drawing; we see a product’s potential. We believe that precision walking machine machining is where art meets engineering. Our approach centers on synergy. We use hybrid machines with $\pm 0.002 mm$ accuracy, but we pair them with AI-powered CAM software to ensure the most efficient paths.
Whether we are tackling titanium for aerospace or PEEK for medical surgery, we use thermal control and custom fixtures to eliminate errors. Our goal is simple: deliver a prototype that doesn’t just look like your CAD model—it performs like it. By focusing on the tiny details, we help our clients speed through development and get to market faster.
Conclusion
Mastering the precision walking machine process is about controlling variables. By selecting the right machine, planning your roughing and finishing stages, and respecting thermal expansion, you can hit the most demanding tolerances. Remember that the material and fixture choice are just as important as the G-code you write. A great prototype is the bridge between a good idea and a great product. Use this guide to ensure that bridge is built on a foundation of precision.
FAQs
Q: How to choose between a CNC walking lathe and milling machine for my prototype?
A: Use a CNC walking lathe if your part is mostly round or cylindrical, like a shaft or a bolt. These machines are much faster for turning. Choose a milling machine if the part is boxy or has a complex 3D shape, like an engine bracket. If the part has both, a hybrid machine is the best, albeit more expensive, choice.
Q: Why does my prototype have poor surface finish even with high-speed machining?
A: There are usually three culprits: 1) A dull tool (carbide lasts longer but can still chip); 2) A feed rate that is too high, creating “ridges” in the metal; or 3) Vibration (check if your fixture is heavy enough or if the part is sticking out too far from the chuck).
Q: How to reduce machining time for prototype batches (10-15 parts) without losing precision?
A: Use batch processing in your CAM software. Do not machine one part from start to finish. Instead, perform the roughing on all 10 parts, then the semi-finishing, then the finishing. This reduces tool change time and allows the machine to stay at a stable temperature.
Q: What is the best way to handle material warping in thin-walled parts?
A: Thin walls (less than 1 mm) are prone to warping due to heat. To stop this, use “layered cutting” to remove material gradually from both sides. You should also use a high-pressure coolant to whisk away heat as soon as it is generated.
Q: Can I achieve a mirror finish directly from a walking machine?
A: While some grinding-equipped walking machines can get close, you usually need a polishing step (using 1000-grit sandpaper or abrasive paste) to reach a true mirror finish.
Discuss Your Projects with Yigu Rapid Prototyping
Are you ready to bring your complex designs to life? At Yigu Technology, we specialize in high-precision prototype machining. Our team of senior product engineers is ready to help you optimize your design for the precision walking machine process. We offer DFM (Design for Manufacturing) feedback to help you lower costs and hit your tolerances the first time.
Would you like us to review your CAD files and provide a step-by-step machining plan for your next prototype?