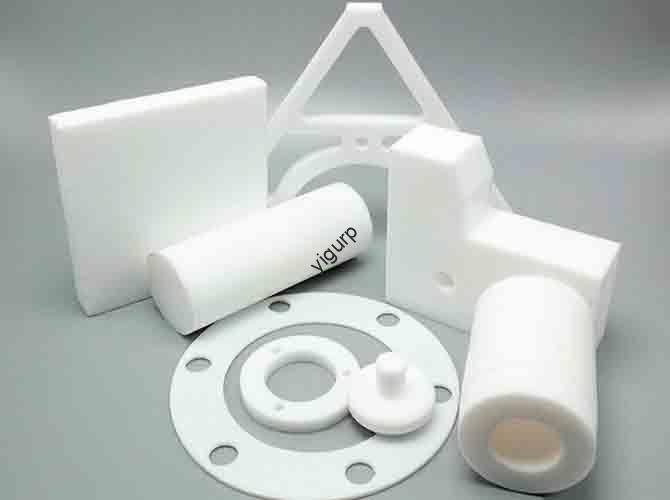
Secondary curing is a controlled post-processing step that uses heat, light, or chemical agents to finalize the polymerization of a 3D printed part, significantly enhancing its mechanical properties, dimensional stability, and environmental resistance. This critical step is essential for photopolymer resins, which are only partially cured during the initial print. By completing the cross-linking of polymer chains, secondary curing solves problems like brittleness, warping, and poor thermal performance, turning a fragile green-state part into a durable, functional component.
Introduction: The Hidden Step to Professional Results
You’ve meticulously printed a part, but it feels tacky, bends too easily, or cracks under minimal stress. This is because for many materials, especially photopolymer resins, the printing process only achieves a “green state” or “green strength.” The 3D printing secondary curing process is the crucial bridge between this intermediate state and a fully finished, high-performance part. It’s the equivalent of tempering steel or firing clay—a transformative treatment that locks in the final properties. This guide will demystify secondary curing, explaining its scientific basis, comparing methods, and providing a practical framework for engineers and makers to implement it safely and effectively, ensuring their prints meet design specifications.
What Is the Science Behind Secondary Curing?
To master secondary curing, you must understand the chemistry it drives. The process is fundamentally about achieving a higher degree of polymer cross-linking.
- The “Green State” Explained: In vat polymerization (SLA, DLP, LCD), the laser or light source initiates a photochemical reaction, causing liquid resin molecules to link into chains and form a solid. However, due to oxygen inhibition, light penetration limits, and the need for speed, this primary curing is often incomplete. The resulting “green” part has many unreacted monomers and short polymer chains, leading to suboptimal properties.
- The Cross-Linking Process: Secondary curing provides the energy (thermal or photonic) needed to continue and complete this reaction. It drives free radical polymerization to completion, linking more monomers into the network and creating bridges between existing polymer chains. This dramatically increases the molecular weight and the density of the polymer network, which directly translates to higher strength, stiffness, and chemical resistance.
- Stress Relief and Annealing: For thermoplastics (like ABS or Nylon in FDM/FFF printing), secondary curing often takes the form of thermal annealing. This involves heating the part to a temperature just below its glass transition point (Tg), allowing the polymer chains to relax and re-organize into a more crystalline, ordered structure. This relieves internal stresses from rapid cooling during printing, reducing warping and increasing layer adhesion and heat resistance.
Which Materials Require Secondary Curing?
The necessity and method of secondary curing depend entirely on the base material technology.
| Material Category | Primary Printing Process | Need for Secondary Curing | Primary Goal of Curing |
|---|---|---|---|
| Standard & Engineering Resins | SLA, DLP, LCD | Essential | Complete polymerization for maximum tensile strength, hardness, and chemical stability. |
| High-Temperature & Castable Resins | SLA, DLP | Critical | Achieve final thermal properties (HDT) and burnout characteristics for metal casting. |
| Elastomeric & Flexible Resins | SLA, DLP | Required | Optimize tear strength and elastic recovery; prevent permanent deformation. |
| FDM Thermoplastics (ABS, PC, Nylon) | FDM/FFF | Beneficial (Annealing) | Relieve internal stress, improve interlayer bonding, and increase heat deflection temperature. |
| FDM Thermoplastics (PLA) | FDM/FFF | Not Recommended | PLA can crystallize excessively and become brittle; standard cooling is sufficient. |
What Are the Primary Methods and Their Applications?
Choosing the right method is key to targeting specific material properties.
1. Photochemical (UV) Curing
This is the standard for photopolymer resins.
- Process: Parts are exposed to a broad-spectrum UV light source, typically with wavelengths around 365nm and 405nm. The energy drives the remaining photoinitiators to complete the reaction.
- Equipment: Can range from simple DIY boxes with UV LED strips to professional rotating turntable curing stations with integrated heaters for even exposure.
- Pro-Tip: For clear or translucent resins, curing times may need to be reduced to prevent yellowing from over-exposure. For thick, opaque parts, curing time must be increased to ensure the core is fully cured. A post-cure hardness tester can be used to verify complete curing.
2. Thermal Curing & Annealing
This method uses controlled heat and is versatile across technologies.
- For Resins: Many engineering resins (e.g., High-Temp, Durable) require a thermal post-cure cycle (e.g., 60-80°C for 1-2 hours) after UV curing to achieve their datasheet mechanical properties. This heat drives thermal initiators and further cross-links the polymer.
- For FDM Thermoplastics (Annealing): The part is placed in a temperature-controlled oven, sand bath, or on a heated bed.
- Example – Annealing Nylon (PA6/PA66): Heat to 80-100°C for 30-60 minutes. This can increase strength by 20-40% and dramatically improve layer adhesion.
- Caution: Parts may experience dimensional change (shrinkage/growth) during annealing. This must be accounted for in the design phase or compensated for by printing slightly oversized parts.
3. Combined Thermo-Photochemical Curing
The most effective method for high-performance resins involves both UV and heat. The UV light completes surface and near-surface curing, while the gentle heat (40-60°C) lowers the resin’s viscosity internally, allowing unreacted monomers to diffuse and increasing the overall degree of conversion. Professional curing stations often combine both.
How Do You Implement a Safe and Effective Curing Process?
A systematic approach prevents failed parts and ensures safety.
1. Pre-Cure Preparation is Critical:
- Cleaning: Residual uncured resin on the surface will cure into a sticky, weak layer. Wash parts thoroughly in 99% isopropyl alcohol (IPA) using a two-bath system (dirty wash, then clean rinse). For water-washable resins, use clean water and dry completely.
- Support Removal: Remove all supports before curing. Cured supports are significantly harder to remove and can damage the part.
2. Process Parameter Development:
There is no universal setting. Parameters depend on:
- Resin Formulation: Always consult the manufacturer’s Technical Data Sheet (TDS) for recommended wavelength, temperature, and time.
- Part Geometry & Volume: Thick, dense sections require longer curing times. Use a curing test coupon—a small part printed alongside your main model—to dial in settings without risking the primary part.
- Property Goals: Are you optimizing for flexibility or rigidity? Adjust time and temperature accordingly.
3. Safety First:
- UV Exposure: Never look directly at UV light sources. Use a curing chamber with an interlock or wear appropriate UV-blocking safety glasses.
- Thermal Hazards: Use a dedicated, well-ventilated oven—not a kitchen oven used for food. Be aware of fumes, especially from high-temp resins or annealing thermoplastics.
- Chemical Handling: Wear nitrile gloves when handling IPA and uncured resin.
What Performance Gains Can You Realistically Expect?
When executed correctly, secondary curing delivers measurable, transformative improvements.
- Mechanical Properties: For a standard tough resin, a full UV+thermal post-cure can increase tensile strength by 30-50% and flexural modulus by 40-70% compared to the green state. Impact resistance also improves significantly.
- Thermal Performance: The Heat Deflection Temperature (HDT) is the most dramatically affected property. Some engineering resins see their HDT rise from ~50°C (as-printed) to over 200°C after full thermal post-curing, enabling functional under-the-hood automotive or aerospace applications.
- Long-Term Stability: Fully cured parts exhibit much lower levels of creep (slow deformation under load) and are far more resistant to UV degradation and chemical attack from solvents or moisture. This is critical for outdoor or industrial use.
- Dimensional Stability: Annealing FDM parts reduces internal stresses that cause warping over time, ensuring the part maintains its shape in service.
Conclusion: The Non-Negotiable Final Step
Secondary curing is not an optional “finishing touch” for functional parts; it is an integral and non-negotiable phase of the manufacturing process for resin-based 3D printing and a powerful enhancer for many thermoplastic prints. It is the step that ensures the part behaves as the material datasheet promises and as your design requires. By investing in the proper equipment—a quality wash station and a controlled curing chamber—and developing a standardized, material-specific curing protocol, you move from producing decorative models to manufacturing robust, reliable, and production-ready components. The marginal extra time and cost are insignificant compared to the risk of part failure in the field.
FAQ: Your Secondary Curing Questions Answered
Q: My resin part turned yellow/brittle after curing. What went wrong?
A: This is classic over-curing. Excessive UV exposure, especially at shorter wavelengths (365nm), can degrade the polymer chains (photo-degradation), leading to discoloration and embrittlement. Solution: Reduce UV cure time, ensure the cure temperature is not too high, or use a curing station with a longer wavelength focus (405nm). For critical applications, consider resins with UV stabilizers.
Q: Can I use sunlight for secondary curing resin parts?
A: It is possible but highly inconsistent and not recommended for functional parts. Sunlight contains UV-A (315-400nm) which can cure resin, but intensity varies wildly with time of day, weather, and season. You have no control over dose (intensity x time), leading to unreliable results and potential over-curing/weathering on the exposed side. A controlled UV chamber is a fundamental tool.
Q: Do I need to post-cure “water-washable” resins differently?
A: Yes, with extra caution. It is absolutely critical to ensure parts are completely dry before UV curing. Trapped water can create steam bubbles during thermal cycles or cause cloudiness. After washing, pat dry and leave in a warm, dry place for several hours or use a compressed air gun.
Q: How do I anneal a complex FDM part without it deforming?
A: Use a “media bath” technique. Place the part in a bed of fine sand or glass beads inside the oven. The media provides uniform heat transfer and physical support to prevent slumping or warping during the annealing process. Remember to account for the uniform dimensional shrinkage that will occur.
Discuss Your Projects with Yigu Rapid Prototyping
Are you developing functional prototypes or end-use parts where material properties are critical? Inconsistent or incomplete post-curing is a common point of failure that can undermine an otherwise perfect print.
At Yigu Rapid Prototyping, we have engineered post-processing into a precise, repeatable science. Our facility features:
- Industrial Curing Systems: Automated UV curing stations with programmable multi-wavelength cycles and integrated thermal control for perfect, repeatable results every time.
- Validated Material Protocols: For every engineering resin in our inventory, we have developed and validated a specific curing protocol to ensure parts achieve their optimal published mechanical and thermal properties.
- Advanced Thermal Annealing: For high-performance FDM parts, we provide controlled annealing services to relieve stress and enhance performance, using media baths to maintain geometric integrity for complex shapes.
- Property Verification: We can provide material test coupons and data from our in-house testing to verify that your cured parts meet the required specifications.
Contact us to ensure your next 3D printed project is not just printed, but professionally finished and fully cured for maximum performance and durability.