In product development, time equals money. Waiting weeks for traditional prototypes can delay launches and raise costs. 3D batch printing prototypes changes this. It lets you make multiple high-quality prototypes fast. This guide covers everything you need: what it is, how to use it, materials, steps, pros, cons, and real cases. By the end, you’ll know how to use 3D batch printing to turn ideas into tested prototypes quickly and affordably.
What Is 3D Batch Printing?
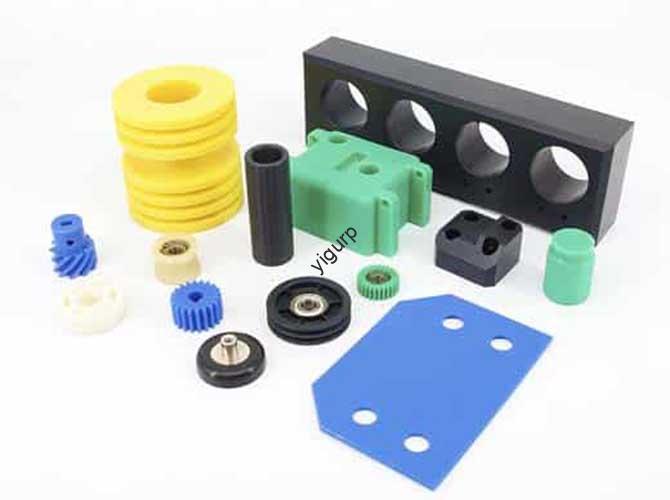
3D batch printing makes multiple prototypes at once using 3D printing tech. It’s not just one prototype—it’s 5 to 100+ identical or custom parts in a single print job.
Think of baking cookies: make one dough, bake many on a tray. It’s faster, easier, and keeps quality high—just like 3D batch printing.
What Does It Do?
3D batch printing serves three key goals for product teams. Each helps move development forward faster.
- Design Validation: Test if a design works for users. Give prototypes to multiple testers to check fit and feel.
- Functional Testing: Ensure parts work as planned. Test multiple samples to check strength, leaks, or movement.
- Pre-Production Display: Show stakeholders physical parts. Get feedback from clients or investors before mass production.
Real-World Example
A startup made a new water bottle. They needed 20 prototypes—10 with flip lids, 10 with straw lids.
3D batch printing made all 20 in 2 days. Traditional machining would take 20 days. They tested both lids fast and picked the user favorite quickly.
Which Material Works Best?
Picking the right material is key. The wrong one makes prototypes unrepresentative of the final product. Use this table to choose.
| Material | Key Traits | Best For | Batch Fit | Cost per kg |
|---|---|---|---|---|
| PLA | Biodegradable, easy to print, low odor | Decor, basic design checks (toy parts) | Excellent—fast, no warps | $20–$30 |
| ABS | Strong, heat-resistant (up to 90°C), durable | Functional parts (tool handles, car parts) | Good—needs enclosed printer | $30–$40 |
| PETG | Chemical-resistant, waterproof, tough | Durable prototypes (bottles, containers) | Excellent—speed + strength | $35–$45 |
| Resin | High detail (0.05mm), smooth surface | Precision parts (jewelry, dental models) | Good—small batches work best | $50–$80 |
| Nylon Powder | Wear-resistant, strong, flexible | Gears, hinges, moving parts | Limited—needs industrial SLS printers | $100–$150 |
| Metal Powders | Ultra-strong, heat/corrosion-resistant | Aerospace, medical implants | Limited—high cost, industrial printers | $500–$1,000 |
Common Problem Fix
“Why do my prototypes break during tests?” You likely used PLA for a strong part.
Switch to PETG or ABS. A PETG hinge lasts 1,000+ openings—PLA only lasts 100. It’s a simple fix for better tests.
What’s the Batch Printing Process?
3D batch printing is easy and automated. Follow these 4 steps to avoid mistakes and get great results every time.
Step 1: Design the CAD Model
Use CAD software like Fusion 360, SolidWorks, or Tinkercad to make your 3D model.
Optimize for batch printing: Fit multiple models on the build plate. Use parametric design to adjust sizes fast (e.g., 3 bottle sizes).
Step 2: Slice the Model
Use slicer software (Cura, PrusaSlicer) to turn the CAD model into printer code.
- Layer Height: 0.2mm (balances speed and quality).
- Infill: 20% for decor, 50% for functional parts.
- Spacing: Leave 1–2mm between prototypes to avoid sticking.
Step 3: Start Batch Printing
Load the sliced file into your 3D printer and hit print. Follow these tips for success:
Use a large build plate (30cm x 30cm) for more prototypes. Watch the first layer—uneven layers cause sticking issues.
Step 4: Post-Process Prototypes
Finish parts to improve look and function. This step takes little time but makes a big difference.
- Remove Supports: Use pliers or a tool to take off excess material. Resin parts need alcohol soaking first.
- Sand Surfaces: Use 200–400 grit sandpaper to smooth rough edges.
- Paint/Coat (Optional): Add paint to match the final product’s look.
Time Comparison: Batch vs. Traditional
3D batch printing saves weeks of time. See how it stacks up to traditional machining for 20 prototypes:
| Step | 3D Batch Printing | Traditional Machining |
|---|---|---|
| Design & Setup | 1 day | 3 days |
| Production | 2 days | 17 days |
| Post-Processing | 1 day | 5 days |
| Total Time | 4 days | 25 days |
What Are the Advantages?
3D batch printing fixes big problems in product development. It adds value in four key ways.
Fast Turnaround
Make 20 prototypes in 4 days (vs. 25 days with machining). Meet tight launch deadlines with ease.
High Precision
Errors are as low as ±0.05mm. Prototypes match the final product’s size exactly (critical for medical parts).
Cost Savings
No expensive molds or tools. 50 PLA prototypes cost $50–$100 (vs. $500–$1,000 for machining).
Design Flexibility
Adjust designs between batches fast. Change colors, sizes, or shapes without retooling.
Real Example
A car maker needed 50 dashboard button prototypes. 3D batch printing cost $80 and took 3 days.
Traditional machining would cost $800 and take 20 days. They saved $720 and 17 days—critical for their launch.
What Are the Limitations?
3D batch printing isn’t perfect. But these common limitations have easy fixes.
| Limitation | Solution |
|---|---|
| PLA lacks strength/durability | Use PETG/ABS for functional parts; 50% infill instead of 20%. |
| Large prototypes are hard to batch | Split large parts into smaller pieces, print in batches, then assemble. |
| Resin needs safety gear | Use water-washable resin; wear gloves/mask; work in a ventilated area. |
Which Industries Use It?
3D batch printing speeds up development across many industries. These are the most common uses.
- Aerospace: Print 20+ small engine parts to test heat resistance and fit.
- Automotive: Make 50+ interior parts (cup holders, door handles) to test comfort.
- Medical: Batch print 10–15 custom prosthetic sockets for patient fit tests.
- Consumer Electronics: Create 30+ phone cases to test market appeal.
Yigu’s Perspective on Batch Printing
At Yigu Rapid Prototyping, we see 3D batch printing as a game-changer. Many clients struggle with slow traditional prototyping.
Our solutions include high-speed FDM printers (150mm/s) optimized for batches. We have a Material Selector Tool to pick the right material fast.
We also offer pre-sliced templates for common parts (phone cases, gears) to save setup time. As tech evolves, we’ll add larger build plates to handle bigger batches—helping you turn ideas into prototypes faster.
Conclusion
3D batch printing prototypes is the fastest, cheapest way to test product designs. It solves slow turnaround, high costs, and inflexible designs that hold back development.
By following this guide—choosing the right material, using the 4-step process, and fixing limitations—you’ll speed up your product launch. Remember: the best batch printing balances speed, quality, and cost. With 3D batch printing, you can turn ideas into tested prototypes in days, not weeks.
FAQ
How many prototypes can I print in one batch? It depends on your printer’s build plate size and prototype size. A 22cm x 22cm plate fits 10–15 small parts or 2–3 medium parts. Industrial 40cm x 40cm plates fit 50+ small parts.
Can I print different designs in one batch? Yes! Slicer software lets you arrange unique models on the plate. Print 5 flip-lid and 5 straw-lid bottles in one batch to compare designs fast.
Are batch printed prototypes strong enough for pre-production tests? It depends on the material. PETG, ABS, or nylon parts work for most tests (drop, load). Avoid PLA for high-stress tests—use PETG instead (matches final product strength).
How long does batch printing take for 10 prototypes? Most small prototypes (5cm x 5cm) print in 8–12 hours. Post-processing adds 1–2 hours. Total time: 1–2 days (vs. 10 days with traditional methods).
Is 3D batch printing cheaper than machining for small batches? Yes! For 5–100 prototypes, 3D batch printing costs 50–80% less. Machining needs expensive tools—3D printing skips that cost.
Discuss Your Projects with Yigu Rapid Prototyping
Not sure how to use 3D batch printing for your prototypes? Our team has years of experience. We’ll help you pick the right material, optimize your design, and speed up your batch prints. Contact us today to discuss your project and get a personalized plan to turn your ideas into validated prototypes fast.