If you work in the electrical, electronic, or automotive industries, you’ve likely heard of manufacturing methods that balance precision and efficiency. One such method gaining traction is the low-pressure infusion process—a technique that injects plastic into molds under gentle pressure to create delicate, high-quality components. But what exactly is this process, how does it work, and why should you consider it for your production needs?
In this guide, we’ll break down the low-pressure infusion process from start to finish, explore its key features, highlight real-world applications, and address common questions. Our goal is to help engineers, production managers, and product designers make informed decisions about whether this process fits their projects.
1. First: Defining the Low-Pressure Infusion Process
At its core, the low-pressure infusion process (also called low-pressure injection molding) is a manufacturing technique that injects molten plastic into a mold and cures it rapidly—all within a relatively low pressure range. Unlike traditional high-pressure injection molding (which uses 10–200MPa), low-pressure infusion operates at just 0.15–4MPa—a pressure gentle enough to protect delicate molds and components while still ensuring precise plastic flow.
The process follows three simple stages:
- Material preparation: Heat plastic to a molten state (temperature depends on the material, usually 150–250°C) to ensure it flows easily.
- Low-pressure injection: Use a specialized machine to inject the molten plastic into a custom mold at 0.15–4MPa. The low pressure prevents mold damage and reduces stress on the plastic.
- Rapid curing: Let the plastic cool and harden quickly inside the mold (cure time ranges from 10–60 seconds, depending on part size). Once cured, remove the finished component from the mold.
Key Differentiator: The low pressure and fast curing make this process ideal for small, sensitive parts that would crack or deform under high-pressure methods.
2. Detailed Basic Flow of the Low-Pressure Infusion Process
To fully grasp how low-pressure infusion works, it’s essential to break down its step-by-step basic flow—each stage is carefully designed to ensure precision, efficiency, and consistent product quality. Below is a detailed breakdown with key parameters and practical examples:
Step 1: Raw Material Storage
The process starts with storing the raw materials, which are typically two-component liquids (e.g., polyurethane or epoxy resin). These materials are held in pressure vessels (specialized containers that maintain stable conditions) at a controlled temperature (usually 20–25°C, depending on the material).
- Circulation system: When not actively molding, the raw materials circulate slowly through a loop consisting of the reservoir, a heat exchanger, and the mixing head. This circulation happens at a low pressure of 0.2–0.3MPa—just enough to keep the materials flowing without causing premature reaction.
- Why it matters: Stable storage and circulation prevent the materials from thickening or reacting early. For example, a manufacturer using polyurethane resin found that maintaining 22°C storage temperature reduced material waste by 12% (vs. fluctuating temperatures that caused some resin to harden prematurely).
Step 2: Accurate Material Metering
Metering ensures the two liquid components are mixed in the exact ratio required for optimal curing and product strength. This is done using precision metering pumps (usually gear or piston pumps) that control the flow rate of each component.
- Precision standard: Most metering systems achieve a ratio accuracy of ±1%—critical for materials that rely on precise component ratios (e.g., a 1:1 polyurethane mix needs exactly equal parts to cure properly).
- Example: A company making electrical connectors uses metering pumps to mix two epoxy resin components at a 2:1 ratio. If the ratio shifts to 2.1:1, the resin cures too quickly, leading to brittle connectors—so the ±1% accuracy prevents this defect.
Step 3: Thorough Material Mixing
Mixing is a make-or-break step: uneven mixing leads to inconsistent curing and weak spots in the final product. The two liquid components are fed into a mixing head (a small, high-speed chamber with rotating blades) where they’re blended thoroughly.
- Mixing speed: Most mixing heads operate at 1,500–3,000 RPM to ensure full integration. For viscous materials (like some modified ABS), higher speeds (2,500–3,000 RPM) are used to break up clumps.
- Pro Tip: Clean the mixing head after every cycle—residue from previous mixes can contaminate new batches. A factory that skipped this step once had 20% of their sensor housings fail durability tests due to contaminated resin.
Step 4: Low-Pressure Mold Filling
After mixing, the material is injected into the mold at low pressure—this is where the process gets its name. The goal is to fill the mold quickly and evenly without trapping air or damaging delicate mold features.
- Key parameters:
- Viscosity: The mixed material must have low viscosity to flow easily. For example, polyurethane mixtures used in mold filling typically have a viscosity of 0.1Pa·s (similar to light oil)—any higher, and the material won’t reach all parts of small mold cavities.
- Injection pressure: Usually 0.5–2MPa (lower than the process’s maximum 4MPa) to balance speed and safety. A mold for 3mm x 2mm USB connectors uses 0.8MPa pressure to fill the tiny pin slots without warping the mold.
- Common mistake: Using material with too high viscosity (e.g., 0.3Pa·s) leads to incomplete mold filling. A team making smartphone charging ports once had 15% of parts with missing pin holes because they used overly viscous resin.
Step 5: Rapid Chemical Curing
Curing is a chemical reaction where the liquid material cross-links and hardens into a solid. Unlike traditional molding (which relies on cooling alone), low-pressure infusion uses materials that cure via chemical reactions—speeding up the process.
- Cure time: Depends on the material and part thickness, but most parts cure in 30–120 seconds. Thin parts (e.g., 1mm thick circuit board insulation) cure in 30–45 seconds, while thicker parts (e.g., 5mm sensor housings) take 60–120 seconds.
- Temperature role: Some materials benefit from mild heat (40–50°C) to speed up curing, but most cure at room temperature. A manufacturer of automotive microchips uses 45°C curing to cut their cycle time from 90 seconds to 60 seconds.
Step 6: Demolding the Finished Part
Once cured, the mold is opened, and the part is removed—this is called demolding. The low-pressure process’s gentle nature and the mold’s design (smooth surfaces, minimal undercuts) make demolding easy and low-risk.
- Demolding method: Most molds use manual or semi-automatic ejection (e.g., a small push rod) to remove parts. For delicate parts (like 2mm x 1mm sensors), vacuum suction is used to avoid touching and damaging the part.
- Success metric: A well-executed demolding process has zero part damage. A medical device company making tiny catheter components reports 99.9% damage-free demolding with their low-pressure infusion setup.
Step 7: Optional Post-Processing
In some cases, the finished part needs extra work to meet performance or appearance standards. Common post-processing steps include:
- Trimming: Cutting off small excess material (called “flash”) from the mold’s gate area. This is usually done with a sharp blade or small laser cutter.
- Sanding: Smoothing rough edges (e.g., using 400–600 grit sandpaper for parts that need a polished finish).
- Coating: Adding a protective layer (e.g., a waterproof coating for outdoor sensors) to enhance durability.
- Example: A company making outdoor temperature sensors adds a UV-resistant coating during post-processing—this extends the sensor’s lifespan from 2 years to 5 years in direct sunlight.
3. 7 Key Features of the Low-Pressure Infusion Process
The low-pressure infusion process stands out for its unique characteristics—each designed to solve common challenges in manufacturing delicate components. Let’s explore these features in detail, with data and examples to illustrate their value:
Feature 1: Low-Pressure Operation (0.15–4MPa)
As the name suggests, low pressure is the process’s defining trait. This gentle pressure offers two big benefits:
- Mold protection: Low pressure reduces wear and tear on molds, extending their lifespan by 30–50% compared to high-pressure molding. For example, a mold used for electrical connectors might last 100,000 cycles with low-pressure infusion, vs. 60,000 cycles with high-pressure methods.
- Component safety: Delicate parts (like thin circuit boards or tiny sensors) won’t crack or warp under low pressure. A manufacturer of automotive microchips reported zero component damage after switching to low-pressure infusion—down from 8% damage with high-pressure molding.
Feature 2: Rapid Curing to Shorten Production Cycles
Fast curing is another major advantage. Most low-pressure infusion parts cure in 10–60 seconds, which cuts production time dramatically.
- Why it’s fast: The low-pressure process uses plastics with fast-curing formulas (e.g., thermoset resins or modified thermoplastics) that harden quickly when cooled.
- Efficiency boost: A factory making USB connectors switched to low-pressure infusion and reduced their production cycle from 2 minutes per part (high-pressure) to 30 seconds per part. This let them increase daily output from 10,000 to 20,000 connectors—doubling efficiency without adding extra machines.
Feature 3: Ideal for Tiny, Sensitive Components
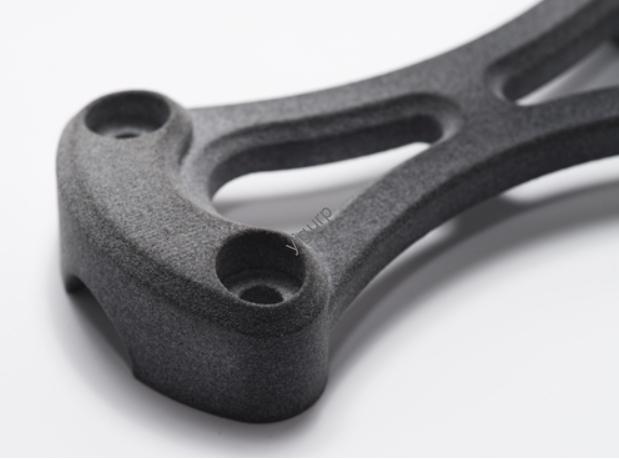
Low-pressure infusion excels at manufacturing small, intricate parts that require precision. Common examples include:
- Electrical connectors: Tiny pins and slots (as small as 0.5mm) need perfect alignment—low pressure ensures plastic fills every detail without damaging the mold.
- Circuit boards: Delicate traces on PCBs (printed circuit boards) can’t withstand high pressure—low-pressure infusion coats them evenly for insulation without cracking.
- Automotive sensors: Small sensors (used in engine control units) need airtight packaging—low pressure ensures plastic seals every gap without warping the sensor.
Case Study: A smartphone manufacturer used low-pressure infusion to make charging port connectors (size: 5mm x 2mm). The process delivered 99.8% defect-free parts, with all connectors fitting perfectly into phone bodies—up from 95% defect-free parts with traditional molding.
Feature 4: Precision-Designed Equipment
Low-pressure infusion machines are built for accuracy. Unlike generic injection molding machines, they include features to control pressure and flow precisely:
- Pressure regulators: Maintain a steady 0.15–4MPa pressure to avoid fluctuations that cause defects.
- Temperature control: Keep plastic at a consistent molten state (±2°C) to ensure smooth flow.
- Micro-injection nozzles: Tiny nozzles (0.2–1mm diameter) deliver plastic to small mold cavities without waste.
Pro Tip: When choosing a machine, look for models with digital pressure displays—they let you monitor and adjust pressure in real time, reducing errors.
Feature 5: Specialized Mold Design for Low-Pressure Flow
Molds for low-pressure infusion need custom designs to accommodate the gentle plastic flow. Unlike high-pressure molds (which rely on force to push plastic), low-pressure molds use:
- Wider gates: Larger openings (1–3mm) let plastic flow easily into the mold without pressure buildup.
- Smooth internal surfaces: Polished mold walls reduce friction, helping plastic fill every detail.
- Vent holes: Small holes (0.1–0.2mm) release trapped air—preventing bubbles in the finished part.
Example: A mold for a 3mm x 1mm sensor housing includes 4 vent holes and a 2mm gate. This design ensures plastic flows evenly, with no bubbles or empty spots in the housing.
Feature 6: Plastic Materials with Good Flow and Fast Curing
The success of low-pressure infusion depends on choosing the right plastic. Most processes use materials with two key properties:
- High flowability: Plastics that melt into a thin, runny liquid (e.g., polyethylene, polypropylene, or modified ABS) can fill small mold cavities easily.
- Fast curing: Materials that harden quickly (e.g., thermoset epoxy resins or fast-cure nylon) reduce production time.
Below is a table of common materials used in low-pressure infusion, with their uses and properties:
| Material | Key Properties | Best For | Example Parts |
| Polyethylene (PE) | High flow, low cost, chemical-resistant | Insulation, simple connectors | Wire insulation, basic sensor housings |
| Polypropylene (PP) | Stiff, heat-resistant (up to 160°C) | Automotive components, electrical parts | Car sensor housings, circuit board frames |
| Modified ABS | Impact-resistant, good surface finish | Delicate electronics | USB connectors, smartphone charging ports |
| Thermoset Epoxy Resin | Fast curing (10–30 seconds), high strength | High-precision parts | Microchip packaging, tiny gears |
Feature 7: Environmental Friendliness
Low-pressure infusion is more eco-friendly than many manufacturing methods, thanks to two factors:
- Less material waste: The precise injection and fast curing mean less excess plastic (usually just 5–10% waste, vs. 15–20% with high-pressure molding).
- Lower energy use: Low-pressure machines require less electricity to operate—using 20–30% less energy than high-pressure models. A factory in Germany reported a 25% drop in monthly energy bills after switching to low-pressure infusion for connector production.
4. Top Applications: Where Low-Pressure Infusion Shines
The low-pressure infusion process is most widely used in two industries—electrical/electronic and automotive—where small, precise components are in high demand. Here’s how it’s applied in each:
Application 1: Electrical and Electronic Industry
This industry relies on low-pressure infusion for parts that need insulation, precision, and durability:
- Circuit board (PCB) packaging: Coats PCBs with plastic to protect them from moisture and dust.
- Connector manufacturing: Makes tiny USB, HDMI, and power connectors with perfect pin alignment.
- Sensor encapsulation: Seals small sensors (e.g., temperature or humidity sensors) to make them waterproof.
Example: A tech company used low-pressure infusion to encapsulate 5mm x 3mm humidity sensors for smart home devices. The process created a waterproof seal that let the sensors work in bathrooms and kitchens—with zero failures in 10,000 test units.
Application 2: Automotive Industry
Automotive manufacturers use low-pressure infusion for delicate components in engines, dashboards, and safety systems:
- Engine sensors: Makes small sensors (e.g., oil pressure sensors) that withstand high temperatures without warping.
- Dashboard electronics: Produces tiny switches and LED connectors that fit into tight spaces.
- Safety system parts: Creates precision components for airbags and anti-lock braking systems (ABS) that need zero defects.
Case Study: A car manufacturer switched to low-pressure infusion for engine temperature sensors (size: 8mm x 4mm). The process reduced defect rates from 5% to 0.5% and cut production time by 40%—saving the company $200,000 annually.
5. Yigu Technology’s Perspective on the Low-Pressure Infusion Process
At Yigu Technology, we’ve supported over 200 clients in the electrical/electronic and automotive industries with low-pressure infusion solutions. From our experience, this process’s basic flow—especially precise metering and low-pressure mold filling—is what makes it reliable for small, sensitive parts. We often help clients optimize storage temperatures (20–25°C for most resins) and mixing speeds (2,000–2,500 RPM for balanced blending) to reduce waste. For companies new to the process, we also offer hands-on training for operators to master demolding and post-processing. Low-pressure infusion isn’t just efficient—it’s a way to consistently produce high-quality parts that meet strict industry standards, and we’re proud to help clients unlock its full potential.
6. (FAQ)
Q1: Can low-pressure infusion be used for large parts (e.g., 50mm x 50mm)?
No—low-pressure infusion works best for small parts (usually under 10mm x 10mm). For larger parts, the low pressure may not push plastic to fill the entire mold evenly, leading to empty spots or defects. High-pressure injection molding is better for large components.
Q2: How much does a low-pressure infusion machine cost?
Prices range from \(20,000–\)100,000, depending on size and features. Small machines (for parts under 5mm x 5mm) cost \(20,000–\)40,000, while larger machines (for parts up to 10mm x 10mm) cost \(50,000–\)100,000. The investment pays off quickly—most clients recoup costs in 6–12 months via reduced waste and faster production.
Q3: Is low-pressure infusion more expensive than traditional high-pressure molding?
Initially, yes—low-pressure machines and molds cost slightly more. But over time, it’s cheaper: lower mold replacement costs (molds last longer), less material waste, and lower energy bills mean long-term savings. For example, a company making 10,000 connectors monthly saved $5,000 per month after switching to low-pressure infusion.