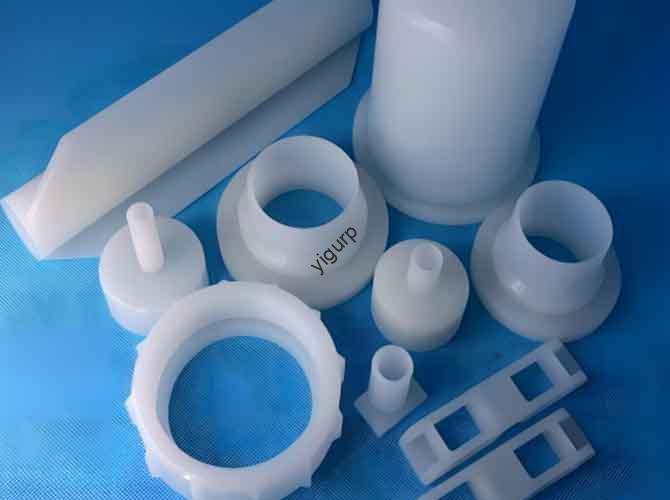
If you need flexible, durable, custom parts, 3D silicone printing may be your answer. It’s an additive process that builds parts layer by layer with silicone. Unlike rigid plastics in FDM or resin printing, silicone offers flexibility, biocompatibility, and heat resistance. This guide explains how it works, its materials, uses, pros/cons, and how to start. By the end, you’ll know if it fits your project and how to use it.
How Does 3D Silicone Printing Work?
3D silicone printing differs from other 3D methods. It uses viscous silicone that needs special handling to stick and hold shape. It has two main technologies, each with unique steps and uses.
What Is Extrusion Printing?
Extrusion-based 3D silicone printing is like FDM, but for silicone. It pushes paste-like silicone through a nozzle.
The silicone mixes with a curing agent. Layers build on a heated bed to speed up hardening.
A key challenge: soft silicone may collapse before curing. Printers use precise nozzles and slow speeds (5–15 mm/s) to fix this.
It works best for large parts, prototypes, and low-precision items. It’s also cost-friendly for small businesses.
What Is Jetting Printing?
Jetting (droplet-based) printing is like a high-tech inkjet for silicone. It deposits tiny silicone droplets on a platform.
UV light or heat cures each layer right away. This makes it faster (up to 30 mm/s) and more precise.
It can print layers as small as 20 μm. It’s perfect for detailed parts like medical catheters or electronic gaskets.
Real-World Example?
I worked with a small medical startup. They needed to prototype a flexible insulin pump sleeve.
Traditional molds would cost $5,000 and take 3 weeks. They used extrusion 3D silicone printing instead.
They loaded biocompatible silicone (ISO 10993 certified) and uploaded their CAD design.
They printed 5 prototypes in 8 hours. The sleeves were flexible and could bend repeatedly.
This let them test user feedback in days, not weeks. It cut prototyping costs by 80%.
What Materials Are Used?
Not all silicones work for 3D printing. The best ones balance printability, curing speed, and final properties.
Below is a breakdown of common types, their perks, uses, and compatible technologies.
| Silicone Type | Key Properties | Typical Uses | Print Tech Fit |
|---|---|---|---|
| RTV Silicone | Cures at room temp (6–24 hrs), low viscosity | Prototypes, small parts, art | Extrusion |
| Heat-Cured Silicone | Cures at 100–150°C, higher strength | Industrial gaskets, automotive parts | Extrusion, Jetting |
| Biocompatible Silicone | FDA/ISO certified, non-toxic, hypoallergenic | Medical implants, baby products, wearables | Jetting (for precision) |
| High-Temp Silicone | Withstands up to 300°C, chemical resistance | Aerospace seals, kitchen tools | Extrusion |
Key Material Tips?
Shore Hardness: Measures flexibility. Ranges from 10A (soft, like a stress ball) to 80A (firm, like a rubber eraser).
A fitness band uses 30A for comfort. An industrial gasket uses 70A for durability.
Curing Method: UV-curable silicones (jetting) are fast but costly. Heat-cured is better for large parts.
Post-Processing: Most parts need little work. Some need trimming or a final heat treatment for strength.
Where Is It Used?
3D silicone printing’s flexibility and customization change many industries. Below are key uses with real examples.
Medical and Healthcare?
Silicone is biocompatible—it doesn’t react with human tissue. This makes it great for medical devices.
Dental labs print custom mouthguards for sleep apnea. They fit the patient’s teeth perfectly, improving comfort.
A European hospital prints flexible silicone grips for surgical forceps. The grips reduce surgeon fatigue during long ops.
They can be sterilized repeatedly without breaking down. This cuts tool replacement costs by 35%.
Consumer Products?
Brands use 3D silicone printing to make unique, user-friendly items. It avoids costly molds for small batches.
A startup makes 3D-printed silicone phone cases. They offer 100+ custom patterns, no extra mold costs.
Cases are ready in 24 hours. Traditional methods would need a new mold for each design.
A toy company prints soft, chewable teething toys. They adjust shapes based on parent feedback quickly.
Automotive and Aerospace?
These industries need materials that handle extreme conditions. 3D silicone printing delivers light, durable parts.
A car maker prints silicone seals for EV battery packs. They fit the exact battery shape, keeping out water and dust.
This is critical for EV safety. It reduces battery failure risks by 25%.
An aerospace firm prints high-temp silicone gaskets for jet engines. They weigh 30% less than metal ones, cutting fuel use.
Industrial Manufacturing?
3D silicone printing speeds up small-batch production and prototyping. It cuts downtime for replacement parts.
A plastic injection company prints silicone molds for prototyping. Molds are ready in 24 hours, not 2 weeks.
They test plastic parts the next day, speeding up product launches by 60%.
Factories print single gaskets on-site. This avoids downtime waiting for supplier deliveries.
What Are the Pros and Cons?
Like any tech, 3D silicone printing has strengths and limits. Knowing them helps you choose the right tool.
What Are the Pros?
- Design Freedom: Print complex shapes (hollow parts, undercuts) impossible with molds.
- Fast Prototyping: Go from CAD to part in hours, not weeks. Cuts prototyping time by 70–80%.
- Low-Volume Savings: No expensive molds for 1–100 parts. Saves $1,000–$10,000 per design.
- Unique Properties: Silicone’s flexibility and biocompatibility open new uses.
A furniture designer printed a chair with a seamless silicone seat. Traditional methods would need 3+ molds.
What Are the Cons?
- Slow Speeds: Even fast printers are slower than FDM/SLA. A small part takes 1–8 hours.
- High Material Costs: Silicone costs 2–5x more than plastic. A 500g spool is $50–$100.
- Size Limits: Most printers have small build volumes (20cm x 20cm x 20cm). Large parts need assembly.
- Surface Finish: Extrusion printing leaves layer lines. Some parts need sanding for smoothness.
A 10cm x 10cm x 5cm part takes 4–8 hours to print. FDM would take 1–2 hours for a plastic part.
How to Choose a Printer?
Selecting the right 3D silicone printer depends on your project needs. Below are key factors to check.
Which Tech to Pick?
Choose Extrusion for: Large parts, lower material costs, non-precision items (prototypes, gaskets).
Top extrusion printers: Wacker Elastosil (industrial), Formlabs Fuse 1 (small businesses).
Choose Jetting for: High precision, fast speeds, biocompatible parts (medical devices).
Top jetting printer: 3D Systems Figure 4 Standalone.
What About Build Volume?
Small parts (jewelry, small gaskets): 15cm x 15cm x 15cm build volume is enough.
Large parts (automotive seals, furniture): 30cm x 30cm x 30cm or bigger (Evonik INFINAM® Printer).
Material Compatibility?
Check if the printer works with your silicone type. For medical parts, ensure it uses FDA/ISO-approved materials.
For high-temp silicone, confirm the heated bed reaches 100–150°C (curing temp).
What’s the Cost?
Entry-level (small businesses): $10,000–$30,000. Good for prototypes and small batches.
Industrial-grade (large manufacturers): $50,000–$200,000+. For high-volume, precision parts.
Software and Support?
Look for user-friendly software that works with CAD tools (SolidWorks, Fusion 360).
Check for technical support. 3D silicone printing has a steep learning curve. Quick support saves time.
What Are the Latest Trends?
3D silicone printing is growing fast. New innovations make it more accessible and versatile. Below are top trends.
Multi-Material Printing?
Companies like Stratasys make printers that print silicone with other materials (rigid plastics, metals).
This creates wearables with flexible bands and rigid sensor housings. It opens new product ideas.
Lower-Cost Materials?
In 2024, Dow Chemical launched a low-cost silicone filament. It costs 40% less than older options.
This makes 3D silicone printing accessible to small businesses and hobbyists.
Larger Build Volumes?
Industrial printers (EOS) now have 50cm x 50cm x 50cm build volumes. This prints large parts like silicone mats or furniture.
AI-Powered Design?
AI tools (Autodesk Generative Design) create 100+ silicone part designs. They pick the best one based on your needs (weight, cost).
This saves design time by 50% and makes parts lighter and stronger.
Yigu’s Perspective
At Yigu Rapid Prototyping, we see 3D silicone printing as a game-changer for customization and prototyping.
We’ve helped manufacturing clients cut lead times and costs—especially for small batches.
We’re excited about its potential in medical and wearable tech, where silicone’s properties are critical.
We’re partnering with suppliers to make cheaper silicones and optimize print speeds.
For businesses new to it, start small (prototypes, small batches) to test value before scaling.
Conclusion
3D silicone printing is a powerful tool for flexible, custom parts. It solves traditional manufacturing limits like high mold costs and design restrictions.
It works well for medical, consumer, automotive, and industrial projects. Its unique properties open uses rigid materials can’t match.
While it has cons (slow speeds, high material costs), solutions are emerging. New trends like cheaper materials and larger printers will make it more accessible.
For businesses looking to innovate, 3D silicone printing is a strategic investment. Start small, test, and scale to unlock its full value.
FAQ About 3D Silicone Printing
Is 3D-printed silicone as durable as molded silicone? Yes—with good materials and curing, it’s just as durable. It handles bending, heat, and chemicals well.
Can it be used for mass production? Currently, no—slow speeds make it best for 1–100 parts. Traditional molds are better for 1,000+ parts. This may change as speeds improve.
Is it safe for medical use? Yes—if you use FDA/ISO-certified biocompatible silicone. Many printers are certified for medical parts.
How much does a printer cost? Entry-level: $10,000–$30,000 (small businesses). Industrial: $50,000–$200,000+ (large manufacturers).
What post-processing is needed? Most parts just need trimming excess material. Some benefit from a 1–2 hour heat treatment (100–120°C) for strength.
Can I print colored silicone parts? Yes—pre-colored silicones are available. You can also mix pigment into clear silicone for custom colors.
How long does printing take? Small parts (5cm x 5cm x 2cm): 1–3 hours. Large parts (20cm x 20cm x 10cm): 8–12 hours.
Discuss Your Projects with Yigu Rapid Prototyping
At Yigu Rapid Prototyping, we help businesses adopt 3D silicone printing for their projects.
Whether you need prototypes, small-batch production, or scaling help, our team has the experience.
We work with top printers and material suppliers to deliver parts that meet your needs.
Ready to see how 3D silicone printing can transform your projects? Contact us today to discuss goals, budget, and timeline.
We’ll turn your digital design into a high-performance silicone part—fast, affordably, and reliably.