Creating a prototype for an electric pressure cooker is a high-stakes engineering challenge. Unlike a simple toaster or blender, a pressure cooker must handle high internal heat and intense atmospheric pressure. One small flaw in the sealing ring groove or a weak point in the lid structure can lead to total functional failure.
The CNC machining process is the gold standard for developing these prototypes. It allows engineers to use production-grade materials to validate design rationality, test safety features like anti-dry burning, and ensure the unit is airtight before investing in expensive mass-production molds. This guide provides a professional, step-by-step breakdown of how these complex kitchen appliances move from a digital concept to a functional physical model.
Preliminary Preparation: Design and Data Processing
A high-quality prototype starts with a perfect digital foundation. If the 3D data is sloppy, the final part will be too.
3D Modeling with CAD Software
Engineers use professional tools like SolidWorks or UG to build a model that includes every internal screw boss and external curve.
| Structure Category | Key Design Details | Precision Requirement | Purpose |
| External Structure | Lid curvature, handle grip, buttons | ±0.1mm | Ergonomics and brand aesthetics |
| Internal Structure | Sealing ring groove, valve seats | ±0.03mm | Guaranteed pressure tightness |
| Process Features | Draft slopes (3°–5°), rounded corners | R2mm | Simplify machining and prevent stress |
Model Repair and Format Conversion
Raw CAD files often have “naked edges” or overlapping surfaces that confuse CNC machines. We use software like Magics to “heal” the model. Once repaired, we export the file to STL format with a mesh density of 0.1mm. This provides enough detail for the machine without creating a file that is too heavy to process.
Material Selection and Process Planning
You must choose materials that mimic the performance of the final mass-produced product. Using the wrong plastic can lead to melting during a heat resistance test.
Choosing the Right Prototype Materials
We match the material to the specific function of the part:
- ABS (Pot Body & Lid): This is the best choice for appearance parts. It is easy to mill and takes paint exceptionally well. We use a high-speed spindle (up to 15,000 rpm) to ensure the plastic doesn’t melt during the cut.
- Nylon (Internal Brackets): Nylon (PA) is used for parts near the heating element. It handles temperatures up to 120°C and is naturally wear-resistant.
- Aluminum Alloy 6061: Used for handles or lid holders that need high rigidity. We anodize these parts to prevent oxidation.
- Transparent Acrylic: If the design includes a display window, acrylic offers 90% light transmittance and can be polished to a glass-like finish.
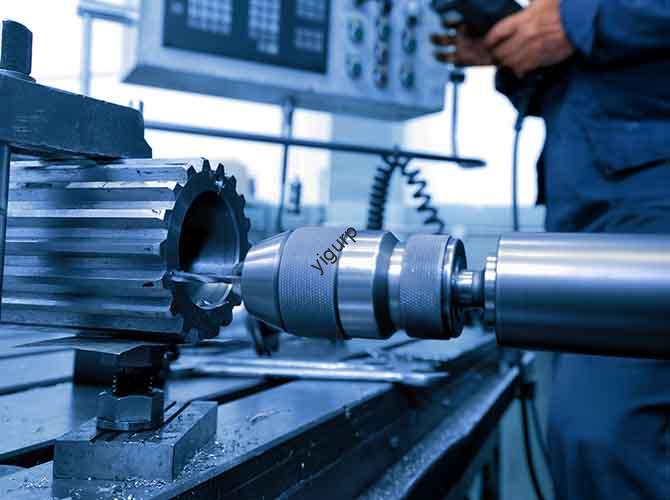
Core CNC Machining Processes
We don’t just use one method; we combine several to get the best result:
- CNC Milling: Best for the large pot body cavity and curved lid.
- CNC Turning: Ideal for round parts like pressure valve knobs.
- Drilling & Tapping: Essential for sensor mounting holes (M4 threads). We use pecking drilling to clear chips and prevent tool breakage.
CNC Machining Execution: Steps and Parameters
This is where the physical work happens. The goal is to move from a raw block of material to a finished part with minimal errors.
Programming and Tool Selection
We use CAM software like Mastercam to convert the 3D model into G-code.
- Roughing: We use a Φ10mm flat-bottom mill to remove 90% of the material quickly.
- Finishing: We switch to a Φ3mm ball-head tool to achieve a surface roughness of Ra ≤1.0μm. This is critical for the sealing groove, as a rough surface will cause air leaks.
Machining Parameter Reference
| Material | Stage | Spindle Speed (rpm) | Feed Rate (mm/min) |
| ABS | Roughing | 11,000 | 1,800 |
| Aluminum | Finishing | 20,000 | 900 |
| Nylon | Roughing | 9,000 | 1,200 |
Process Monitoring
The “First Piece” is always inspected mid-process. We pause after the roughing stage to measure the sealing groove width with a micrometer. If the tolerance exceeds ±0.1mm, we recalibrate the tool offsets immediately.
Post-Processing and Functional Testing
A pressure cooker prototype isn’t a success until it can hold 100kPa of pressure without leaking.
Surface Treatment for a Premium Look
- ABS Parts: We sand the parts with 1000-grit paper, apply a 30μm primer, and finish with a matte black spray. We cure the parts at 60°C for two hours to ensure the paint sticks.
- Aluminum Parts: We use isopropyl alcohol to degrease the part before anodizing it to a silver-gray finish.
Rigorous Functional Testing
This is the most critical stage. We simulate real cooking conditions:
- Tightness Test: We fill the pot with water and pressurize it to 100kPa. It must hold this for 30 minutes with a pressure drop of less than 5kPa.
- Heat Resistance: We heat the unit to 100°C for two hours. We then check the sealing groove again; if it warped even 0.05mm, the material or design must change.
- Button Feel: We press the buttons 1,000 times to ensure the “click” feels consistent and the stroke stays at 2mm.
Inspection and Optimization
Before we deliver the prototype, we use a Coordinate Measuring Machine (CMM) to verify “invisible” dimensions.
Critical Checkpoints
- Lid-body mating gap: Must be within ±0.1mm.
- Threaded hole positions: Must be within ±0.05mm to avoid assembly interference.
How to Save Costs
To keep the project under budget, we often split complex parts. Instead of machining a lid and its handle as one giant block, we machine them separately and join them. This reduces machining time by 30%. We also use hybrid processes, where we 3D print small internal brackets and reserve CNC for the high-precision pressure components.
Yigu Technology’s Perspective
At Yigu Technology, we view the CNC machining electric pressure cooker prototype process as a “safety validator.” We focus on the two pillars of this product: sealing and strength.
Many shops overcharge by using aluminum for parts that don’t need it. We suggest Nylon (PA) for internal brackets because it is heat-resistant and costs less. For the sealing zones, our “layered finishing” technique ensures a surface so smooth that leaks are virtually impossible. By combining CNC precision with 3D printing for small parts, we help our clients cut prototype costs by 20–30% while accelerating their time-to-market.
FAQ
Why is Nylon (PA) used instead of ABS for internal parts?
Nylon can handle up to 120°C, whereas ABS begins to soften at 90°C. Since internal parts are near the heating element and steam, ABS would warp or melt, causing the pressure valve to fail.
How do you guarantee the pot won’t leak?
We use a Φ3mm ball-head tool for the final pass on the sealing groove to get a mirror-like finish (Ra ≤0.8μm). We then perform a 100kPa pressure test for 30 minutes. If the pressure drops more than 5kPa, we reject the part.
How long does the whole process take?
Typically 4 to 6 days. One day for design, two days for machining, one day for painting, and two days for assembly and safety testing.
What is the “Anti-Dry Burning” test?
This is a safety test where we run the heating element with no water in the pot. We verify that the sensors cut power before the internal temperature damages the prototype.
Can I use 3D printing for the whole prototype?
No. Most 3D printing materials are too porous to hold pressure and cannot handle the heat of a pressure cooker. CNC machining with solid blocks of ABS or Nylon is required for functional safety.
Discuss Your Projects with Yigu Rapid Prototyping
Are you ready to bring your next kitchen appliance to life? At Yigu Technology, we specialize in the high-precision CNC machining required for pressurized systems. Whether you need a single “look-alike” model or a batch of functional prototypes for safety testing, our engineers are here to help. Would you like me to review your 3D files and provide a free DFM (Design for Manufacturing) report for your project?