Creating a prototype for a modern clothes dryer is a sophisticated engineering journey. It is not merely about making a box that looks like an appliance; it is about validating airflow dynamics, drum rotational stability, and user ergonomics before committing to mass production. The CNC machining clothes dryer prototype process is a rigorous workflow that transforms a digital CAD concept into a high-fidelity physical model.
This process allows engineers to detect structural flaws, such as interference between the drum and the cabinet, or air leaks in the condensation tubes, early in the development cycle. By following a structured approach—from material selection to final debugging—manufacturers can save thousands in rework costs. This guide provides a professional breakdown of the entire process, ensuring your prototype meets the highest standards of precision and functionality.
Preliminary Preparation: Lay the Foundation for Machining
The success of any prototype is decided during the preparation phase. Skipping steps here often leads to “cascading errors” that are expensive to fix later.
1.1 3D Modeling and Structural Design
We begin by using professional software like SolidWorks or UG NX. These tools allow for parametric design, meaning if we change the drum diameter, the mounting brackets update automatically.
- Appearance Simulation: We replicate the standard household cabinet size (typically 600×600×850mm). We pay close attention to the door curvature and the control panel layout.
- Detachable Design: A good prototype must be easy to take apart. We design bolted joints (typically M4 screw holes) between the drum and cabinet rather than permanent welds.
- Critical Dimension Control: We maintain a drum diameter tolerance of ±0.1mm. If the drum is off-center, it will vibrate violently during testing, rendering the prototype useless.
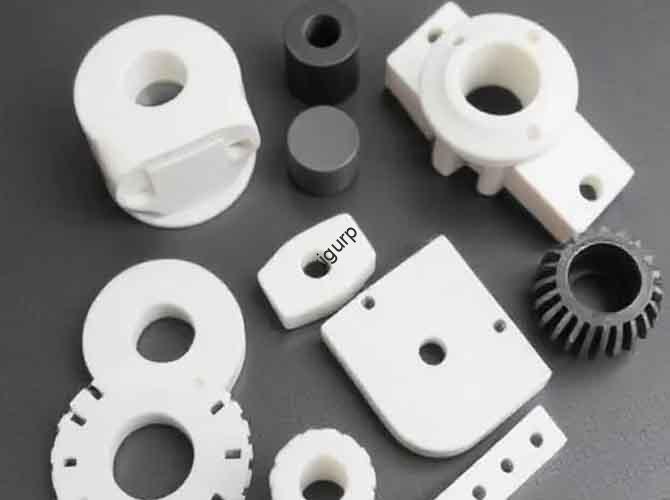
1.2 Material Selection: Matching Properties to Parts
A clothes dryer is a multi-material machine. Choosing the right “blank” for each part is critical for authentic testing.
| Component | Recommended Material | Key Property | Cost (per kg) |
| Cabinet & Door | ABS Plastic | Easy to machine, takes paint well | $3 – $6 |
| Drum & Brackets | Aluminum Alloy 6061 | High strength, lightweight | $6 – $10 |
| Observation Window | Acrylic (PMMA) | High transparency | $8 – $12 |
| Control Panel | ABS + PC Blend | Heat and impact resistance | $4 – $7 |
| Condensation Tubes | PVC | Waterproof, corrosion-resistant | $2 – $4 |
Expert Insight: We always use 6061 Aluminum for the drum. While some shops use plastic to save money, a plastic drum will warp under the radial forces of rotation. Aluminum ensures a roundness error ≤0.02mm, which is the gold standard for smooth operation.
CNC Machining Process: From Setup to Production
Once the materials are ready, we move to the CNC machining center. This is where precision meets physical material.
2.1 Machine and Tool Setup
We utilize high-precision three-axis or multi-axis CNC machines. These machines offer a positioning accuracy of ±0.01mm.
- Roughing Tools: We use Φ6–Φ10mm carbide milling cutters to remove 90% of the material quickly.
- Finishing Tools: We switch to Φ2–Φ4mm high-speed steel (HSS) cutters for a surface finish of Ra 1.6–3.2.
- Ball Nose Cutters: These are essential for the curved inner walls of the drum and the ergonomic handle of the door.
2.2 Programming and Simulation
Before the tool touches the material, we run a digital simulation. This “dry run” in software like Mastercam identifies potential tool collisions. We split the model into the cabinet, drum, and panel, programming each for the most efficient toolpath.
2.3 Clamping and Execution
Proper clamping prevents “chatter” marks. We use vacuum suction cups for the large, flat cabinet panels to distribute force evenly. For the drum, we use precision flat pliers with soft pads to avoid scratching the aluminum.
| Material | Stage | Speed (rpm) | Feed (mm/tooth) | Coolant |
| Aluminum (Drum) | Roughing | 1,500 | 0.25 | Emulsion |
| ABS (Cabinet) | Finishing | 1,800 | 0.15 | Compressed Air |
| Acrylic (Window) | Finishing | ≤500 | 0.08 | Compressed Air |
Pro Tip: For the Acrylic window, never exceed 500rpm. High speeds generate friction heat that will melt the surface, causing “cloudiness” or cracks.
Post-Processing: Enhance Functionality and Aesthetics
Parts straight off the machine are functionally accurate but lack the “feel” of a finished product.
3.1 Surface Treatment
- Cabinet Texture: We apply a matte PU paint and cure it at 60°C for 2 hours. This perfectly simulates the powder-coated steel of a real dryer.
- Control Panel: We use silk-screen printing for the icons. We use high-temperature ink so the “Start” and “Mode” labels don’t fade during heat testing.
- Drum Polishing: We remove all burrs from the metal drum to ensure it doesn’t snag fabrics during the rotation test.
3.2 Assembly and Debugging
We assemble the prototype in a specific sequence. First, the drum and bearings are mounted to the cabinet. Next, we install the condensation tubes using waterproof glue. Finally, the door is attached with hinges.
Functional Testing Checklist:
- Drum Rotation: Must be smooth with no “jitter” or abnormal noise.
- Door Closure: We use a force gauge to ensure the opening force is ≤5N.
- Leak Test: We fill the condensation tubes with water for 12 hours. Zero leakage is the pass criteria.
Key Precautions: Avoiding Common Pitfalls
In my years as a product engineer, I have seen many prototypes fail due to simple oversights.
- Heat Accumulation: When machining ABS plastic, we limit continuous cutting to 15 minutes. This prevents the material from softening and losing its shape.
- Tool Wear: A dull tool can increase your dimensional error by 0.05mm. We replace roughing tools every 10 hours of run time to maintain accuracy.
- Accuracy Compensation: For thin-walled panels (1.5mm), we always leave a 0.1mm allowance. This offsets the slight deformation caused by the clamping pressure.
Yigu Technology’s Perspective
At Yigu Technology, we don’t just “cut parts”; we validate your vision. We believe a clothes dryer prototype is the ultimate design validator. By using five-axis machining for drums and 3D scanning post-production, we verify every curve to a tolerance of ±0.03mm.
In one recent project, our 3D scan found a 0.08mm misalignment in a door hinge that would have caused a seal failure in mass production. We caught it in the prototype stage, saving the client nearly $15,000 in mold modification costs. Our goal is to cut your rework rates by 25% and get your product to the market 1–2 weeks faster.
FAQ
How long does the entire CNC machining clothes dryer prototype process take?
Typically, the process takes 10–14 working days. This includes 2 days for preparation, 4 days for machining, 2 days for painting/polishing, and 2 days for assembly and testing.
Can I replace aluminum alloy with ABS plastic for the drum?
We strongly advise against it. ABS is not strong enough to handle the radial force of a rotating load. It will deform, causing the drum to jam. Aluminum alloy is essential for a functional test.
What causes the drum to jam, and how do you fix it?
Jamming is usually caused by poor roundness (error >0.02mm) or misaligned bearings. We fix this by re-machining the drum surfaces and using a dial indicator to realign the bearings to a coaxiality of ±0.01mm.
Is CNC machining better than 3D printing for a dryer?
Yes. 3D printing is great for small parts, but for a large-scale appliance, CNC machining provides much better structural strength and a more authentic surface finish that reflects the final manufactured product.
How do you ensure the control panel buttons don’t stick?
We use “pocket milling” to create a 0.1mm clearance between the button and the housing. This ensures clear tactile feedback without any sticking.
Discuss Your Projects with Yigu Rapid Prototyping
Do you have a new appliance design that needs a high-precision physical model? At Yigu Technology, we specialize in the complex CNC machining required for the housewares industry. From rotating drums to crystal-clear acrylic windows, we have the expertise to bring your dryer prototype to life. Would you like me to review your CAD files and provide a free DFM (Design for Manufacturing) analysis to optimize your project?