Introduction
If you are a machinist, a CNC operator, or someone who makes parts, you know that holding a workpiece securely is half the battle. Traditional clamps can get in the way, block cutting paths, or even damage delicate materials. So, what is the solution? A vacuum plate for machining. It is a simple but powerful tool that uses suction to hold parts in place. Think of it as a flat surface with tiny holes that, when connected to a vacuum pump, creates a powerful grip. Unlike clamps, it holds the entire part evenly, without leaving marks. Whether you are working with thin sheets of metal, fragile plastic, or large flat panels, a vacuum plate can boost your precision, speed up your setup, and cut down on wasted material. In this guide, we will cover everything you need to know—from how they work to which one to choose for your specific project—so you can make smarter decisions and avoid common mistakes.
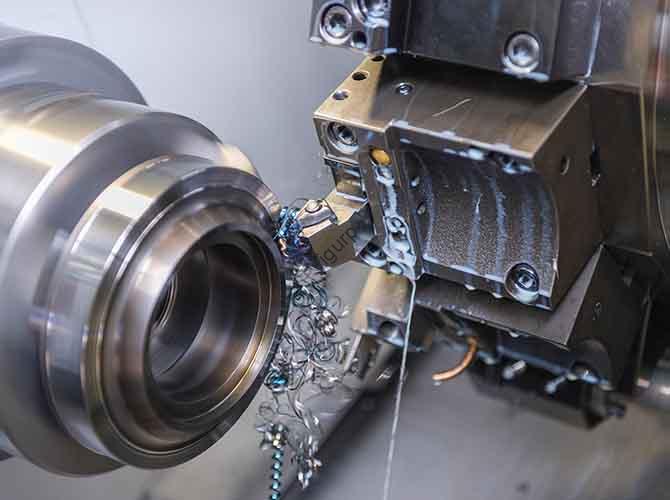
What Is a Vacuum Plate for Machining, and How Does It Work?
At its core, a vacuum plate for machining is a flat, rigid surface—usually made of aluminum, steel, or a strong composite—with a network of tiny holes or grooves. These holes are connected to a vacuum system. When you turn the vacuum on, it sucks the air out from under your workpiece. This creates negative pressure, and the powerful force of atmospheric pressure (which is about 14.7 psi at sea level) then pushes the workpiece firmly down onto the plate. The part is held securely, not by force, but by suction.
This holding method relies on two key things: a strong vacuum and a perfect seal. Let’s break it down with a real-world example. Imagine a CNC shop that machines aluminum sheets for aerospace parts. They use a 24×36-inch aluminum vacuum plate with a grid of small, 1/8-inch holes. The operator places the aluminum sheet on the plate, aligning it with reference marks. They then turn on the vacuum pump, which pulls the air out and creates a vacuum level of 28–29 inches of mercury (inHg) —the industry standard for machining. Within seconds, the sheet is locked in place, held by even pressure across its entire surface. No clamps are needed. The CNC machine then mills intricate slots and holes, and because the pressure is even, the thin aluminum doesn’t warp or shift. The parts meet the strict aerospace tolerance of ±0.001 inches. When the job is done, the operator simply turns off the vacuum, and the part lifts right off. It is fast, clean, and precise.
It is important to remember that this only works if you have an airtight seal between the workpiece and the plate. For materials that are porous, like wood or some composites, air will leak through. In these cases, operators use special sealing tapes or gaskets around the edges of the part to block the leaks. For parts that are not perfectly flat, you can get custom plates machined to match the exact shape, though these are more expensive.
What Are the Common Types of Vacuum Plates for Machining?
Not all vacuum plates are the same. The right type depends on your workpiece material, its size, and the kind of machining you plan to do. Here is a breakdown of the most popular types.
| Type of Vacuum Plate | Best For | Pros | Cons |
|---|---|---|---|
| Grid Vacuum Plates | Flat, solid workpieces like aluminum sheets or plastic panels. | Very versatile, works with most flat parts, easy to clean, and affordable. | Requires a perfectly flat workpiece to seal properly. Not ideal for porous materials. |
| Porous Vacuum Plates | Delicate or very thin workpieces, like copper foils or glass panels. | Provides even pressure, so it won’t damage fragile parts. Has no visible holes on the surface. | More expensive than grid plates. Can get clogged with dust and needs regular cleaning. |
| Custom Contoured Vacuum Plates | Non-flat workpieces, like curved metal brackets or molded plastic parts. | Creates a perfect seal for irregular shapes. Offers the highest precision for those parts. | Very expensive (custom machining can cost $500 to $5,000+). Can only be used for one specific part shape. |
| Modular Vacuum Plates | Small parts or holding multiple workpieces at once, like small metal components. | Very flexible. You can reconfigure the setup for different part sizes. Saves space on your CNC table. | Lower holding force than solid plates. Not ideal for large workpieces (over 12×12 inches). |
Let’s look at a couple of examples to see these types in action. A medical device company makes small stainless steel brackets for surgical tools. They use a modular vacuum plate. Its flexible design lets them hold ten brackets at once on their CNC table, which doubles their production speed. The holding force of about 15-20 psi is more than enough to keep these small, flat parts stable during milling. On the other hand, a company that makes automotive windshields needs to cut large, curved glass panels. They use custom contoured vacuum plates. Each plate is machined to match the exact curve of a specific glass panel, ensuring a perfect, airtight seal. Without this custom plate, the glass would shift during cutting, leading to cracks and expensive waste.
What Key Factors Should You Consider When Choosing a Vacuum Plate?
Choosing the right vacuum plate can mean the difference between a smooth, precise job and a costly disaster. Here are the most critical factors to evaluate.
1. Workpiece Material and Thickness
The material you are machining is the biggest factor in your choice.
- For solid, non-porous materials like aluminum, steel, or acrylic, a standard grid vacuum plate works best. It is affordable, effective, and easy to use. For very thin materials (under 1/8 inch), consider a porous plate to avoid bending the part.
- For porous materials like wood, carbon fiber, or foam, you can still use a grid plate, but you must use sealing tape or a gasket around the part’s edges to block air leaks. A porous plate will not work here because air will simply seep right through the material.
- For fragile materials like glass, thin copper, or plastic films, a porous plate is ideal. It distributes pressure evenly, so you won’t get cracks or dents.
A good example is an electronics company that machines thin copper circuits only 0.005 inches thick. They first tried a grid plate, but the copper bent because the pressure was uneven around the grid’s holes. Switching to a porous plate solved the problem. The even pressure held the copper perfectly flat, and the circuits met their required tolerance of ±0.0005 inches.
2. Vacuum Level and Holding Force
Vacuum level is measured in inches of mercury (inHg). Holding force is the resulting pressure on your part, measured in pounds per square inch (psi). Here is a simple guide:
- For standard machining like milling metals or plastics, a vacuum level of 28–29 inHg (which provides about 14–15 psi of force) is usually sufficient.
- For heavy-duty machining with deep cuts or high feed rates, you will need a higher level of 29–30 inHg (16–18 psi). This requires a more powerful pump and a very rigid plate.
- For delicate parts, a lower force of 8–12 psi is better. You can use a vacuum regulator to dial in the exact pressure you need.
According to industry data, a holding force of just 10 psi is enough to hold a 10×10-inch aluminum sheet that is 1/4 inch thick during light milling. But for deep cuts over 1 inch, you will need at least 15 psi to prevent the part from shifting.
3. Workpiece Size and Shape
- Large, flat workpieces (over 24×24 inches) need a solid grid or porous plate that matches your CNC table’s size. Look for plates with reinforced edges to prevent them from flexing, which can break the vacuum seal.
- Small workpieces (under 6×6 inches) are perfect for modular plates. You can hold many parts at once, which saves a huge amount of setup time.
- Non-flat workpieces like curved or angled parts usually require custom contoured plates. Some manufacturers offer “semi-custom” options with interchangeable inserts, which can save money.
4. Compatibility with Your Machining Equipment
Make sure the plate will actually fit your machine.
- Mounting: The plate must have holes or slots that match your machine’s table. Most use standard T-slots.
- Size: The plate must be smaller than your machine’s work envelope. You need room for the cutting tool to move freely around the part.
- Vacuum Connection: The air inlet on the plate should match the size of your vacuum pump’s hose. Common sizes are 1/2 inch and 3/4 inch.
One CNC router operator learned this lesson the hard way. They bought a 36×48-inch vacuum plate for a machine with a 30×40-inch work area. The plate was too big, and during operation, the spindle crashed into the edge of the plate. The result was a $2,000 repair for a new spindle and a $500 cost for a new, smaller plate. A costly mistake that was easy to avoid.
How Do You Use and Maintain a Vacuum Plate for Machining?
Even the best vacuum plate won’t perform well if you don’t use it correctly or keep it clean. Here is a simple, step-by-step guide.
Step 1: Prepare the Workpiece and Plate
- Clean everything: Wipe both the plate and the bottom of your workpiece with a lint-free cloth. Remove any dust, oil, or debris. Even a tiny particle can break the vacuum seal.
- Seal porous materials: If your part is porous, apply vacuum sealing tape around its edges where it will sit on the plate.
- Align the part: Use the reference marks on the plate (often etched lines) to position your part correctly for your machining program.
Step 2: Activate the Vacuum and Test the Hold
- Turn on the pump: Let it run for 10-15 seconds to build up full vacuum pressure. Check the gauge.
- Test the seal: Gently push or pull on the workpiece. It should feel completely solid and not move at all. If it moves, turn off the vacuum and look for leaks or debris.
- Adjust pressure: For delicate parts, use a regulator to lower the force. For heavy cuts, increase it, but never go over the plate’s maximum rating.
Step 3: Machine the Part and Monitor
- Start with a test cut: Make a small, safe test cut to confirm the part is not shifting.
- Watch the vacuum gauge: Keep an eye on the pressure. If it suddenly drops, there is a leak. Stop the machine immediately to prevent damaging the part.
Step 4: Clean and Maintain After Use
- Remove the part: Turn off the vacuum and lift the part off.
- Clean the plate: Use a small brush or compressed air to clear out any dust, chips, or debris from every hole and groove. Clogged holes mean less holding power next time.
- Inspect for damage: Look for cracks, dents, or worn edges. A small crack can be repaired with epoxy, but a badly damaged plate needs replacement.
- Store it properly: Keep the plate in a dry, cool place. For aluminum plates, a light coat of oil can prevent rust.
A precision machine shop in Michigan follows this routine strictly. They clean their plates after every use, inspect them weekly, and replace worn parts like gaskets every three months. As a result, their vacuum plates last an average of five years—twice as long as the industry average of two to three years.
Conclusion
A vacuum plate for machining is a transformative tool for anyone who needs to hold parts securely, precisely, and without damage. By using the simple power of atmospheric pressure, it solves the age-old problem of work-holding. Whether you choose a versatile grid plate for everyday metalwork, a gentle porous plate for delicate materials, a flexible modular plate for small parts, or a precision custom contoured plate for complex shapes, the right choice depends on your specific needs. By understanding how they work, selecting the right type, and following a simple maintenance routine, you can boost your machining accuracy, speed up your workflow, and reduce wasted material. For any machinist or manufacturer serious about precision work, a vacuum plate is an investment that pays for itself many times over.
FAQ
How much does a vacuum plate for machining cost?
Costs vary widely based on the type, size, and material. A small, basic grid plate (12×12 inches) can cost between $150 and $300. A large porous plate (36×48 inches) might range from $800 to $1,500. Custom contoured plates are the most expensive, starting around $500 and going up to $5,000 or more for complex shapes. Remember, this does not include the cost of a vacuum pump, which starts at around $300.
Can a vacuum plate hold curved or irregularly shaped workpieces?
Yes, but you will likely need a custom contoured vacuum plate. This type of plate is machined to match the exact shape of your workpiece, creating a perfect seal. For parts with only a slight curve, a cheaper alternative is to use a flexible vacuum membrane (a rubber sheet) on top of a standard grid plate. The membrane conforms to the part’s shape, but this method only works for minor curves.
How do I fix a vacuum leak in my plate?
First, you need to find the leak. Turn on the vacuum and spray a small amount of soapy water on the plate’s surface, especially around the edges and holes. You will see bubbles forming where air is leaking out. The fix depends on the cause. If it is a gap between the part and the plate, use sealing tape. If a hole or groove is clogged, clean it out. If the plate itself has a small crack, you might be able to seal it with a strong epoxy designed for metal.
Discuss Your Projects with Yigu Rapid Prototyping
Are you looking to improve the precision and efficiency of your machining work? At Yigu Rapid Prototyping, we understand the critical role that work-holding plays in producing high-quality parts. We can help you select the perfect vacuum plate for machining for your specific application, whether you are working with aerospace aluminum, delicate electronics components, or anything in between. Our team of experts can advise you on the best type, size, and features to match your needs and your budget.
Contact Yigu Rapid Prototyping today to discuss your project. Let’s work together to ensure your parts are held securely and machined with ultimate precision.