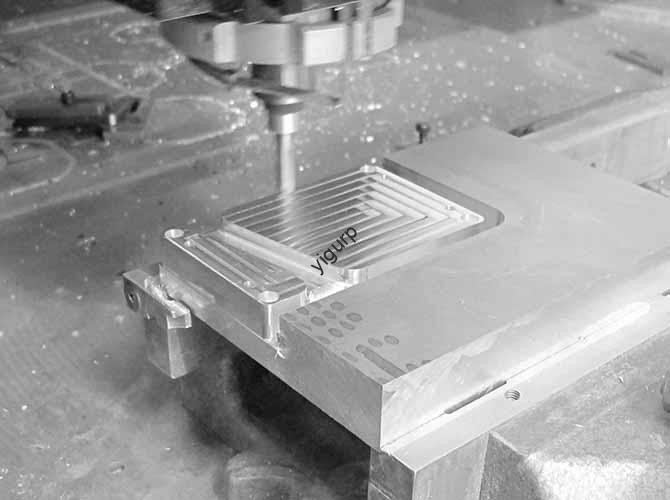
CNC machining plane step problems—those visible, uneven ridges where tool paths meet or surfaces transition—are a common headache for machinists. They ruin part precision, make surfaces look unprofessional, and even break functionality, like weakening seals on flat components. These issues don’t pop up out of nowhere; they come from tool issues, equipment wear, poor programming, or wrong parameters. This article breaks down their root causes, simple fixes, and ways to stop them before they start. By the end, you’ll have clear, actionable steps to eliminate plane steps for good.
What Causes CNC Plane Steps?
Tool-Related Issues
Tools are the first thing to check—they’re the direct link between your machine and the workpiece. Even small tool problems can create big step issues. Let’s look at real-world examples and fixes:
| Tool Problem | How It Causes Steps | Quick Fix | Pro Tip |
|---|---|---|---|
| Wear or Damage | A worn cutting edge removes material unevenly, leaving ridges at tool joints. | Replace worn tools right away. For indexable inserts, check edges every 200–300 cycles. | Use diamond-coated or PCD tools—they last 3–5x longer, cutting down on wear errors. |
| Inconsistent Diameter | New and old tools with 0.02 mm diameter gaps create 0.01 mm step heights. | Label tools by diameter (e.g., “φ10.00 mm End Mill #3”) and calibrate new ones first. | Use a tool presetter (±0.001 mm accuracy) and store data in the CNC system for auto-compensation. |
| Poor Installation | Loose collets or spindle slag cause tool deflection (≥0.03 mm), leading to uneven cuts. | Clean spindle holes/collets with alcohol; torque collets to specs (e.g., 25 N·m for ER32). | Switch to hydraulic collets—they cut runout to <0.005 mm for stable positioning. |
| Example: A small shop once had steps on aluminum panels. We found their end mills were worn after 400 cycles (way over the 300-cycle limit). Replacing tools and adding PCD inserts cut step issues by 70%. |
Equipment Wear
Your CNC machine’s parts wear down over time, leading to wobbly or uneven cuts. Focus on these key components:
- Ball Screw Bearings: Wear causes 0.01 mm motion lag, creating regular steps every 10–20 mm. Lubricate with lithium grease every 50 hours; replace if backlash exceeds 0.005 mm.
- Guide Rails: Dirt or scratches increase friction, making feed rates uneven. Clean daily with a lint-free cloth; grind out scratches if needed.
- Spindle: Runout over 0.005 mm vibrates tools, leaving wavy steps. Balance spindles quarterly; replace bearings if runout is too high.
Programming Mistakes
Even good tools and machines fail with bad programming. Most step issues here come from poor tool path design or wrong allowance settings.
How to Optimize Equipment & Parameters?
Cutting Parameter Tweaks
Aggressive settings (fast feeds, deep cuts) cause vibration and steps. Keep it simple with these guidelines:
- Cutting Depth: Use 0.1–0.3 mm for finishing (vs. 0.5–1 mm for roughing). Shallow cuts reduce tool bend and heat.
- Feed Rate: Lower to 0.05–0.1 mm/rev for finishing (from 0.15 mm/rev). Slow feeds cut chip buildup.
- Cutting Speed: 300–500 m/min for aluminum; 100–200 m/min for steel. Faster speeds break up built-up edges.
- Layered Machining: For parts ≥10 mm thick, split finishing into 2–3 passes (0.2 → 0.1 → 0.05 mm). Each pass fixes small uneven spots.
Machine Maintenance Checks
Set a weekly maintenance routine to catch wear early:
- Clean guide rails and spindle taper holes.
- Check ball screw lubrication.
- Test spindle runout with a dial indicator.
- Tighten all clamps and fasteners.
A client once ignored maintenance and had steps on every plane part. After 1 week of routine checks and lubrication, their step rate dropped by 65%.
How to Improve Programming & Paths?
Tool Path Design
The goal is to eliminate gaps between tool paths. Try these easy fixes:
- Add Overlap: Use 0.1–0.2 mm overlap between parallel paths. For a 10 mm end mill, set path spacing to 9.8 mm to cover gaps.
- Transition Arcs: Replace sharp corners with R0.5–1 mm arcs. Arcs stop sudden tool speed changes that cause micro-steps.
- Use Face Mills: For planes >200 mm², use φ50 mm face mills (8 teeth) instead of small end mills. They cut 50–70% fewer tool joints (and steps).
Finishing Allowance
Not enough allowance leaves roughing marks (steps) behind. Follow these rules:
| Material | Total Allowance | Roughing Allowance | Finishing Allowance |
|---|---|---|---|
| Aluminum Alloys | 0.3–0.5 mm | 0.2–0.3 mm | 0.1–0.2 mm |
| Steel | 0.5–0.8 mm | 0.3–0.5 mm | 0.2–0.3 mm |
| Example: A 20 mm steel plate—rough to 20.3 mm, then finish to 20.0 mm. This ensures the finishing pass erases all roughing marks. |
How to Fix Special Step Scenarios?
Pseudo-Steps
Pseudo-steps aren’t real gaps—they’re deep lines from built-up edges. They happen when cutting steel at <100 m/min. Here’s how to fix them:
- Use TiAlN or TiCN coated inserts—they cut friction, reducing built-up edges by 80%.
- Increase speed by 30–50% (e.g., 100 → 150 m/min for 45# steel). Faster speeds break up chip adhesion.
Deep Cavity Steps
Steps in deep cavities (depth >5x tool diameter) come from tool deflection. Try this 3-step fix:
- Add a finishing arc: Program a 0.5–1 mm arc to smooth the cavity bottom after deep milling.
- Two-tool processing: Use a long roughing end mill (φ12 mm) to remove bulk material, then a short, stiff one (φ12 mm, 3x D length) to finish—less deflection.
- Calibrate tip compensation: A φ10 mm, 50 mm bar deflects ~0.02 mm under load. Add -0.02 mm Z-compensation to cut fully.
How to Prevent Steps Proactively?
Stopping steps before they start saves time and rework. Use these actionable practices:
- Real-Time Monitoring: Install vibration sensors on the spindle. Set alerts for vibration >0.01 mm—this triggers auto-feed reduction.
- Tool Life Management: Replace tools after 500 aluminum parts or 300 steel parts. Don’t wait for wear to cause steps.
- Cutting Fluid Care: Filter fluid daily to remove chips (>50 μm); replace every 3 months. Clean fluid prevents chip buildup on workpieces.
Conclusion
CNC machining plane steps are fixable—you just need to target their root causes: tool issues, equipment wear, programming mistakes, or wrong parameters. Start with tool checks (the easiest fix), then optimize parameters and programming. For special cases (pseudo-steps, deep cavities), use the targeted solutions above. Most importantly, be proactive: regular maintenance and monitoring stop steps before they ruin your parts. By following these steps, you’ll get smooth, precise planes every time—saving time, reducing rework, and improving part quality.
FAQ
What’s the maximum step height I can correct with re-machining?
For steps <0.05 mm, one finishing pass (ap=0.03–0.05 mm, F=0.05 mm/rev) works. For steps >0.1 mm, use two passes: a light roughing pass (ap=0.08 mm) to reduce the step, then a finish pass. This avoids overloading the tool.
Can CAM software prevent step problems?
Yes! Advanced CAM tools (UG/NX, Mastercam) have “constant chip load” and “smooth path” features. Constant chip load keeps cutting forces steady (no vibration), while smooth paths add transition arcs automatically—cutting step risk by 40–50%.
Why do steps still happen with new tools and calibrated parameters?
Check workpiece clamping! Loose clamps cause 0.02 mm+ movement during machining. Use toggle clamps or vacuum chucks (≥80 kPa pressure) to secure parts. Also, ensure blanks are flat—0.1 mm bow in a 200 mm plate leads to uneven cuts and steps.
Discuss Your Projects with Yigu Rapid Prototyping
Struggling with CNC machining plane steps or other prototyping challenges? Our team of experts has years of experience solving complex machining issues. Whether you’re working on small parts, large planes, or deep cavities, we’ll tailor a solution to your project’s needs. Contact Yigu Rapid Prototyping today to discuss your project and get a free consultation—let’s build precise, smooth parts together.