Introduction
An electric heating compress eye instrument is a device designed for comfort and relaxation. It gently warms the area around your eyes to relieve strain and dryness. Creating a prototype for such a product is a delicate task. The device must fit the curved contours of the face, maintain a safe and steady temperature between 40°C and 50°C , and be comfortable to wear. The CNC machined electric heating compress eye instrument prototype process is the ideal way to achieve this. It allows you to create precise, functional parts from real materials. This article guides you through the entire process. We will cover the essential design steps, the core machining work, the finishing touches, and how to solve common problems to create a prototype that is both high-quality and test-ready.
What Design Foundation Ensures a Successful Eye Instrument Prototype?
Before any machining begins, you need a solid plan. The design stage is where you define every detail that will make your prototype a success.
Understanding What Your Product Must Do
First, define the core functions. Your eye instrument needs to heat up consistently to a target temperature, ideally between 40°C and 50°C. Users should be able to adjust this temperature and set a timer, maybe for a 5 or 10-minute session. Inside the device, you must reserve space for all the components: the heating element (like a thin metal sheet or film), the temperature sensor, the circuit board, and the battery.
Designing the Structure for Comfort and Assembly
The housing must be ergonomic. It needs a curved shape that fits the average eye socket comfortably. You will design it as two or more parts that snap or screw together. This allows easy access to the inside for assembly and future battery replacement. Inside, you need to create mounts to hold all the components securely. The gap between the inner shell and the heating element must be carefully considered for good heat transfer.
Selecting Materials That Match Your Goals
The materials you choose for the prototype should be similar to what you plan for mass production. This makes your tests more meaningful.
- For the Housing: ABS plastic is a great all-rounder. It is easy to machine, can be dyed any color, and is cost-effective. For a more premium feel, you might choose aluminum alloy. If you need a transparent window for an indicator light, use PC or acrylic.
- For Internal Parts: Use ABS or acrylic to create brackets and supports for the circuit board and battery.
- For the Heating Element: You will prototype with thin metal sheets or a flexible electric heating film.
Creating Detailed 3D Models
Use CAD software to build a precise 3D model. Define all the critical dimensions. The shell thickness should be consistent, maybe 1.5mm to 2mm. Model the internal cavities for the components, leaving small 0.5mm gaps for assembly. Mark the positions for buttons, display windows, and any heat dissipation holes. From this model, you will export the files needed for machining, like DXF or DWG for your CNC programmer.
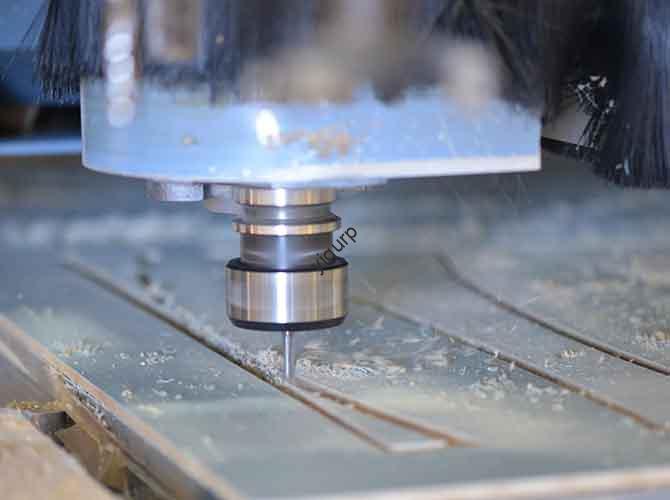
How Does the Core CNC Machining Process Work for an Eye Instrument?
With the design ready, you move to the CNC machine. This is where your digital model becomes a physical object. The process is linear and requires attention at every step.
Step 1: Preparing Your Materials
Start by preparing your raw materials. For a plastic housing, you will need an ABS plate or rod with a thickness matching your design, typically 1.5mm to 3mm. If you are using metal for parts, you will have aluminum or stainless steel plates of the correct thickness. These are cut into blanks, slightly larger than the final part.
Step 2: Programming the Tool Paths
Your 3D model is loaded into CAM software like Mastercam. Here, a programmer plans every cut the machine will make.
- They set the machining parameters: the speed, the feed rate, and the depth of each cut.
- For roughing, they use a larger tool, like a 6mm flat cutter, to remove the bulk of the material quickly.
- For finishing, they switch to smaller tools, like a 0.5mm ball cutter, to create the fine details, smooth curves, and small holes.
Step 3: Clamping and Setting Up the Part
The material blank must be held perfectly still. A vise or a vacuum cup is used for this. For a symmetrical design, the programmer will carefully find and set the center point of the part. This ensures that the left and right sides of the eye instrument are machined identically.
Step 4: Machining the Parts Layer by Layer
The CNC machine now begins its work, cutting the part layer by layer.
- For the Housing: It mills the outer shape, creating the smooth, curved surface. It machines the openings for buttons and any indicator lights.
- For the Internal Structure: It carves out the battery compartment, the slots for the circuit board, and the precise positions where the heating element will be fixed.
- For Heat Management: If needed, the machine can cut small grooves or create thin thermal columns inside the housing. These features are designed to guide and optimize the heat flow from the heating element to the skin contact area.
Step 5: Controlling the Critical Details
During machining, you must control two things tightly.
- Tolerance Control: The overall size of the housing must be accurate to within ±0.1mm. This ensures that all the parts fit together perfectly and that there is no unwanted movement inside.
- Surface Quality: The finishing passes should create a smooth surface. This might be a matte or glossy finish achieved directly by the machine, which can reduce the need for extra polishing later.
What Post-Machining Steps Finish the Prototype?
Once the parts are machined, they need surface treatment and assembly to become a working prototype.
Applying the Right Surface Finish
The raw machined parts are now given their final look and feel.
| Part Type | Treatment Method | Purpose and Effect |
|---|---|---|
| Plastic Housing | Spraying | Apply a matte paint for a soft, non-slip feel, or a high-gloss paint for a sleek look. Soothing colors like light blue or off-white are common for eye care products. |
| Visible Surfaces | Silk Screen Printing | Print your brand logo and operation icons (like “+” and “-” for temperature control) clearly on the shell. |
| Metal Parts (if used) | Anodization / Sandblasting | Anodization adds a durable, corrosion-resistant layer. Sandblasting gives the metal a pleasant, textured tactile feel. |
Testing and Assembling the Prototype
Before final assembly, you should verify the core functions.
- Functional Verification:
- Install a prototype heating element, like an electric heating film, and connect it to a test circuit. Check how fast it heats up and if the temperature is uniform across the surface.
- Test the timing function. Does it shut off automatically after 5 minutes?
- Press the buttons. Do they feel responsive? Check if the LED indicators are clearly visible.
- Assembly Process:
- Attach the circuit board, battery, and heating element to their designated spots on the internal bracket.
- Carefully connect all the small wires.
- Finally, snap or screw the housing halves together. The fit should be tight to prevent dust from getting inside.
How Do You Optimize the Prototype Based on Feedback?
Your first prototype is a learning tool. You will use it, test it, and get feedback. Here are common issues and how to fix them.
| Problem Found During Testing | Improvement Action |
|---|---|
| The edges of the housing feel sharp or uncomfortable against the skin. | Go back to the CAD model and optimize the curvature of the shell. Add larger fillets and rounds to the edges. |
| One area of the instrument gets too hot, creating a hotspot. | The heat distribution is uneven. Redesign the internal air gaps or add a thin aluminum heat spreader between the heating element and the shell to diffuse the heat. |
| The charging port is hard to access or feels flimsy. | Redesign the port area. Consider switching to a more user-friendly option, like a magnetic Type-C charging port , which is easier to connect and more durable. |
What Are Common Technical Difficulties and Their Solutions?
During the machining and assembly of an eye instrument prototype, you might face these technical challenges. Here is how to solve them.
- Low Accuracy on Complex Curves: The human eye socket is a complex 3D shape. A standard 3-axis CNC machine might struggle. The solution is to use a 4-axis or 5-axis CNC machine. These can tilt the part or the tool to reach all the angles perfectly. Using high-quality, sharp tools, like diamond-coated cutters, also helps.
- Uneven Temperature in the Prototype: If the heat is not spreading evenly, you need to improve the thermal path. Machine very precise grooves or channels inside the housing to hold the heating element flat against the skin-contact area. You can also use a thin aluminum plate as a heat spreader.
- Plastic Housing Warps After Machining: Some plastics have internal stress that releases during machining, causing the part to bend. To fix this, choose a high-strength ABS or PC material. You can also perform an annealing step on the plastic blank before machining. This involves heating it slowly and letting it cool to relieve internal stresses.
- Poor Button Feel: If the buttons are mushy or unresponsive, the design needs work. You can design the prototype to use small silicone button pads that sit under the hard plastic buttons. Also, ensure the CNC machining leaves enough space inside for the button to travel and make a solid click.
Conclusion
Creating a high-quality CNC machined electric heating compress eye instrument prototype is a multi-step journey that blends careful planning with precise execution. It starts with a design that considers ergonomics, material choice, and the critical need for safe, even heating between 40°C and 50°C. The CNC process then brings this design to life, machining complex curves and internal structures with ±0.1mm accuracy. Finally, post-processing and thoughtful assembly create a functional prototype ready for testing. By understanding each step and knowing how to troubleshoot common issues like hotspots or poor surface finish, you can develop a prototype that not only looks good but also performs reliably, paving the way for a successful final product.
FAQ
What is the ideal temperature range for the electric heating compress eye instrument prototype, and how does CNC machining support this?
The ideal and safe temperature range is 40°C to 50°C. CNC machining supports this by allowing you to create precise internal grooves or thermal columns in the housing. These features help guide the heat and ensure it spreads evenly across the area that contacts the skin. The tight tolerances also ensure the heating element sits flush against the shell for efficient heat transfer.
Can CNC machined prototypes for electric heating eye instruments be directly used for small-batch production?
No, generally they are not used for production. CNC machining is for design verification and functional testing. It is perfect for making one or a few prototypes. For small-batch production, you need to switch to methods like injection molding for plastic parts. These processes are much faster and cheaper per unit when making dozens or hundreds of pieces.
How long does it take to produce a CNC machined electric heating compress eye instrument prototype?
The timeline depends on the complexity of the design. For a relatively simple design with a plastic housing, the process from final design to assembled prototype typically takes 5 to 7 days. If your design is more complex, perhaps using metal parts or requiring very fine surface details, it can take 7 to 14 days or even 2-3 weeks if multiple rounds of iteration are needed.
Discuss Your Projects with Yigu Rapid Prototyping
Are you ready to develop a new electric heating compress eye instrument? Turning your concept into a comfortable, safe, and effective device requires a prototyping partner with precision and experience. At Yigu Rapid Prototyping, we specialize in the CNC machined electric heating compress eye instrument prototype process. Our team understands the importance of ergonomic curves, tight tolerances, and the critical task of creating even heat distribution. We can help you select the right materials, optimize your design for machining, and build a functional prototype that you can test and refine.
Contact Yigu Rapid Prototyping today to discuss your eye care project. Let’s work together to create a prototype that brings soothing warmth to life.