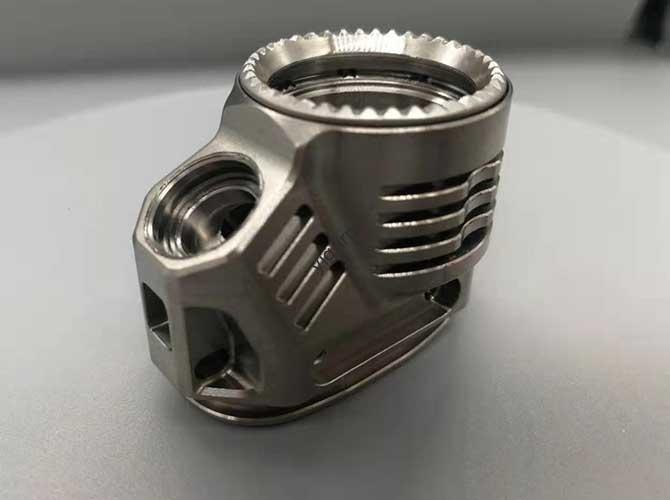
CNC machining is the undeniable backbone of modern prototype production. It offers the precision, flexibility, and speed required to turn a digital “napkin sketch” into a physical, high-performance part. For engineers and product designers, choosing the right equipment is a make-or-break decision. Selecting the wrong machine or using an outdated process doesn’t just result in an inaccurate part—it leads to missed deadlines and wasted budgets.
Unlike mass production, where a machine might run the same part for six months, prototyping demands extreme adaptability. You need to test multiple design iterations quickly while maintaining tight tolerances to ensure the prototype reflects the final product. This guide breaks down the core equipment, essential tooling, and the latest technologies to help you optimize your CNC prototyping workflow.
What Core Equipment is Used for Prototype Machining?
The right CNC machine sets the foundation for a successful project. Prototyping requires versatile equipment that can handle diverse shapes, sizes, and materials with minimal downtime between setups.
Common CNC Machines for Prototyping
Different geometries require different mechanical approaches. Here is how the most common machines stack up for prototype work:
| Machine Type | Key Components | Ideal Prototype Parts | Prototyping Advantages |
| Vertical Machining Center (VMC) | Bed, vertical spindle, 3–5 axes | Phone shells, sensor brackets, flat plates | Low setup time (30–60 mins); very cost-effective for small batches. |
| Horizontal Machining Center (HMC) | Horizontal spindle, rotary table | Gearboxes, engine blocks, multi-sided parts | Processes multiple sides in one setup; superior for alignment across faces. |
| Gantry Machining Center | Large overhead frame, 3–5 axes | Drone frames, automotive dashboards | Handles massive parts (up to 5m) without losing micrometer precision. |
| CNC Lathe (Turning Center) | Chuck, turret, 2–4 axes | Shafts, bolts, nozzles, pulleys | Fast for rotational parts; achieves excellent surface finishes (Ra <1.6μm). |
Real-World Example: A startup developing a new wearable fitness tracker needed 10 prototypes of a curved sensor bracket. They chose a 3-axis VMC. The setup took only 45 minutes. Because the VMC is so flexible, when they decided to change the curvature of the bracket to improve comfort, they simply updated the program and had a fresh prototype in hand within 2 hours. A specialized mass-production machine simply cannot offer that kind of pivot speed.
How Do You Select the Right Tooling?
In prototyping, the tool is the point of truth. Dull or mismatched tools lead to rough surfaces and dimensional errors. Because each prototype may have unique features, you often need a wider range of tools than you would for a standard production run.
Matching Tools to Materials
The tool material must be harder than the workpiece to maintain precision throughout the cut.
- Plastics (ABS, Delrin): We recommend High-Speed Steel (HSS). These tools are inexpensive ($5–$20) and offer incredibly sharp edges that slice through plastic without melting it.
- Aluminum Alloys: Cemented Carbide is the gold standard here. It resists heat and prevents “built-up edge,” where aluminum bits stick to the tool and ruin the finish.
- Steel & Stainless: Use Carbide with TiAlN Coating. This coating acts as a heat shield, allowing the tool to handle the abrasiveness of steel.
- Titanium: Ceramic tools are best for aerospace or medical prototypes. They can withstand temperatures up to 1,200°C without reacting chemically with the titanium.
Pro Tip: Use Indexable Tooling
For prototyping, prioritize indexable tools with replaceable inserts. If an edge wears out during a difficult design test, you only replace the $15 insert rather than a $150 solid carbide end mill. It is a massive cost-saver when you are constantly changing designs.
What Technologies Drive Accurate Prototyping?
Beyond the heavy iron of the machine, three core technologies ensure your prototypes are consistent and accurate: fixturing, programming, and precision control.
1. Modular Fixturing: The Key to Stability
Fixtures hold your part steady. In prototyping, you don’t want to build a custom fixture for every iteration. Modular fixtures—using interchangeable plates, pins, and clamps—allow you to reconfigure your setup in minutes.
For example, if you are machining a multi-hole bracket and the hole pattern changes in version 2.0, you simply move the pins on your modular plate. This cuts setup time by 50% compared to traditional clamping methods.
2. Smart Programming and Simulation
CNC programming translates your CAD model into G-code. Prototyping demands software that allows for quick edits.
- CAD/CAM Integration: Tools like Fusion 360 or Mastercam allow engineers to simulate the machining process on a screen first.
- Collision Detection: This is a lifesaver. A simulation can catch a “crash” between the tool and a fixture before it happens in real life, potentially saving a $200 part and a $10,000 spindle.
3. Precision Control and Calibration
To ensure a prototype fits into its final assembly, it must meet strict tolerances (often ±0.01mm).
- Calibration: We use laser interferometers to check machine accuracy monthly. For prototypes, we aim for ±0.005mm positioning accuracy.
- In-Process Probing: High-end machines use a probe to measure the part while it is still on the table. If a hole is 0.01mm too small, the machine automatically adjusts the tool path and re-cuts it.
How Can You Optimize Your Prototyping Workflow?
Efficiency in prototyping is measured by how fast you can move from “Idea A” to “Test B.” Here are four practical strategies to streamline the process:
- Start with “Near-Net-Shape” Blanks: Don’t machine a tiny part out of a massive block. Use raw material that is close to the final dimensions to reduce machining time by up to 50%.
- Leverage 5-Axis Machining: By using a 5-axis VMC, you can machine the front, back, and sides of a complex part in one setup. This eliminates the “stack-up error” that happens when a human has to manually move and re-clamp a part.
- The “Plastic First” Strategy: For early iterations, machine your part in PLA or ABS plastic even if the final part will be aluminum. It’s faster to cut, cheaper, and lets you verify the “fit” before using expensive alloys.
- Tool Labeling: Maintain an organized rack of tools labeled specifically for material types (e.g., “Aluminum Only”). Reusing proven tools across iterations ensures consistency between Version 1 and Version 5.
Yigu Technology’s Perspective
At Yigu Technology, we believe CNC prototyping is an art of flexibility. We specialize in high-stakes industries like aerospace and medical devices, where there is zero room for error. We prioritize VMCs and modular fixturing because they allow us to cut iteration times by 40% on average. For complex, multi-sided components, we lean on 5-axis technology to ensure perfect alignment without manual intervention. Our goal is to build a workflow that adapts to your design changes in real-time, helping you get your product to market faster and more reliably.
FAQ
Which CNC machine is best for a batch of 1 to 5 parts?
A 3-axis VMC is generally the best choice. It is versatile, has a relatively low setup cost, and can handle a wide variety of materials. If your part is strictly cylindrical, a CNC lathe is more efficient.
How much does CNC prototyping typically cost?
If you are outsourcing, a single prototype can cost anywhere from $50 to $200 depending on complexity and material. Owning a mid-range 5-axis VMC can require an investment of $50,000 to $150,000, which is why many startups choose to partner with dedicated CNC shops first.
Can CNC machines handle flexible materials like rubber?
Yes, but it requires specialized techniques. You must use low spindle speeds (500–1,000 RPM) and extremely sharp HSS tools to prevent the material from tearing or deforming. Cryogenic machining (cooling the part until it’s brittle) is also an option for very soft materials.
What is the standard tolerance for a CNC prototype?
Most professional shops offer a standard tolerance of ±0.1mm. However, for high-precision needs like medical or aerospace, we can achieve ±0.01mm or even tighter depending on the geometry.
What is the difference between G-code and M-code?
G-code controls the motion of the machine (where it goes and how fast), while M-code controls machine functions like turning on the coolant or starting the spindle.
Discuss Your Projects with Yigu Rapid Prototyping
Are you ready to turn your complex designs into high-precision reality? At Yigu Technology, we combine the latest CNC equipment with a deep understanding of rapid iteration. Whether you need a single functional prototype or a small pilot batch, our engineering team is here to help you optimize your design for manufacturing. Would you like me to review your CAD files and provide a tailored DFM analysis for your project?