Introduction
If you have ever needed to machine a super-hard material like tungsten carbide or hardened steel, you know that traditional cutting tools struggle. They wear out fast, break, or just cannot cut the shape you need. That is where Electric Discharge Machining (EDM) comes in. EDM is a non-contact process that uses electrical sparks to erode material. It can cut any conductive material, no matter how hard, and create complex shapes that would be impossible with milling or turning. In this guide, I will explain how EDM works, the different types, the key components and parameters, and where it is used. Whether you are a beginner or a pro, you will learn how to get the most out of this powerful technology.
How Does Electric Discharge Machining Work?
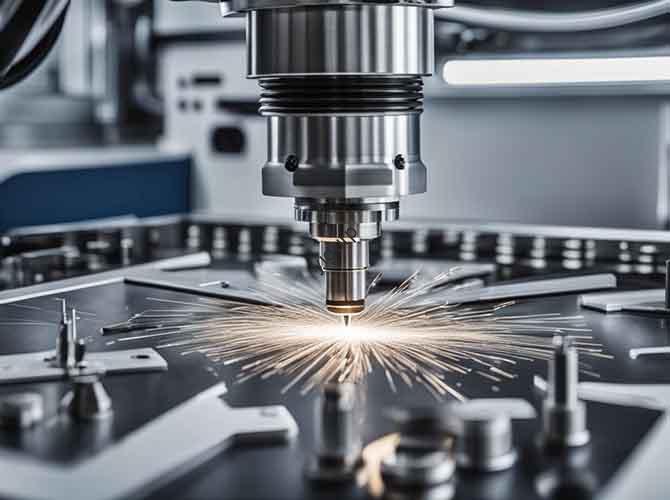
Electric Discharge Machining is based on a simple principle: controlled sparks erode material. An electrode and a conductive workpiece are submerged in a dielectric fluid—usually deionized water or oil. A voltage is applied, and when the gap between electrode and workpiece is just right, a spark jumps across. The spark generates intense heat, up to 10,000°C, melting and vaporizing a tiny bit of the workpiece. The dielectric fluid cools the area and flushes away the debris. Millions of sparks happen every second, gradually shaping the part.
Three Conditions Must Be Met
- A small spark gap—typically 0.01 to 0.3 mm—between electrode and workpiece. This prevents short circuits and ensures consistent sparks.
- Dielectric fluid fills the gap. It insulates, cools, and flushes away melted material.
- A pulse generator delivers short, high-voltage pulses that create the sparks.
Real-World Example
A mold shop needed to create a mold for a toy with tiny, curved details—like dinosaur scales. Traditional milling tools kept breaking in the hardened steel. They switched to EDM, using a graphite electrode shaped like the toy. The process etched the details perfectly without touching the steel. The mold produced over 10,000 toys with consistent quality.
What Are the Different Types of EDM?
EDM is not one process. Different types are suited for different jobs.
| EDM Type | Also Called | How It Works | Best For |
|---|---|---|---|
| Sinker EDM | Ram EDM, Die Sinking | A solid electrode (graphite or copper) is lowered into the workpiece. Sparks erode the shape of the electrode into the part. | 3D shapes like mold cavities and gear teeth. |
| Wire EDM | Wire-Cut EDM | A thin, charged wire moves along a programmed path, cutting through the workpiece like a spark-powered bandsaw. | Flat, complex shapes like aerospace components and metal stencils. |
| Hole Drilling EDM | Fast Hole EDM | A hollow electrode flushes dielectric through itself to drill deep, narrow holes. | Cooling holes in turbine blades—holes can be 100x deeper than their diameter. |
| Micro EDM | — | Uses ultra-small electrodes, as thin as 0.01 mm, for precision micro-machining. | Medical devices like tiny needles, and electronics like microchips. |
Pro Tip
Do not overcomplicate your choice. For flat parts with intricate edges, use wire EDM. For 3D shapes like a mold cavity, use sinker EDM. I once saw a shop try to drill a 0.5 mm hole with wire EDM instead of hole drilling EDM—it took five times longer.
What Are the Key Components and Consumables for EDM?
Running an EDM machine requires more than just the machine itself.
Essential Components
- Power supply: Controls pulse frequency, voltage, and current. A high-quality supply ensures consistent sparking, which is critical for surface finish.
- Servo control system: Maintains the correct spark gap. Too small and it shorts; too large and sparks stop.
- Dielectric system: Includes a reservoir, pump, and filter. It circulates fluid and removes debris. Clean filters weekly—a clogged filter ruins parts.
Must-Have Consumables
- Electrodes: For sinker EDM, graphite is cheap and works well; copper is more durable but pricier. For micro EDM, tungsten electrodes resist wear.
- Wire: For wire EDM, brass wire is common and affordable. For stainless steel or titanium, use zinc-coated brass—it cuts faster.
- Filters and flushing nozzles: Filters keep debris out of the spark gap. Adjusting nozzle angle can cut time by 20 percent, according to the Society of Manufacturing Engineers.
What Parameters Control the EDM Process?
Getting good results from EDM means understanding and adjusting key parameters. Small changes make a big difference.
| Parameter | What It Does | How to Adjust |
|---|---|---|
| Pulse on time (Ton) | Length of each pulse. Longer Ton = more heat = faster material removal. | For roughing, increase Ton (e.g., 100 µs) to save time. For finishing, decrease Ton (e.g., 20 µs) for a smooth surface. |
| Pulse off time (Toff) | Time between pulses. Longer Toff = more cooling = less electrode wear. | If electrode wears fast, increase Toff. If the process is too slow, decrease Toff—but stay above 10 µs to avoid overheating. |
| Current (amperage) | Strength of the pulse. Higher current = more material removed. | For hard materials like tungsten carbide, use higher current (e.g., 50 A). For thin parts, use lower current (e.g., 5 A) to prevent warping. |
| Flushing pressure | Force of the dielectric fluid. Higher pressure = better debris removal. | If you see burn marks, increase pressure (e.g., 50 psi). For delicate parts, decrease pressure (e.g., 10 psi). |
Case Study: Fixing a Rough Surface
A client brought a stainless steel part with a rough surface—Ra 8 µm, far above their medical device spec. Their parameters were Ton 80 µs and current 40 A. We adjusted Ton to 30 µs and current to 20 A. The finish improved to Ra 1.6 µm, meeting spec. The lesson: balance material removal rate with surface quality.
What Materials Can EDM Machine, and What Are Its Applications?
EDM shines where other processes fail—especially with hard, brittle, or heat-sensitive materials.
Best Materials for EDM
EDM works on any electrically conductive material. Common ones include:
- Hardened steel (up to 65 HRC)
- Tungsten carbide
- Titanium and its alloys
- Copper and brass
- Stainless steel
What EDM Cannot Do
EDM does not work on non-conductive materials like plastic, glass, or wood. For those, use laser cutting or waterjet.
Top Applications
- Mold and die making: Creating precise cavities in hardened steel molds for plastic, metal, or rubber parts.
- Aerospace components: Cutting complex shapes in titanium and Inconel without causing stress cracks.
- Medical devices: Micro EDM makes tiny, precise parts like surgical needles and orthopedic implants.
- Burr-free machining: EDM leaves no burrs—critical for electronics where burrs can cause short circuits.
Conclusion
Electric Discharge Machining is a powerful tool for precision manufacturing. It uses controlled sparks to erode material, with no contact and no cutting forces. It can machine any conductive material, no matter how hard, and create shapes that are impossible with traditional methods. The four main types—sinker, wire, hole drilling, and micro EDM—each have strengths for different jobs. Success depends on understanding the key components, adjusting parameters like pulse time and current, and choosing the right electrode and wire. EDM is slower than milling for simple parts, but for complex shapes and hard materials, it is often the only way to get the job done.
FAQ About Electric Discharge Machining
1. Is EDM expensive?
EDM machines cost more upfront than traditional mills—starting around $50,000 versus $10,000. But for hard-to-machine parts, they save money by eliminating tool wear and reducing setups.
2. How accurate is EDM?
Modern EDM machines can hold tolerances as tight as ±0.001 mm. That is precise enough for aerospace and medical applications. Accuracy depends on the servo system and electrode quality.
3. Can EDM cut thick materials?
Yes. Wire EDM can cut parts up to 300 mm thick. Sinker EDM can handle even thicker workpieces—up to 500 mm—with the right electrode.
4. How long does EDM take?
EDM is slower than traditional machining. A 100 mm cut might take 10 minutes with EDM versus 2 minutes with a mill. But for complex shapes or hard materials, EDM is faster because it avoids tool changes and breakage.
5. Is EDM safe?
Yes, with proper precautions. Wear gloves and eye protection—dielectric fluid can splash. Ensure the machine is grounded to avoid shocks. Never touch the electrode or workpiece while the machine is running.
Discuss Your Projects with Yigu Rapid Prototyping
At Yigu Rapid Prototyping, we have extensive experience with Electric Discharge Machining for aerospace, medical, and industrial applications. Our shop is equipped with modern sinker, wire, hole drilling, and micro EDM machines. We work with hardened steel, titanium, carbide, and other conductive materials. Our team helps you choose the right process, set optimal parameters, and deliver precision parts on time. Whether you need a complex mold cavity, a turbine blade with cooling holes, or a tiny medical component, we have the expertise to get it right. Contact Yigu today to discuss your project and get a free quote.