Introduction
In the field of metal processing, brass has become a core material in industries like electronics, automotive, and aerospace due to its excellent electrical and thermal conductivity, as well as its good machinability. However, brass milling is by no means a simple application of ordinary metalworking technology. Its unique combination of low hardness and high ductility can easily lead to problems such as sticky tools, burrs, and precision deviations. This article, drawing on 10 years of precision machining experience, will take you from basic principles to practical skills, comprehensively breaking down the key points of brass milling. It will help you avoid common pitfalls and achieve a double improvement in both efficiency and precision.
1. Brass Milling Basics: Understanding the Core Logic First
Before you start machining, you must understand the material you are working with. The physical properties of brass, a copper-zinc alloy, directly affect the machining process.
- Low Hardness (HB 80-110) : This is much lower than steel. While it means lower cutting resistance for the tool, it also makes the material prone to sticky tools.
- Strong Ductility (Elongation ≥30%) : This high ductility means brass tends to form long, continuous chips during cutting. This requires special chip-breaking designs in your tooling and process.
- High Thermal Conductivity (380 W/(m·K)) : Brass dissipates heat more than three times faster than steel. While this is good for the part, it can cause uneven tool wear.
- Zinc Content Matters: Brass with a zinc content of 30%-35% (like H65) offers the best machinability. Too much zinc can make the material brittle.
Practical Case: An electronic component factory once tried to mill H62 brass using the same parameters they used for steel. Because they didn’t account for its high ductility, the chips wrapped around the tool, forcing them to stop and clean the machine three times per hour. Their processing efficiency was only 40% of what it should have been with reasonable parameters.
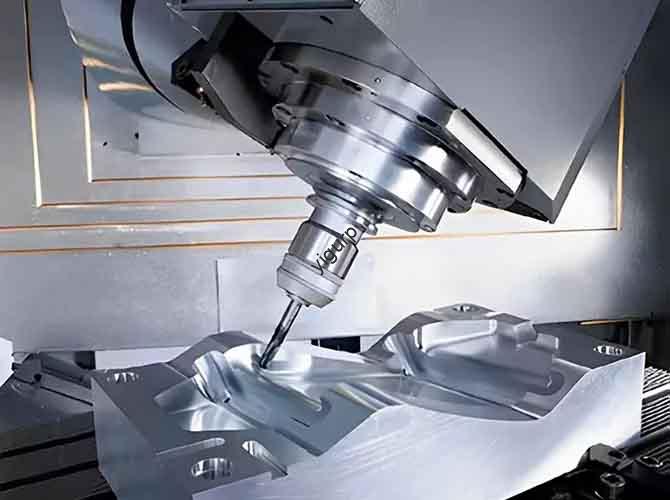
2. What Equipment and Tools Are Best for Brass Milling?
Choosing the right “weapon” is half the battle. While there’s no single “brass-specific” milling machine, you need to select equipment with the right capabilities.
Key Equipment Features to Look For
- Spindle Speed: Brass milling requires a higher cutting speed. A spindle speed of at least 8,000 rpm is recommended.
- Rigidity: Insufficient rigidity can lead to chatter and poor surface finish. Look for a machine with a bed weight of at least 2.5 tons.
- Cooling System: A high-pressure cooling system (≥ 10 bar) is essential to effectively wash away chips and prevent sticking.
- Control System: It must support high feed rates (≥ 10 m/min) and tool tip radius compensation.
Selecting the Right Milling Cutter
The core principle is matching the tool material to the machining scenario.
| Milling Cutter Type | Applicable Scenarios | Recommended Material | Key Benefits |
|---|---|---|---|
| Carbide End Mills | Plane milling, contouring. | Tungsten-Cobalt Alloy (WC-Co) | High hardness, good wear resistance. |
| Diamond-Coated Mills | High-precision, high-finish processing. | Carbide + Diamond Coating | Very low friction, excellent anti-stick knife properties. |
| Corn Milling Cutters | Roughing, large material removal. | HSS + TiN Coating | Large chip space, good chip-breaking effect. |
| Ball Head Mills | Surface and cavity processing. | Carbide | Smooth cutting action, good surface quality. |
Experience Sharing: When milling brass, always prefer cutters with sharp cutting edges and a groove design featuring a “large rake angle + forgiving chip groove.” This significantly reduces the risk of sticking. An auto parts factory once replaced ordinary cutters with diamond-coated end mills, reducing sticking problems by 80% and extending tool life by three times.
Setting Up Your CNC Machine
Correct machine setup is critical. Key points include calculating spindle speed based on cutter diameter and recommended cutting speed, setting the feed rate appropriately, and ensuring your cooling system is aimed directly at the cutting zone. The use of high-pressure emulsion cooling is generally the most cost-effective method.
3. What Are the Key Parameters and Optimization Strategies for Brass Milling?
Accurately controlling your cutting parameters is the key to producing high-quality parts consistently.
Cutting Speed and Feed Rate
These are the core parameters affecting efficiency and quality. As a general guide, for carbide end mills, a cutting speed of 150-300 m/min and a feed rate of 0.08-0.30 mm/tooth is recommended, with lower values for finishing operations.
Professional Interpretation: A cutting speed that is too high can accelerate tool wear. A speed that is too low can cause the cutting temperature to drop, leading to the formation of a built-up edge (BUE) and sticky tools. The feed rate must be matched to the speed; too fast can cause burrs, too slow is inefficient.
Controlling Surface Roughness
For parts where surface finish is critical, you need a comprehensive approach.
- Tool Selection: Use diamond-coated tools or cutters with a very fine edge roughness (Ra ≤ 0.02μm).
- Cutting Parameters: For finishing, use a cutting speed ≥250 m/min, a feed rate of 0.08-0.12 mm/tooth, and a light depth of cut.
- Toolpath: Use climb milling to reduce friction between the tool and the workpiece.
- Cooling and Lubrication: Use a high-lubricity cutting fluid with high pressure to ensure the cutting area is sufficiently cooled.
4. What Are Common Problems in Brass Milling and How Do You Solve Them?
Even with the best preparation, problems can arise. Here are the most common issues and their solutions.
Burrs and Flash
This is perhaps the most common problem. The primary causes are a feed rate that is too high, a dull cutting edge, or a cutting speed that is too low. Preventive measures include reducing the feed rate, replacing or sharpening tools promptly, and increasing the cutting speed. Follow-up cleanup can be done with hand filing, ultrasonic cleaning, or electrochemical deburring for mass production.
The Brass Sticky Knife Problem
This is often the most difficult issue to solve. It happens when chips bond to the cutting edge. The solution requires a three-pronged approach:
- Tool Optimization: Choose a cutter with a large rake angle (15°-20°) and wide chip grooves. Diamond-coated tools offer the best anti-stick performance.
- Parameter Adjustment: Increase the cutting speed (≥250 m/min) to avoid low-temperature bonding. Increase the feed rate slightly to help chips detach quickly.
- Cooling and Lubrication: Use an extreme pressure cutting fluid containing sulfur or chlorine to reduce friction. Use high-pressure cooling (≥20 bar) to physically wash away chips.
Adjusting Accuracy Errors
Inaccuracies can stem from several sources. Regularly calibrate your equipment for spindle runout and guide rail parallelism. Minimize clamping errors by using three-point positioning or dedicated fixtures. Account for thermal deformation—brass conducts heat quickly, so you may need to reserve a small allowance (0.01-0.02mm) during processing or allow the machine to cool down during long runs.
Conclusion
Brass milling presents a unique set of challenges that demand a dedicated approach. Its low hardness and high ductility make it prone to sticky tools and burrs, but by understanding its material properties, you can select the right equipment, tools, and cutting parameters to overcome these issues. From choosing diamond-coated cutters with a large rake angle to optimizing cutting speeds and using high-pressure cooling, each step is critical. Mastering these techniques will allow you to machine brass parts with high efficiency, excellent precision, and a superior surface finish.
FAQ
What is the best tool for brass milling?
Your first choice should be carbide end mills made from tungsten-cobalt alloy. For high-precision work or when you have serious issues with sticky tools, diamond-coated tools are highly recommended. For roughing operations where you need to remove a lot of material quickly, corn milling cutters are a good option.
What cutting speed should I use for brass milling?
It depends on your tool material. For high-speed steel tools, aim for 80-180 m/min. For carbide tools, a range of 150-300 m/min is typical. Diamond-coated tools can handle even higher speeds, up to 300-400 m/min.
How can I fix burrs after brass milling?
The best approach is to control them from the source by reducing the feed rate and keeping your tools sharp. For post-processing, small batches can be finished by hand sanding. For mass production, more efficient methods like ultrasonic deburring or electrochemical deburring are recommended.
What should I do if the brass sticking problem is severe?
First, increase your cutting speed to over 250 m/min. Second, switch to a tool with a large rake angle. Third, use an extreme pressure cutting fluid with sulfur or chlorine additives. Finally, ensure you are using high-pressure cooling to physically wash the chips away from the cutting zone.
Discuss Your Projects with Yigu Rapid Prototyping
Are you facing challenges with brass milling or need high-precision brass parts? At Yigu Rapid Prototyping, we have extensive experience machining this unique material. Our team understands the intricacies of tool selection, parameter optimization, and problem-solving to deliver parts that meet the most demanding specifications.
Contact Yigu Rapid Prototyping today to discuss your project. Let’s build something great together.