Acrylic—also called PMMA—is everywhere, from store displays to medical gear, because it’s clear, tough, and easy to shape. CNC machining is the go-to way to make precise, transparent acrylic parts, but getting that crystal-clear finish isn’t always simple. This guide breaks down every step you need to know, from picking the right acrylic to final inspection, so you can get consistent, high-quality results every time. We’ll use real examples, practical tips, and plain language to make even complex steps easy to follow.
What Is Acrylic for CNC Machining?
Before you start machining, you need to know what acrylic is and why it’s great for transparent parts. Acrylic (Polymethyl Methacrylate, PMMA) is a plastic that’s prized for its near-glass clarity and shatter resistance. It’s lighter than glass, more durable, and easier to machine—making it perfect for projects where clarity and strength matter.
Key Acrylic Properties
These properties make acrylic unique for transparent CNC work, but they also bring challenges. Here’s what you need to watch for:
| Property | Value | Why It Matters |
|---|---|---|
| Density | 1.18 g/cm³ | Lighter than glass (2.5 g/cm³), so parts are easier to handle and install. |
| Light Transmission | Up to 92% | Critical for transparency—beats glass (85-90%) and most other plastics. |
| Heat Deflection Temp | 95°C (203°F) | Easily melts if tools get too hot—needs careful speed control. |
| Hardness | Rockwell M 95 | Scratch-resistant but not scratch-proof—needs protection during machining. |
| UV Resistance | High | Won’t yellow outdoors—great for signs, light fixtures, and outdoor gear. |
Is Acrylic Easy to Machine?
It’s doable, but it has quirks. Acrylic is flexible, so you can make intricate shapes. But it’s sensitive to heat and scratching. Dull tools or slow feeds can melt edges, and loose clamping can cause vibrations that scratch the surface. The good news? CNC machining fixes these issues with precise control. For example, a local sign shop we worked with switched to CNC from manual routing—they cut down on scrap by 40% because the machine maintains consistent speeds and tool paths.
Step-by-Step: CNC Machining Acrylic for Clarity
Follow these steps to get a crystal-clear finish. We’ll include real-world tips from our experience machining acrylic parts for medical devices and retail displays.
1. Pick the Right Acrylic
Not all acrylic is the same—choose wisely for transparency:
- Cast Acrylic: Best for clear parts. It has low internal stress, so it machines cleanly and doesn’t crack easily. We use this for medical device enclosures (like clear covers for blood pressure monitors) because it’s defect-free.
- Extruded Acrylic: Cheaper but riskier. It has more internal stress, so it’s prone to cracking during machining. Good for simple parts (like basic display shelves) where clarity isn’t perfect.
- Continuous Cast Acrylic: Middle ground—combines cast quality with extrusion speed. Great for high-volume projects, like retail display stands.
Pro tip: Always check for bubbles or scratches in the acrylic sheet before machining. Even a tiny bubble will show up in the final part.
2. Program the CNC Correctly
CNC programs need to account for acrylic’s sensitivity. Focus on:
- Tool Paths: Use climb milling (cutting with the direction of the spindle) to reduce edge chipping.
- Cutting Depths: Take shallow, layered cuts (0.1–0.2 mm per pass) to avoid stressing the material.
- Speed & Feed: Match speeds to your tool—we’ll cover this more later.
Example: When we programmed parts for a LED light diffuser, we adjusted the tool path to avoid sharp turns (which cause heat buildup). This cut down on melted edges by 70%.
3. Choose the Right Tools
Tools make or break your finish. Here’s what works best:
- Single-Flute/O-Flute End Mills: These are designed for acrylic. They evacuate chips quickly, so heat doesn’t build up. Dull tools are your enemy—replace them every 50–100 parts.
- High Rake Angles: Tools with 30–45° rake angles slice through acrylic cleanly, reducing friction.
4. Clamp Acrylic Securely
Vibrations cause scratches and chipping. Use these clamping methods:
- Vacuum Tables: Great for large sheets—they distribute pressure evenly without scratching the surface. We use these for big display panels.
- Soft Jaws/Protective Padding: For small parts, wrap jaws in felt or foam to avoid marring the acrylic. Don’t clamp too tight—you’ll cause stress cracks.
5. Master Machining Techniques
Stick to these parameters to avoid heat and damage:
- Spindle Speed: 18,000–24,000 RPM. Too slow = melting; too fast = chipping.
- Feed Rate: 500–1500 mm/min (depends on tool size). Test on scrap first.
- Cooling: Use air blasts (not oil-based coolants—they leave residue). Oil can ruin transparency.
6. Post-Machining Finishing
Even precise machining needs finishing to get perfect clarity. Here’s how:
Surface Polishing
- Start with 400-grit sandpaper (wet sand with water to keep it cool).
- Move to finer grits: 800, 1200, then 2000 grit.
- Buff with a polishing compound (we use Meguiar’s PlastX) for a glossy finish.
- Hand-polish with a microfiber cloth to remove any remaining scratches.
Edge Polishing
Edges are easy to overlook, but they need attention too:
- Sand edges with the same grit progression as the surface.
- Flame polishing (quick pass with a small flame) works for non-critical parts (like display edges).
- For optical parts (like lenses), hand-polish edges to match the surface clarity.
7. Inspection & Protection
Check your part under bright, even lighting for:
- Scratches, blemishes, or cloudiness
- Light distortion (hold the part up to a straight line to test)
- Uniform clarity across the entire surface
Add a protective film or coating to prevent scratches during handling. We use a clear vinyl film for parts that get shipped to customers.
Which CNC Operations Work for Acrylic?
Acrylic is versatile—here are the most common CNC operations and their uses:
| Operation | Best For | Example |
|---|---|---|
| CNC Milling | Complex 3D shapes, smooth surfaces | Lenses, decorative acrylic parts |
| CNC Turning | Cylindrical parts | Acrylic rods, light covers |
| CNC Drilling | Clean, burr-free holes | Display fixture mounting holes |
| CNC Engraving/Cutting | Intricate shapes, text | Retail signs, awards |
| Laser Cutting | High-precision edges | Architectural models, small parts |
Why Choose Acrylic for Transparent Parts?
Acrylic beats glass and other plastics for many transparent projects. Here’s why:
- Better Clarity: 92% light transmission—clearer than most glass.
- Shatter-Resistant: Safer than glass (won’t break into sharp pieces).
- Lightweight: Half the weight of glass—easier to install and transport.
- UV Stable: Won’t yellow outdoors (unlike some plastics, like polycarbonate).
- Easy to Finish: Polishes to a glass-like shine with simple tools.
Example: A local restaurant switched from glass to acrylic for their menu displays. They reduced breakage by 100% and cut shipping costs by 30% because acrylic is lighter.
Common Applications
CNC machined acrylic is used in almost every industry. Here are the most popular uses:
- Signage & Displays: Retail signs, museum displays, menu boards.
- Lighting: LED diffusers, lamp shades, light covers.
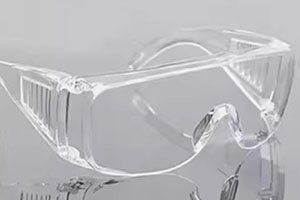
- Medical: Clear enclosures for diagnostic tools, lab equipment.
- Automotive: Headlight lenses, interior accents.
- Electronics: Touchscreen protectors, device casings.
- Art & Decor: Sculptures, custom wall panels, awards.
How to Fix Common Problems
Even pros run into issues—here’s how to fix them:
- Melting Edges: Increase feed rate, use a single-flute tool, or add air cooling.
- Scratches: Improve dust collection, use a vacuum table, or polish the surface.
- Cracking: Loosen clamping, use cast acrylic, or take shallower cuts.
- Cloudy Finish: Use finer sandpaper, buff with polishing compound, or avoid oil-based coolants.
Conclusion
Achieving perfect optical clarity with acrylic CNC machining isn’t hard—you just need to focus on the details: pick the right acrylic, use the correct tools and parameters, and finish carefully. Acrylic’s unique properties (clarity, strength, light weight) make it the best choice for transparent parts across industries. By following the steps in this guide, you’ll reduce scrap, save time, and get consistent, crystal-clear results every time. Remember: test on scrap first, prioritize heat control, and never skip finishing—those small steps make a big difference.
FAQ
Q: Cast vs. extruded acrylic—Which is better for clarity? A: Cast acrylic is better. It has lower internal stress and fewer defects, so it machines to a clearer finish. Extruded acrylic is cheaper but riskier for high-clarity parts.
Q: How do I stop acrylic from melting during CNC machining? A: Use a single-flute end mill (for chip evacuation), keep spindle speed between 18,000–24,000 RPM, and use an air blast to cool the tool and material.
Q: Can CNC machined acrylic be used outdoors? A: Yes! Acrylic has high UV resistance, so it won’t yellow or degrade in sunlight. It’s perfect for outdoor signs, light fixtures, and architectural parts.
Q: Is acrylic clearer than glass? A: In most cases, yes. Acrylic transmits up to 92% of light, while standard glass transmits 85–90%. It’s also shatter-resistant and lighter than glass.
Q: How long does it take to finish a CNC acrylic part? A: It depends on the part size and complexity, but most small-to-medium parts take 30–60 minutes (machining + finishing). Large parts (like display panels) may take 2–3 hours.
Discuss Your Projects with Yigu Rapid Prototyping
Whether you’re working on a small prototype or a high-volume production run, Yigu Rapid Prototyping has the expertise to help with your acrylic CNC machining needs. Our team specializes in creating transparent acrylic parts with perfect optical clarity, using industry-best practices and high-quality materials. We’ll work with you from design to delivery, ensuring your project meets your specifications and timeline. Contact us today to discuss your project and get a free quote.