Introduction
Feeling limited by the generic, mass-produced vases found in every home store? You’re not alone. Your space deserves a focal point that reflects your unique taste and story, not one that blends into the background. This is where 3D printing technology transforms from an industrial tool into a personal design studio, putting unprecedented creative power directly in your hands. Imagine crafting a vase with the perfect geometry to complement your mid-century modern furniture, or embedding a meaningful pattern that traditional pottery could never achieve. This guide explores how 3D printed vases are revolutionizing home decor by unlocking infinite customization, detailing the ideal materials and accessible workflows, and providing actionable solutions to common challenges, empowering you to create pieces that are authentically yours.
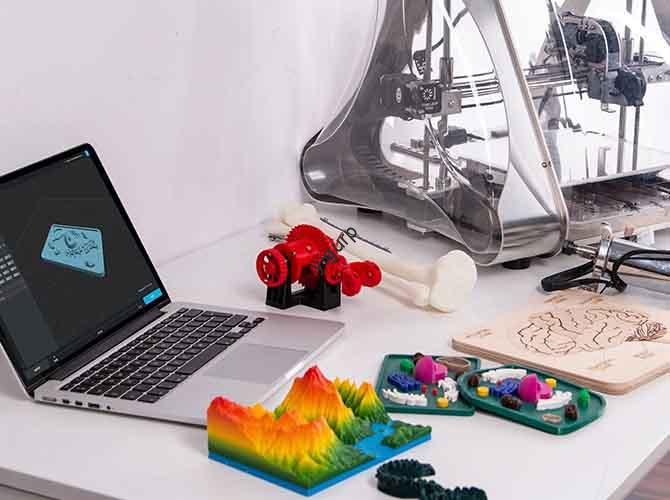
Why Choose 3D Printing for Your Next Vase?
3D printing, or additive manufacturing, builds objects layer by layer from a digital file. For vase creation, this process offers distinct advantages over conventional methods like pottery wheel throwing or injection molding.
| Advantage | How It Benefits Your Vase Project | Real-World Implication |
|---|---|---|
| Limitless Geometric Freedom | Create organic shapes, intricate latticework, or perfectly calculated spirals that are impossible to mold or throw. | Achieve a true sculptural art piece that doubles as a functional vase. |
| True Personalization & On-Demand Creation | Modify a digital design in minutes to adjust height, width, pattern, or text. Print only what you need, when you need it. | Create a one-of-a-kind gift or perfectly scale a vase to fit an exact nook on your shelf. |
| Accessible Design & Democratized Making | Beginners can download and customize thousands of free models. Advanced users can design from scratch using intuitive software. | No prior pottery or sculpting skills required. The barrier to entry is remarkably low. |
| Economic Small-Batch Production | Eliminate the high cost of creating physical molds. Ideal for producing limited editions, testing designs, or a small home business. | A custom vase becomes financially viable, not a luxury commission. |
The underlying driver of this shift is a broader movement in the U.S. 3D printing market, which is expanding rapidly, fueled by demand for personalized, on-demand goods. This trend is moving 3D printing from pure prototyping into the realm of end-use consumer products, making custom vases a perfect and timely application.
How Do You Start? A Beginner-Friendly Workflow
Creating your first 3D printed vase is a straightforward, four-step journey.
- Find or Design Your Model: Start by exploring vast online repositories like Thingiverse, where countless vase designs are freely available. For customization, use beginner-friendly CAD software like TinkerCAD, which allows you to easily import and modify existing models—change a texture, add a monogram, or adjust dimensions with simple clicks.
- Prepare for Print (Slicing): Use slicing software (like Cura or PrusaSlicer) to convert your 3D model into printer instructions. For vases, a key setting is “Vase Mode” or “Spiralize Outer Contour.” This setting prints a single, unbroken perimeter wall in a continuous spiral, creating a watertight object quickly and with an attractive finish.
- Print: Load your chosen filament and start the print. A typical desktop FDM printer can complete a medium-sized vase in 4 to 8 hours.
- Post-Process & Finish: This is where a simple print becomes a polished decor item. Remove any supports, then sand lightly to smooth layer lines. For a glossy, sealed finish or to make a porous material watertight, apply a coat of clear resin, spray enamel, or a waterproof sealant.
What Materials Should You Use for Style and Function?
Your choice of material defines the vase’s aesthetics, durability, and purpose. Here’s a comparison to guide your selection:
| Material | Best For… | Key Properties & Considerations |
|---|---|---|
| PLA (Polylactic Acid) | Decorative, indoor vases. The ideal, user-friendly starter material. | Wide color range, easy to print, biodegradable. Not heat-resistant and can be brittle. For water-holding, an internal sealant is required. |
| PETG (Glycol-Modified PET) | Functional vases for fresh flowers. A great balance of durability and printability. | Good water and chemical resistance, stronger and more flexible than PLA. Slightly more challenging to print than PLA. |
| Ceramic-Infused/Clay-Like Resins | Vases with a high-end, traditional ceramic look. Printed using SLA/DLP resin printers. | Achieves a smooth, matte, stone-like finish right off the printer. Parts are brittle and require thorough post-curing. |
| Advanced Composites (Wood, Metal filled) | Unique aesthetic statements (e.g., a vase with a wood-like finish). | Filaments infused with wood fiber or metal powder can be sanded and stained for a premium look. Often require a hardened printer nozzle. |
Material Innovation Note: The market is rapidly evolving beyond basic plastics. Innovations in high-performance polymers, resins, and composite materials are expanding creative possibilities, allowing for finishes and properties that closely mimic traditional artisan materials.
How Can You Solve Common 3D Printing Vase Challenges?
Even with a good design, you might encounter these common hurdles. Here’s how to overcome them.
How Do You Achieve a Smooth, Professional Surface?
The layered “stair-step” effect is the most common aesthetic challenge.
- Prevention (Slicer Settings): Use a smaller layer height (e.g., 0.1mm) for finer details. For curved surfaces, enable “Adaptive Layer Height” if your slicer supports it.
- Cure (Post-Processing): Sanding is effective. Start with coarse grit (200) to remove major lines and progress to fine grit (600+) for smoothness. For PLA, a quick pass over the surface with a heat gun (carefully!) can slightly melt and smooth layer lines. For a flawless finish, apply a filler primer and sand again before painting.
How Do You Ensure the Vase is Watertight?
A decorative vase might not need to hold water, but for functional use, sealing is critical.
- For PLA/PETG Vases: Apply a thin, even coat of food-safe epoxy resin or a clear waterproof sealant (like those used for concrete) to the interior. Ensure it coats all surfaces and let it cure fully.
- Design Tip: Using the “Vase Mode” setting mentioned earlier inherently creates a single, unbroken wall with no seams, which is the best starting point for a watertight print.
What If My Print Fails or Warps?
Print failures are part of the learning process.
- Warping/Bed Adhesion: Ensure your print bed is perfectly leveled and clean. Use a heated bed and an appropriate adhesive (glue stick, hairspray, or a PEI sheet).
- Clogs or Under-Extrusion: Check that your filament is dry (moisture causes many issues) and that your nozzle temperature is correct for your material. Clean or unclog the nozzle if necessary.
What Does the Future Hold for 3D Printed Home Decor?
The trend of localized, on-demand manufacturing is a major force in the 3D printing industry. For consumers, this means faster access to custom goods and a smaller carbon footprint compared to mass-produced, shipped items. As materials become more sophisticated and printers more user-friendly, creating bespoke home decor like vases will shift from a niche hobby to a mainstream activity.
We can expect to see more online platforms offering customizable digital designs for vases and other decor, where you tweak parameters and have the final product printed locally and shipped within days, perfectly aligning with the growing consumer desire for unique, sustainable, and personally meaningful possessions.
Conclusion
3D printing vases is far more than a novelty; it’s a powerful gateway to personalized, meaningful home decor. It breaks down the barriers between your imagination and the physical object on your shelf, offering a blend of artistic freedom, practical functionality, and accessible technology. While it requires a willingness to learn and troubleshoot, the reward is the unparalleled satisfaction of displaying a piece that is undeniably and uniquely yours. By understanding the simple workflow, choosing the right material for your vision, and applying basic finishing techniques, you can transform digital designs into beautiful, tangible art that brings personality and creativity into your space.
FAQ: 3D Printing Vases
Q: Do I need to buy a 3D printer to make my own vases?
A: Not necessarily. While owning a printer offers maximum flexibility, a vast network of online 3D printing services (like Shapeways, Craftcloud, or local makerspaces) exists. You can upload your design file, choose a material, and have the finished vase shipped to you. This is an excellent, low-commitment way to start.
Q: How much does it cost to 3D print a vase?
A: Cost varies significantly. For a medium-sized vase printed at home with PLA, the material cost is typically between $3 and $8. If using a professional service with higher-end materials like resin or ceramics, the cost can range from $20 to $80 or more, factoring in material, labor, and shipping. Your own design time is the most valuable, but free, component.
Q: Are 3D printed vases safe for flowers and plants?
A: With proper material choice and sealing, yes. Use PETG or sealed PLA for fresh flowers. Ensure any sealant or paint used inside is non-toxic and waterproof. For purely decorative use with dried flowers or as a standalone object, material safety is less critical.
Q: What’s the best way to add color or a complex pattern?
A: You have several options: 1) Use multicolor filament that changes color as it prints. 2) Paint the finished vase with acrylics or spray paint after priming and sanding. 3) For advanced users, a printer with multiple extruders can print different colors simultaneously. 4) Some advanced printing technologies like Carbon’s Digital Light Synthesis (DLS) allow for integrated color and complex textures during the print process itself.
Discuss Your Projects with Yigu Rapid Prototyping
Ready to move beyond the limitations of off-the-shelf decor? At Yigu Rapid Prototyping, we help bring your unique vision to life. Whether you’re a homeowner with a sketch, an interior designer sourcing custom pieces for a client, or an entrepreneur testing a new product line, our expertise in design for additive manufacturing and high-quality finishing can transform your concept into a stunning reality. We offer guidance on material selection to achieve the perfect look and feel, and handle the technical complexities of production. Contact us today for a consultation, and let’s create something extraordinary for your space.