Introduction
In the race to bring a new product to market, the prototyping phase is often the most critical bottleneck. You face the relentless pressure of time, budget, and the agonizing risk of discovering a fatal design flaw only after committing to expensive production tooling. Traditional prototyping methods like CNC machining or manual fabrication are slow, costly, and inherently limit design complexity. This is where 3D printing solid prototypes emerges not merely as an alternative, but as a strategic accelerator. This guide moves beyond the basics to demonstrate how this technology solves the core pain points of modern product development by collapsing iteration cycles, enabling radical design freedom, and providing cost-effective validation at every stage. We’ll provide a professional framework to integrate solid prototyping into your workflow, transforming it from a step in the process to the engine of innovation.
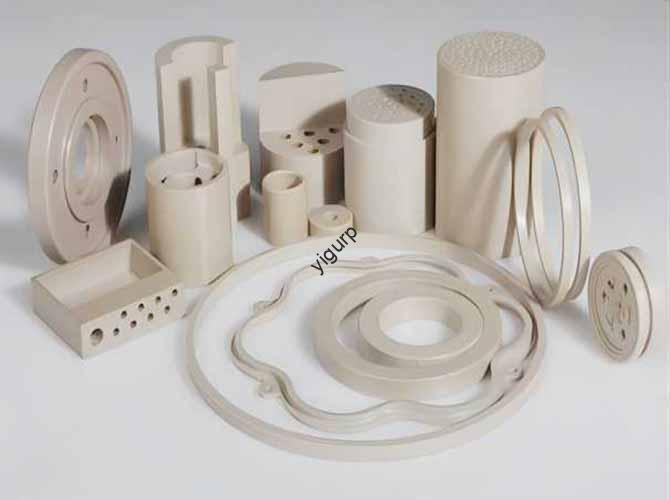
What Truly Defines a “Solid Prototype” in 3D Printing?
In professional contexts, a “solid prototype” is more than a physical mock-up. It is a fully dense, dimensionally accurate, and functionally representative model created directly from digital data, layer by layer. Unlike hollow or shell-like models, solid prototypes are characterized by their structural integrity, enabling them to be used for rigorous fit, form, and functional testing. The “solid” nature can be achieved through high infill density in FDM printing, the inherently solid process of resin curing (SLA/DLP), or the sintered/fused nature of powder-based technologies (SLS, SLM). This key characteristic is what bridges the gap between a visual concept and a testable component.
What Are the Compounding Strategic Advantages Over Traditional Methods?
The value proposition of 3D printing for solid prototyping is multi-dimensional, creating a compound advantage that is difficult to replicate with subtractive methods.
- Radical Compression of the Iteration Loop: The most significant impact is on development speed. A design change that would require weeks to re-program and re-machine a metal or plastic block can be updated in the CAD model and reprinted in a matter of hours or days. A study by the Aberdeen Group found that companies using 3D printing for prototyping reduce their time-to-market by up to 50-70% compared to those using traditional methods. This allows for more iterations within the same timeframe, leading to a more refined and de-risked final product.
- Economic Viability for Low Volumes and Complex Designs: Traditional CNC machining or injection molding for prototypes incurs high non-recurring engineering (NRE) costs, primarily from custom tooling and fixture setup. 3D printing eliminates these costs entirely. The economics are simple: the cost of the first prototype is virtually the same as the tenth. This makes it perfectly suited for A/B testing variations, creating bespoke one-off tools, or producing small batches of pre-production units for user testing without the financial burden of tooling.
- Unleashing “Complexity for Free”: This is perhaps the most transformative benefit. In additive manufacturing, geometric complexity adds negligible cost. Internal lattices for lightweighting, conformal cooling channels, organic shapes, and consolidated assemblies that would be impossible or prohibitively expensive to machine become straightforward to print.
Case Study: The Consolidated Drone Chassis
A robotics startup was developing an advanced drone. The initial design involved over 12 separate aluminum and plastic parts, requiring significant assembly and creating multiple potential failure points. Using Selective Laser Sintering (SLS) with nylon, they redesigned the entire central chassis and arm assembly into a single, monolithic “solid” prototype. This printed part integrated mounting points, cable routing channels, and vibration-dampening lattice structures. The result was a 40% reduction in part count, a 15% weight saving, and a drastic increase in structural rigidity. They were able to test this complete assembly in flight conditions after just 48 hours of printing, a feat impossible with their previous machined approach.
How Do You Select the Right Technology and Material for Your Prototype’s Purpose?
Not all “solid” prototypes are equal. The optimal combination of technology and material is dictated by the prototype’s specific validation goal.
| Prototype Goal (What are you testing?) | Recommended Technology | Ideal Material(s) | Why It’s the Best Fit |
|---|---|---|---|
| Form & Fit / Visual Presentation | SLA / DLP (Resin) | Standard, Tough, or ABS-Like Resins | Achieves near-injection-molded surface finish and fine detail, perfect for ergonomic reviews and stakeholder presentations. |
| Functional & Mechanical Testing | FDM / FFF | PETG, ABS, Nylon, PC (Polycarbonate) | Offers excellent strength-to-cost ratio. PETG is great for general durability; PC for high heat and impact; Nylon for toughness and fatigue resistance. |
| Complex, Load-Bearing & Snap-Fit Assemblies | SLS (Powder Bed Fusion) | Nylon 11, Nylon 12 (PA11/PA12) | Produces isotropically strong, durable parts with no support structures, ideal for testing intricate mechanisms and under-stress components. |
| High-Fidelity Thermal or Chemical Testing | Advanced FDM or SLS | PEI (ULTEM), PEEK, Chemical-Resistant Nylons | These high-performance engineering thermoplastics mimic the thermal and chemical resistance of final production materials for accurate environmental testing. |
| Metal Part Validation (Form, Fit, Light Load) | Binder Jetting or FDM with Metal Fill | Stainless Steel, Bronze (green state, sintered) | Provides a metal prototype at a fraction of the cost of full DMLS, suitable for checking fit with other metal components and basic functional checks. |
What Does a Professional Solid Prototyping Workflow Look Like?
Success requires a disciplined, end-to-end process.
- Define the Validation Objective: Start by asking, “What must this prototype prove?” Is it a dimensional fit check, a user feel test, or a failure point under load? This dictates every subsequent decision.
- Design for Additive Manufacturing (DfAM): Optimize the CAD model for the chosen 3D printing process. This includes:
- Orienting the part to maximize strength and minimize supports.
- Specifying critical tolerances (adding clearance for press-fits, accounting for shrinkage).
- Incorporating test features (like ribs or gussets) directly into the prototype design.
- Technology & Material Selection: Use the matrix above to make an informed choice.
- Print Preparation & Execution: This involves precise slicer configuration for infill, perimeters, and support strategy. For critical prototypes, print a small test coupon first to verify material properties and printer calibration.
- Post-Processing & Validation: Support removal, surface finishing (sanding, priming), and, crucially, measurement. Use calipers, CMM (Coordinate Measuring Machine), or 3D scanners to verify the prototype against the original CAD model. Document any deviations.
What Are the Common Pitfalls and How to Mitigate Them?
Even with the right tools, mistakes happen. Here’s how to avoid the major ones:
- Pitfall: Underestimating Material Behavior.
- Scenario: A PLA prototype passes a room-temperature fit test but fails miserably when installed in a sun-exposed enclosure.
- Mitigation: Always prototype with a material that matches or approximates the thermal and chemical environment of the final product. Use ABS or ASA for outdoor/automotive applications.
- Pitfall: Ignoring Anisotropy in FDM Prints.
- Scenario: A bracket printed in a strong material like PETG snaps because the load was applied perpendicular to the layer lines (the weakest direction).
- Mitigation: Orient the print so that the primary stress is applied parallel to the layer lines. For critical load-bearing parts, consider SLS technology, which offers more isotropic properties.
- Pitfall: Designing for Machining, Not for Additive.
- Scenario: Simply using a CNC-ready CAD file for 3D printing, resulting in excessive material use, long print times, and missed opportunities for consolidation.
- Mitigation: Embrace DfAM. Consolidate assemblies, hollow non-critical volumes with escape holes, and use lattices. This reduces weight, cost, and print time while often improving performance.
Conclusion
3D printing for solid prototypes is far more than a convenient way to make a physical model. It is a fundamentally different approach to product development that prioritizes speed, iteration, and the exploration of optimal design over the constraints of traditional manufacturing. By strategically matching the prototype’s purpose to the appropriate technology and material, and by adhering to a disciplined DfAM-oriented workflow, teams can unlock unprecedented agility. This allows them to fail fast and cheaply in the digital-to-physical transition, converge on superior designs more quickly, and ultimately bring better, more innovative products to market with greater confidence and significantly reduced risk. The solid prototype is no longer just a step in the process—it is the physical embodiment of a faster, smarter, and more creative path to production.
FAQ (Frequently Asked Questions)
Q: Can a 3D printed solid prototype be as strong as an injection-molded or machined part?
A: It depends on the technology and material, but it can come very close or even match it in specific scenarios. SLS Nylon parts have excellent and isotropic mechanical properties, often suitable as end-use parts. High-performance FDM materials like PC or PEI can surpass the strength of common plastics like ABS. However, 3D printed parts have a different internal structure (layer adhesion) compared to homogeneous molded parts. For direct comparison, the prototype should be printed in an orientation that maximizes strength for the intended load and with the appropriate infill (often 80-100% for solid simulation).
Q: How do I accurately estimate the cost and time for a solid prototype?
A: Use your slicer software as a costing engine. After preparing the print, the slicer will provide an estimate of material volume/weight and print time. Multiply the material weight by its cost per kilogram, and add a factor for machine time (if applicable) and post-processing labor. For time, add 10-20% contingency to the slicer’s estimate for setup, potential pauses, and post-processing. For quick quotes from service bureaus, provide the 3D file, desired material, and quantity.
Q: What is the largest single-piece solid prototype I can reasonably 3D print?
A: For in-house printing, it’s limited by your machine’s build volume (typically up to 300x300x400mm for desktop industrial). For larger prototypes, the standard practice is segmentation. The part is intelligently split into sections with alignment features (dowels, interlocking joints), printed separately, and then assembled using high-strength adhesives or mechanical fasteners. This is common for automotive dashboards, large-scale architectural models, or full-size furniture prototypes.
Q: When does it still make sense to use CNC machining over 3D printing for a solid prototype?
A: CNC is preferable when: 1) You need the exact final material (e.g., a specific grade of aluminum) for testing, 2) The part has simple, primarily orthogonal geometries that are faster/cheaper to machine, 3) You require ultra-high surface finish or tight tolerances on all faces that would require excessive post-processing on a 3D print, or 4) You are producing a larger batch (e.g., 50+ units) where the upfront CNC programming cost is amortized effectively. The decision is often economic and geometric.
Discuss Your Projects with Yigu Rapid Prototyping
Are you looking to break free from the constraints of traditional prototyping and accelerate your product development cycle? At Yigu Rapid Prototyping, we specialize in translating complex designs into high-fidelity, functional solid prototypes. Our expertise spans the full spectrum of technologies—from high-detail SLA for flawless visual models to industrial SLS and FDM for load-bearing functional tests. We provide DfAM consultancy to optimize your designs for performance and manufacturability and handle the entire process from file preparation to precision post-processing. Contact us for a comprehensive project review and discover how our solid prototyping solutions can save you time, reduce costs, and de-risk your path to production.