You’ve invested in a powder-based 3D printer like an SLS or HSS system, drawn by the promise of complex, durable parts without supports. You load up with Polystyrene (PS) powder—a popular, cost-effective choice—only to encounter clumping, weak parts, inconsistent surfaces, or worrying safety concerns. What went wrong? 3D printing with PS powder is a powerful but nuanced process that demands respect for both material science and industrial hygiene. It’s not simply “filament in powder form.” This guide provides a professional, comprehensive framework for safely handling, processing, and optimizing PS powder to achieve reliable, high-quality results while mitigating the unique risks associated with fine polymer powders.
What Exactly Is 3D Printing PS Powder, and Why Use It?
Polystyrene (PS) powder for additive manufacturing is a fine, spherical-grade thermoplastic specifically engineered for processes like Selective Laser Sintering (SLS) and High-Speed Sintering (HSS). Unlike commodity polystyrene (like that in disposable cups), 3D printing-grade PS is characterized by:
- Controlled Particle Size Distribution: Typically 50-100 microns to ensure smooth recoating and consistent fusion.
- Low Melting Point (~160-180°C): Enables efficient energy use from lasers or infrared lamps.
- High Flowability: Critical for creating uniform powder layers.
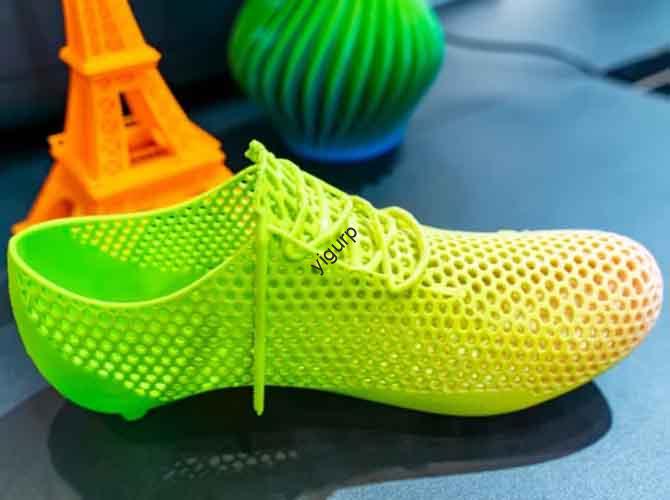
Its primary advantages are low material cost, excellent dimensional stability with minimal warping, and good surface finish straight from the build chamber. It’s widely used for conceptual prototypes, form-and-fit models, and light-duty functional parts, especially in automotive styling and consumer goods packaging.
A Real-World Perspective: A medical device startup used PS powder to iterate dozens of ergonomic housing prototypes for a handheld scanner. The lack of support structures allowed them to test complex internal channels freely, and the low cost per part (~$5 in material for a 150g model) made rapid iteration financially viable. However, their initial batches suffered from brittle failures until they addressed powder moisture—a critical lesson in material conditioning.
What Are the Critical Safety Protocols for Handling PS Powder?
Safety is not an add-on; it is the foundation of working with any fine powder. PS powder presents specific hazards that must be managed systematically.
How Do You Mitigate Inhalation and Dust Exposure Risks?
The fine, inhalable particles are the primary concern. Chronic exposure to polymer dust can cause respiratory irritation.
- Engineering Controls Are Mandatory:
- Local Exhaust Ventilation (LEV): Use a downdraft table or enclosed powder handling station with integrated HEPA filtration for all sieving, mixing, and depowdering tasks.
- Printer Enclosure: Ensure your printer is a fully enclosed system with negative pressure or filtration to contain airborne powder during recoating.
- Personal Protective Equipment (PPE) is Non-Negotiable:
- Respiratory Protection: A properly fitted NIOSH-approved N95 respirator is the minimum for powder handling. For extended sessions or if any dust is visible, use a half-mask respirator with P100 filters.
- Eye Protection: Safety goggles with a seal prevent powder from getting behind glasses.
- Apparel: Wear a dedicated lab coat or coveralls and nitrile gloves. Change and laire separately from street clothes.
What Are the Fire and Explosion Hazards?
While PS is not the most combustible powder, any fine organic dust suspended in air can form an explosive mixture.
- Static Discharge is the Ignition Source: Powder flowing through hoppers or being sieved generates significant static charge.
- Mitigation Strategy: Use grounded, anti-static equipment (conductive hoses, containers, and tools). Maintain relative humidity between 40-60% in the printing environment to reduce static buildup. Never use compressed air for general cleaning; use a vacuum cleaner rated for combustible dust (with conductive hoses and grounded bins).
How Do You Source, Store, and Condition PS Powder for Optimal Results?
Material quality upon loading dictates print success. This is a supply chain and logistics challenge.
What Specifications Should You Look For When Sourcing?
Don’t just buy “PS powder.” Specify and verify:
- Particle Size Distribution (PSD): Request the D10, D50, and D90 values. A tight distribution (e.g., D50: 65μm, 90% between 55-75μm) ensures consistent layer density and fusion.
- Bulk Density and Flow Rate: These directly affect how the powder spreads in the recoater. Consistent values between batches are key for repeatable results.
- Virgin vs. Recycled Blend Ratio: Most processes use a blend of virgin and recycled (sieved) powder, typically 50/50 or 60/40. Know your supplier’s blend ratio, as it affects mechanical properties and surface finish.
What is the Correct Storage and Conditioning Workflow?
| Step | Procedure | Purpose & Rationale |
|---|---|---|
| 1. Receiving & Quarantine | Store new and in-use powder in sealed, moisture-barrier containers in a dry, temperature-stable area. | Prevents moisture absorption from ambient air, which is the #1 cause of voids, reduced strength, and poor surface finish. |
| 2. Pre-Processing Drying | Dry powder in a dedicated powder dryer or desiccating oven for 4-6 hours at 60-70°C before loading into the printer. | Removes absorbed moisture. PS can absorb >0.5% moisture by weight, which turns to steam during sintering, creating porosity. |
| 3. Sieving | Pass powder through a vibratory sieve (100-120 micron mesh) before loading into the feed hopper. | Removes agglomerates (clumps) and any foreign particles that could jam the recoater blade or cause defects. |
Pro Tip: Implement a Powder Life Tracking log. Record the number of build cycles and hours of heating exposure for each batch. PS powder degrades through thermal aging (oxidation and chain scission), leading to yellowing and reduced elongation at break. Establish a conservative refresh rate (e.g., refresh 50% of the bed volume with virgin powder after 3-4 builds).
What Are the Optimal Machine Parameters and Process Controls for PS?
Moving from “it prints” to “it prints optimally” requires tuning key variables.
How Do You Calibrate for Energy Input and Thermal Management?
The sintering window for PS is relatively wide, but precise control is needed for strength and detail.
- Laser Power & Scan Speed (SLS): These must be balanced to achieve full particle coalescence without over-sintering (which causes part growth and loss of fine features). A typical starting point is 0.2-0.3 J/mm³ volumetric energy density. Calculate with:
Energy Density = Laser Power / (Scan Speed * Hatch Spacing * Layer Height). - Bed Pre-Heating Temperature: The powder bed is typically pre-heated to just below the glass transition temperature (Tg) of PS (~90-100°C). This reduces the thermal differential the laser must provide, minimizing residual stress and warping.
- Cooling Cycle: A controlled, slow cool-down inside the build chamber is critical to prevent part warpage. Rushing this step by opening the chamber early is a common source of dimensional inaccuracy.
How Can You Troubleshoot Common PS Powder Printing Defects?
| Defect | Likely Cause | Corrective Action |
|---|---|---|
| Weak, Crumbly Parts | Insufficient Energy Input (low laser power, fast speed) or Wet Powder. | Increase energy density by 10-15%. Verify powder is thoroughly dried. |
| Part Growth & Loss of Detail | Over-Sintering (excessive energy input) or Over-Heated Bed. | Reduce laser power or increase scan speed. Lower bed pre-heat temperature by 5°C. |
| Powder Bed Streaks/Uneven Layers | Recoater Blade Wear, Clogged Sieve, or Poor Powder Flowability. | Inspect and replace recoater blade. Re-sieve powder. Check humidity; powder may be damp. |
| Orange Peel Surface Texture | Partial Sintering of powder adjacent to the part due to excessive bed temperature. | Slightly reduce bed pre-heat temperature. Ensure cooling cycle is active between layers. |
What Does Effective Post-Processing Entail?
The job isn’t done when the build finishes.
- Cooling & Depowdering: After the controlled cool-down, carefully extract the “cake” and move it to a dedicated, ventilated depowdering station. Use gentle brushes and low-pressure air to remove loose powder. Always wear full PPE during this step.
- Powder Recovery & Sieving: All recovered powder should be sieved immediately to remove any sintered agglomerates before being blended for reuse. This maintains the quality of your powder ecosystem.
- Part Cleaning & Finishing: For a clean finish, parts can be bead blasted with fine glass beads at low pressure. PS can also be easily sanded, primed, and painted for aesthetic prototypes. For functional parts, note that PS is susceptible to chemical attack by many solvents (e.g., acetone, gasoline).
The Professional Prototyping Perspective: PS Powder as a System, Not a Consumable
In an industrial setting, PS powder is not a simple feedstock; it’s a core component of a closed-loop manufacturing system. The goal is repeatability and cost-per-part optimization.
- Data-Driven Process Control: We instrument our SLS builds with infrared cameras to monitor bed temperature uniformity in real-time. For a client producing hundreds of identical cable clip prototypes, we discovered a 5°C gradient across the bed causing inconsistent flexibility. The fix wasn’t adjusting laser settings, but rebalancing the heating elements and adjusting powder packing density, achieving 99% part consistency.
- The True Cost Equation: The cheapest powder per kilogram can be the most expensive. We audited a client using an off-spec, “bargain” PS powder. The wider particle size distribution led to a 30% higher failure rate and required a 40% higher virgin powder refresh rate. Switching to a premium, consistent powder lowered their total cost per acceptable part by 22%, despite a 15% higher sticker price.
- The Safety Culture Imperative: We treat powder handling with the same rigor as a chemical lab. Our standard operating procedure includes a buddy system for powder changes, mandatory PPE checkpoints, and quarterly airborne dust monitoring. This isn’t just liability management; it’s essential for sustaining a skilled workforce and uninterrupted production.
Conclusion
Mastering 3D printing with PS powder requires a dual focus: rigorous process engineering for quality and unwavering commitment to safety for wellbeing. Success hinges on understanding the material’s hygroscopic nature, thermal behavior, and flow characteristics. By implementing systematic drying and sieving, calibrating energy input precisely, and establishing a disciplined powder management lifecycle, you unlock the true potential of PS for rapid, cost-effective prototyping. Remember, the powder in your hopper is the product of your care—or neglect—in the steps prior. Treat it as a precision engineering material, respect its associated hazards, and it will reliably translate your complex designs into tangible, high-quality parts.
FAQ:
Q: Can I use standard polystyrene pellets and grind them into powder for 3D printing?
A: Absolutely not. This is extremely dangerous and ineffective. Industrial 3D printing powders are produced through controlled precipitation processes to achieve perfect sphericity and a narrow size distribution. Grinding creates irregular, sharp particles with poor flowability and inconsistent sintering. It also generates an immense amount of explosive dust in an uncontrolled manner. Always source powder from reputable additive manufacturing material suppliers.
Q: How many times can PS powder be recycled/reused?
A: It depends on the process thermal history, but a typical rule is 3-5 build cycles before significant property degradation. After each cycle, powder undergoes thermal aging (oxidation), which raises its melt flow index and reduces part toughness. Professional users track this with MFR (Melt Flow Rate) tests. For consistent results, maintain a refresh ratio (e.g., 30-50% virgin powder added to the system per build).
Q: What is the difference between PS and PA12 (Nylon 12) powder for SLS?
A: PA12 is significantly stronger, more flexible, and chemically resistant than PS, making it the choice for end-use functional parts. However, it is 2-3x more expensive and more hygroscopic. PS is a cost-effective material for visual prototypes, master patterns for casting, and non-stressed components where high detail and low warpage are priorities.
Q: Is post-curing necessary for PS powder parts?
A: No. Unlike photopolymer resins, thermoplastic PS parts do not require UV post-curing. The sintering process during printing provides full consolidation. However, controlled cooling is a critical part of the process to relieve internal stresses.
Q: How should I dispose of waste PS powder and failed parts?
A: Do not simply discard with household trash. Check local regulations for plastic waste. The preferred method is professional recycling through a service that can handle polymer powders. As a last resort, small quantities of fully sintered/solid PS parts can be disposed of as plastic waste, but uncured, loose powder requires special handling due to its dust hazard. Contact a hazardous waste disposal company for guidance.
Discuss Your Projects with Yigu Rapid Prototyping
Navigating the complexities of powder-based 3D printing—from material science to factory-floor safety—requires specialized expertise. Whether you’re evaluating PS powder for a new product line, struggling with quality consistency, or need to scale production safely, our engineering team brings proven experience in industrial SLS/HSS process optimization and material management.
Let us help you build a robust, cost-effective powder printing workflow. Contact Yigu Rapid Prototyping for a consultation. We’ll analyze your needs and provide a clear path to achieving reliable, high-quality parts with the optimal material strategy.