Introduction
The allure of dinosaurs never fades, but the way we bring them to life has undergone a revolution. 3D printing has transformed dinosaur models from mass-produced toys into highly detailed, customizable, and even scientifically accurate creations you can produce at home. Yet, the gap between downloading a file and holding a museum-quality Triceratops can be daunting. Questions about material failure, lost detail, and frustrating post-processing are common. This guide is designed to bridge that gap. We’ll move beyond theory, providing a professional’s roadmap—from choosing the right model style to the final brushstroke of paint—helping you avoid costly mistakes and consistently create impressive pieces that stand the test of time.
What Types of Dinosaur Models Can You 3D Print?
The first decision isn’t about printer settings; it’s about intent. Choosing a model type that matches your skill level and goal is critical for success. The wrong choice can lead to assembly failures or a disappointing lack of detail.
Are You Printing for Display, Play, or Education?
Your answer dictates the ideal model category. Here’s a breakdown to guide your choice:
| Model Category | Key Characteristics & Design Focus | Ideal For | Skill Level & Considerations |
|---|---|---|---|
| Anatomically Accurate | Based on peer-reviewed fossil data; emphasizes muscle topology, bone structure, and realistic posing. Often includes fine skin texture. | Serious collectors, educators, museum displays, paleoartists. | Intermediate to Advanced. Requires careful printing to preserve fine details; extensive post-processing for realism. |
| Articulated & Poseable | Features integrated joints (ball-and-socket, hinges) that print in-place or assemble post-print. Allows for dynamic poses. | Interactive displays, hobbyists, stop-motion animation, engaging kids. | Beginner (pre-assembled) to Advanced (kit). Print orientation and tolerance calibration are crucial for joint function. |
| Stylized & Decorative | Prioritizes aesthetics over accuracy; includes cartoon styles, fantasy hybrids, or minimalist designs. | Room decor, gifts, themed events, low-stress creative projects. | Beginner Friendly. Forgiving of minor printing artifacts; focuses on clean form and painting. |
| Modular & Scalable | Designed in interlocking sections (head, limbs, body segments) to bypass printer size limits or allow for customization. | Creating large-scale models (life-size skulls), customizable kits, or easier printing of massive creatures. | Intermediate. Requires precise alignment and strong adhesive/fastening for assembly. |
Expert Insight: A common pitfall is choosing a highly articulated, multi-part Tyrannosaurus kit as a first project. The sheer number of supports, tolerance issues, and post-assembly cleanup can overwhelm. Start with a sturdy, single-piece model from the “Stylized” or simpler “Accurate” categories to master fundamentals first.
Which 3D Printing Material Is Best for Dinosaur Models?
The material is the foundation of your model’s durability, appearance, and feel. There’s no universal “best”—only the best for your specific goal. Let’s move beyond basic pros and cons to a practical selection matrix.
How Do You Choose Between PLA, ABS, PETG, and Resin?
Consider these four key dimensions: Detail Fidelity, Durability, Printability, and Safety/Post-Processing.
| Material | Detail & Surface Finish | Durability & Environment | Ease of Printing | Post-Processing & Safety |
|---|---|---|---|---|
| PLA | Good detail, but layer lines are visible. Wide color range. | Brittle; low impact strength. Can warp/deform in hot cars or direct sun. | Easiest. Low warp, prints cool, minimal odor. | Simple. Easy to sand, prime, and paint. Biodegradable and non-toxic fumes. |
| PETG | Moderate detail, slightly glossy “wet” look. Layer lines evident. | Tough and durable. Excellent layer adhesion, good impact and moisture resistance. More heat-resistant than PLA. | Moderate. Prone to stringing; needs precise retraction settings and a heated bed. | Can be trickier to sand and paint; requires specific primers for adhesion. Low odor. |
| ABS | Good detail, but can suffer from slight “melting” from high temps. Can be vapor-smoothed. | Strong and slightly flexible. Good heat and UV resistance if painted. Can become brittle over time. | Difficult. High warp risk; requires a heated chamber or enclosed printer and excellent ventilation for fumes. | Sands beautifully. Acetone vapor smoothing creates a glossy, injection-molded finish. Use with serious ventilation. |
| Resin (SLA/DLP) | Exceptional, ultra-fine detail. Captures microscopic scales and skin textures. Isotropic, smooth surface. | Standard resins are brittle. “Tough” or “Durable” engineering resins offer better strength but at higher cost. UV degradation if unpainted. | Moderate-High. Messy resin handling, washing, and post-curing required. Printer maintenance is more involved. | Minimal sanding. Mandatory chemical handling (gloves, eyewear, ventilation). Painting requires a primer for adhesion. |
Professional Recommendation: For a **highly detailed, display-only *Microraptor, *resin is unbeatable*. For a **child’s playable, articulated *Brachiosaurus that will survive drops, PETG is the champion for its toughness and safety. For a large, decorative Stegosaurus wall mount, PLA is perfectly sufficient and cost-effective.
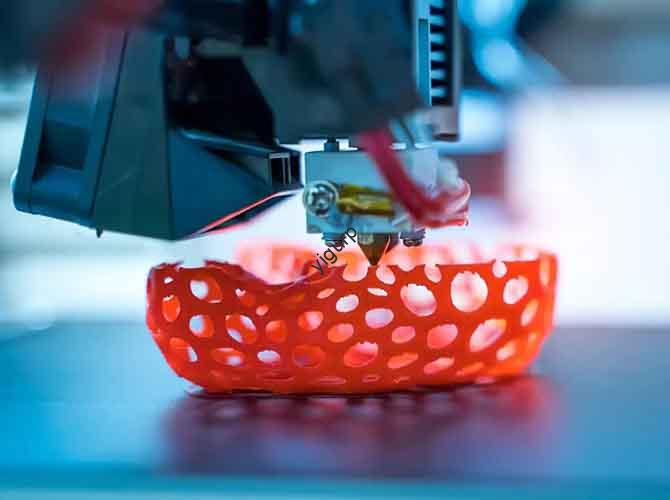
How Can You Maximize Print Accuracy and Realistic Detail?
Achieving “screen-quality” details from your printer requires a strategic approach. It’s a combination of machine calibration, slicer wisdom, and model preparation.
What Slicer Settings Are Non-Negotiable for Quality?
Optimizing your slicer software is where the magic happens. Here are the levers to pull:
- Layer Height: This is your primary detail control. 0.15mm is a great balance of quality and speed for most bodies. Drop to 0.1mm or lower for intricate heads, teeth, and claws.
- Print Speed: Slow down for detail. 30-50mm/s is ideal for quality prints. High speeds create vibration that blurs fine features.
- Infill Pattern & Density: Use Gyroid or Cubic patterns for consistent strength. 15-20% is ample for static models. For articulated joints or thin limbs, boost to 30-40%.
- Support Strategy: They are necessary evils. Use Tree Supports (in Cura or PrusaSlicer) wherever possible—they use less material, are easier to remove, and leave fewer scars on your model’s “skin” than traditional block supports.
Case Study: The Textured Ankylosaurus Problem
A client printed a beautifully textured Ankylosaurus backplate, but the osteoderms (bony knobs) came out blurred. The issue? They printed at a fast 0.28mm layer height. We advised a re-print at 0.1mm layer height with “Tree Supports” only from the build plate (not the model itself). The result was a crisp, defined texture that required almost no clean-up, ready for dry-brushing painting techniques.
What Does the Professional Post-Processing Workflow Look Like?
Post-processing is what separates a hobbyist print from a professional model. It’s a multi-stage journey from rough plastic to a living, breathing creature.
From Support Removal to Painting: A Step-by-Step Guide
Follow this sequence for best results:
- Initial Clean-Up (FDM): Remove supports carefully with flush cutters and needle-nose pliers. For Resin: Wash thoroughly in IPA, let dry, and fully UV post-cure according to resin specs.
- Gap Filling & Sanding (FDM Focus):
- Inspect for layer gaps or support scars.
- Use a modeler’s putty (e.g., Tamiya Putty) to fill defects. Let dry completely.
- Sand progressively: Start with 120-grit for major imperfections, move to 240-grit, and finish with 400-grit for a smooth base. Wet-sanding can reduce dust.
- Priming – The Critical Foundation:
- Use a high-fill spray primer (like automotive primer). Apply in light, sweeping coats from 10-12 inches away.
- Let dry fully. The primer will reveal any flaws you missed. Sand lightly with 400-grit and re-prime if necessary. Repeat until smooth.
- Painting & Detailing:
- Basecoat: Apply your main color with spray or airbrush for even coverage.
- Wash & Dry Brush: Use a dark wash (thinned paint) to seep into crevices and define scales. Then, dry-brush a lighter color over raised details to make them “pop.”
- Sealing: Protect your work with a matte or satin clear spray varnish. This unifies the finish and protects the paint.
Conclusion
3D printing dinosaur models is a profoundly rewarding fusion of historical fascination, technical skill, and artistic expression. The journey from file to finished piece is methodical: it begins with aligning your model choice with your purpose, continues with selecting a material based on durability and detail needs, relies on precision slicing to capture complexity, and culminates in the transformative art of post-processing. There is no single shortcut, but by understanding the role and requirements of each stage, you can systematically overcome the common hurdles. Remember, even the most stunning museum diorama started as a collection of raw materials and a plan. Your next great prehistoric creation is within reach.
FAQ (Frequently Asked Questions)
Q: My multi-part dinosaur model doesn’t fit together after printing. What went wrong?
A: This is almost always a calibration issue. Your printer’s dimensional accuracy is off. Calibrate your extrusion steps (e-steps) and, more importantly, your horizontal expansion/compensation setting in your slicer. Print a simple calibration cube and measure it with digital calipers to fine-tune. For press-fit parts, a 0.2mm negative horizontal expansion is a common starting point.
Q: How do I safely and effectively paint resin dinosaur models?
A: Safety first: Ensure the model is fully cured and any residual uncured resin is gone. Priming is mandatory: Resin surfaces can be slick. Use a primer formulated for plastics or resins (like Vallejo Surface Primer) to ensure paint adhesion. Thin acrylic paints applied in layers work best. Seal with a clear coat to prevent UV yellowing of the resin underneath.
Q: Can I make my 3D printed dinosaur model weatherproof for outdoor display?
A: Yes, with the right material and finishing. Use ASA or PETG filament, as they have excellent UV and weather resistance. Avoid PLA and standard ABS. For finishing, apply a filler primer, paint with outdoor-rated acrylic paints, and seal with multiple coats of a clear, UV-resistant polyurethane or automotive clear coat to create a protective barrier.
Q: What’s the best way to scale a dinosaur model up or down without losing detail?
A: Scaling in your slicer is simple, but wall thickness matters. When scaling down too much, thin walls may disappear or become too fragile. When scaling up, increase your number of perimeter walls (e.g., from 2 to 3 or 4) in the slicer to maintain strength without resorting to excessive, time-consuming infill.
Discuss Your Dinosaur Projects with Yigu Rapid Prototyping
Creating the perfect prehistoric masterpiece often benefits from a professional partner. Whether you’re an educator looking for durable classroom models, a museum designing an interactive exhibit, or a collector seeking flawless, large-scale replicas, our team at Yigu Rapid Prototyping can help. We offer end-to-end expertise—from advising on the most robust material and technology choice (including high-detail resin casting from your 3D printed master) to handling the complex printing, assembly, and professional finishing you desire. Let us handle the technical challenges, so you can focus on the wonder of the final product. Share your vision with us for a confidential consultation.