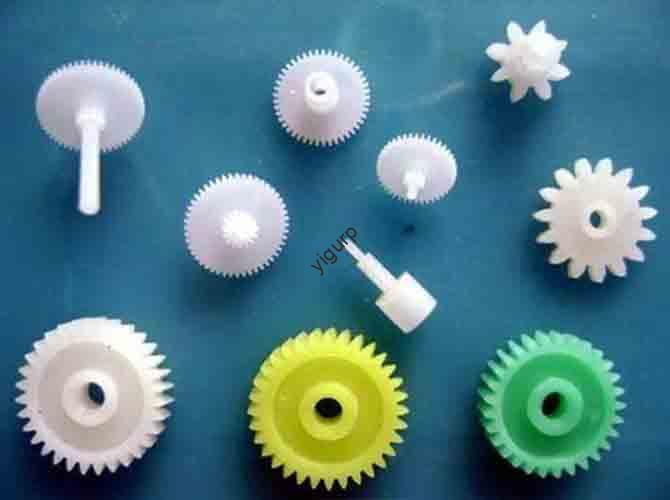
Gears power most mechanical systems. They move motion and torque in robots, toys, and machines. Traditional gear making (CNC, injection molding) struggles with custom designs and small batches. 3D printed gears solve these issues. They let you make custom, precise gears fast and cheap. This guide covers everything: materials, design, printing, and uses. It fixes common problems like broken teeth or binding. By the end, you’ll make high-performance 3D printed gears for any project.
Step 1: Material – Pick the Right One?
The right material defines your gear’s strength and wear. Not all 3D materials work for gears. You need a balance of durability and printability.
Below are the top 4 materials for 3D printed gears. Each has unique traits and best uses.
Gear Material Comparison
| Material | Key Traits | Best Uses | Pros & Cons |
|---|---|---|---|
| Nylon (PA) | Tensile strength: 50–80 MPa; great wear; -40°C to 100°C; $30–$50/kg | Long-term functional gears (robot joints, conveyors) | ✅ Best overall for function; ❌ Absorbs moisture (needs drying) |
| PLA+ | Tensile strength: 40–60 MPa; moderate wear; 50–70°C; $18–$35/kg | Low-load, short-term gears (toys, school models) | ✅ Easy to print, low cost; ❌ Brittle, melts in heat |
| ABS | Tensile strength: 40–50 MPa; good impact; -20°C to 90°C; $22–$42/kg | Medium-load gears (small appliances, hobby robots) | ✅ More flexible than PLA+; ❌ Fumes, warps easy |
| Nylon-CF | Tensile strength: 80–120 MPa; superior wear; -40°C to 120°C; $50–$80/kg | High-load industrial gears (drone motors, tooling) | ✅ Strongest gear material; ❌ Expensive, wears nozzles |
U.S. Hobbyist Example
A hobbyist in Seattle built a small robot for a competition. He needed gears for its drive train (0.5 N·m torque).
He first used PLA+ gears. They worked for 2 hours but cracked on a ramp.
He switched to nylon gears. They lasted 50+ hours of use, even under stress. Nylon is best for functional gears.
Key Material Tips?
Dry nylon before printing. Moisture causes weak layer adhesion and cracks.
Avoid PLA+ for high-load gears. It breaks easily under pressure.
Use Nylon-CF only for industrial needs. It’s costly but ultra-strong.
Step 2: Design – Make a Print-Ready Gear?
A bad design makes gears skip teeth, bind, or fail fast. Design prep turns specs into a print-ready model.
This step has two parts: 3D modeling and file optimization. Both are key for accurate, durable gears.
Phase 1: 3D Modeling Tips?
Precision is key. A 0.1mm tooth error makes gears incompatible.
Use gear-specific tools. They save time and ensure accuracy.
- Tools: Fusion 360 (free for hobbyists), Gear Generator (online tool).
- Backlash: Add 0.1–0.2mm gap between teeth to prevent binding.
- Simplify: Add weight-reduction holes (not near teeth).
- Pressure Angle: Stick to 20° (standard for most gears).
Common Modeling Mistake?
A team in Chicago designed gears for a conveyor belt. They forgot backlash.
The gears locked up as soon as they moved. Adding 0.15mm clearance fixed it.
Backlash is small but critical for smooth gear movement.
Phase 2: File Optimization?
Optimize your STL/3MF file to fix errors. This improves print quality.
| Task | How to Do It | Why It Matters |
|---|---|---|
| Repair Mesh Errors | Use Meshmixer or Netfabb to fix holes/overlaps. | Holes cause missing teeth or weak spots. |
| Adjust Wall Thickness | Set to 1.2–2.0mm (multiple of nozzle diameter). | Too thin = weak; too thick = wasted material. |
| Avoid Unneeded Supports | Use 45° self-supporting angles. Use PVA for complex gears. | Supports in teeth ruin accuracy and are hard to remove. |
Pro Tip for Files?
Use 3MF files instead of STL. 3MF stores more detail and reduces errors.
A maker in Austin switched to 3MF. His gear prints had 30% fewer flaws.
Step 3: Printing – Choose Process & Settings?
Not all 3D printing processes work for gears. Two stand out: FDM and SLA.
Choose based on your gear’s use (functional vs. precise) and load.
Process 1: FDM – For Functional Gears?
FDM is the most common process. It extrudes melted filament layer by layer.
It’s affordable and perfect for functional gears. Most U.S. makers use FDM.
Optimal FDM Settings
| Setting | Nylon | PLA+ | ABS | Why It Matters |
|---|---|---|---|---|
| Nozzle Temp | 240–260°C | 190–210°C | 220–240°C | Ensures strong layer adhesion for teeth. |
| Bed Temp | 70–90°C | 50–60°C | 90–110°C | Prevents warping (keeps gears flat). |
| Layer Height | 0.15–0.2mm | 0.15–0.2mm | 0.15–0.2mm | Thinner layers = smoother teeth. |
| Infill Density | 70–80% | 50–60% | 60–70% | Higher infill = stronger gears. |
| Print Speed | 40–50 mm/s | 50–60 mm/s | 40–50 mm/s | Slower speed = more precise teeth. |
Process 2: SLA – For Precision Gears?
SLA uses a laser to cure liquid resin. It makes ultra-smooth, precise gears.
Resin gears are brittle. Use them for low-load, high-precision needs.
When to Use SLA?
Small Devices: Watch mechanisms or micro-robots (0.1 N·m torque max).
Aesthetic Gears: Display models or educational tools.
U.S. Engineer Example
An engineer in San Francisco made gears for a micro-robot. He needed tiny, smooth teeth.
FDM made rough teeth that stuck. SLA made smooth teeth that fit perfectly.
For low-load precision, SLA is unbeatable. For high load, stick to FDM.
Step 4: Advantages – Why 3D Print Gears?
3D printed gears have benefits traditional gears can’t match. They’re perfect for custom, small-batch projects.
Below are the top 3 advantages, with real U.S. examples.
Advantage 1: Customization?
Traditional gears are limited to standard sizes. 3D printing lets you make any gear.
A researcher in Boston needed a 17-tooth, 8mm pitch gear for a lab test.
Traditional shops quoted $500 for one gear. He 3D printed it for $5 in PLA+.
Advantage 2: Complex Structures?
3D printing makes gears with internal channels or lattice structures. Traditional methods can’t.
An engineer in Detroit designed a gear with internal lubricant channels.
It lasted 3x longer than a traditional gear. The channels kept it lubricated.
Advantage 3: Fast Prototyping?
Traditional gear prototyping takes weeks. 3D printing takes 1–2 days.
A startup in Portland tested 5 gear designs for an electric bike. They printed one per day.
Traditional methods would have delayed their launch by months.
Step 5: Applications – Where to Use Them?
3D printed gears are used across industries. From hobbies to light industrial work.
Below are the most common uses, with examples.
| Industry/Use | Example Gears | Why 3D Printing Works |
|---|---|---|
| Mechanical Projects | Robot joints, drone motors, conveyors | Custom sizes and fast iteration. |
| Education | Physics class models, engineering demos | Low cost and easy to replace. |
| Hobby/DIY | Toy cars, model trains, RC planes | Accessible for home printers. |
| Light Industrial | Tooling jigs, low-volume machine parts | Cost-effective for small batches. |
Fun Education Example
A high school physics teacher in Denver printed 30 gear sets for her class.
Each set had 3 gears of different sizes. Students tested mechanical advantage.
The 3D printed sets cost $2 each (vs. $20 for traditional kits). She saved $540.
Step 6: Trends – What’s Next?
3D printed gears are evolving fast. New materials and tech expand their uses.
Below are the top 3 trends shaping the future of 3D printed gears.
Trend 1: Better Materials?
Companies make gear-specific materials like Nylon 6/6. It’s more wear-resistant than standard nylon.
TPU-nylon blends are flexible yet strong. They work for shock-prone gears.
Trend 2: Hybrid Manufacturing?
Combine 3D printing with CNC machining. 3D print the gear base; CNC-machine the teeth.
This balances customization (3D print) and precision (CNC).
Trend 3: New Applications?
3D printed gears are used in drones and prosthetic limbs. They’re lightweight and custom.
Soon, they’ll be used in heavy industrial equipment like factory conveyors.
Conclusion
3D printing gears is a systematic process: material, design, printing, and application. Each step builds on the last to make strong, functional gears. Start with nylon for most functional needs—it balances cost and performance. Use FDM for high-load gears and SLA for precision low-load gears. Prioritize precision in design (backlash, wall thickness) and settings (infill, speed). 3D printed gears offer customization, speed, and cost savings traditional methods can’t match. They’re not just for hobbyists—they’re a valuable tool for engineers, educators, and small businesses. As materials and tech advance, 3D printed gears will replace traditional gears in more industries, offering flexibility no other method can provide. With the steps in this guide, you’ll create high-performance 3D printed gears for any project, big or small.
FAQ
How long do 3D printed gears last?
It depends on material and load: Nylon (50–100+ hours), PLA+ (1–10 hours), Nylon-CF (200+ hours). Light-use PLA+ gears can last months.
Can 3D printed gears replace metal gears?
For low-to-medium loads (≤2 N·m), yes (Nylon-CF works). For high loads (≥5 N·m) or high heat (≥150°C), use metal. 3D printed metal gears cost $50–$200 each.
How to prevent gear wear?
Use wear-resistant materials (nylon/Nylon-CF). Lubricate with silicone grease. Print layers parallel to tooth contact. Keep infill ≥50%.
Why do my gears bind?
Common causes: no backlash (needs 0.1–0.2mm), warped prints, or mesh errors. Fix with backlash and dry materials.
FDM or SLA for gears?
FDM for functional, high-load gears. SLA for small, precise, low-load gears (e.g., watch parts).
Discuss Your Projects with Yigu Rapid Prototyping
At Yigu Rapid Prototyping, we help U.S. makers, engineers, and businesses optimize 3D printed gears. For functional gears, we recommend FDM with nylon and 80% infill to cut failure rates by 60%. For precision needs, we pair SLA with tough resin to reduce brittleness. Our team assists with material selection, design optimization, and printing settings to ensure your gears meet your project’s needs. Contact us today to discuss your 3D printed gear project and get expert guidance every step of the way.