Introduction
Imagine you’re pouring liquid silicone into a mold frame, and you can see exactly how it flows around your prototype, filling every tiny groove and pushing air out as it goes. This is the power of transparent silicone mold flipping. Unlike standard opaque silicone, this specialized material lets you watch the entire mold-making process. You can spot air bubbles in real-time, verify that the silicone has reached every detail, and ensure a flawless result before the material even cures. It’s a game-changer for projects where precision is critical, like optical lenses, medical devices, or intricate decorative pieces. This guide walks you through the materials, the step-by-step process, and the key precautions to help you create perfect, crystal-clear molds every time.
What Materials and Tools Do You Need?
The success of a transparent silicone mold starts with choosing the right components. Quality here is non-negotiable.
| Category | Key Item | Selection Tips & Specifications | Critical Role |
|---|---|---|---|
| Silicone | Additive (Platinum-Cure) Silicone (Best) or Condensation Silicone (Budget) | Additive: Low shrinkage (0.1-0.5%), high transparency (85-95% light transmission), flexible (Shore A 20-40). Condensation: Higher shrinkage (1-2%), lower transparency (70-80%). Avoid silicones with fillers, as they cause cloudiness. | Captures fine details while staying clear enough for you to see through it. |
| Curing Agent | Matches the silicone type | Additive uses a 1:1 ratio. Condensation uses a 100:2 to 100:5 ratio. Use an electronic scale for precise measurement. A 1% error can cause uneven curing or loss of transparency. | Triggers solidification without yellowing or clouding the silicone. |
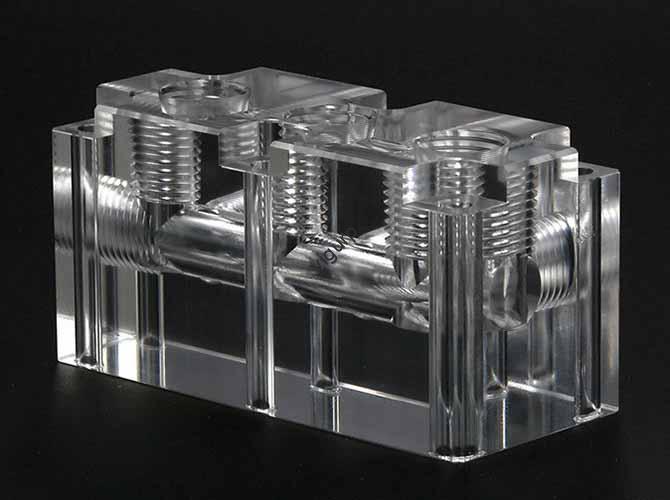
| Mold Frame | Acrylic sheets (preferred) or plastic/wood | Acrylic is transparent, letting you monitor the silicone as you pour. Use 3-5mm thick sheets. Ensure the frame is perfectly flat to prevent leaks. | Holds the liquid silicone and defines the mold’s shape. |
| Release Agent | Silicone oil or food-grade petroleum jelly | Silicone oil (100-500 cSt) is best; it leaves no residue and won’t affect transparency. Apply an extremely thin layer (1-2μm). For wax prototypes, use petroleum jelly. | Prevents the silicone from sticking to the master prototype. |
| Auxiliary Tools | Electronic scale, vacuum chamber, stirring rods, level tool | A vacuum chamber reaching -0.1MPa is critical for removing bubbles. Use glass or plastic stirring rods to avoid scratching the container. | Ensure precise mixing, bubble-free silicone, and a perfectly level cure. |
How Do You Make a Transparent Silicone Mold Step by Step?
This process demands patience and attention to detail, but the results are worth it.
Step 1: Prepare the Master Prototype
The prototype is the heart of your mold. Its surface finish dictates the quality of everything that follows.
- Clean Impeccably: Wipe the prototype with isopropyl alcohol to remove every trace of oil, dust, or fingerprint. Any imperfection will be visible in the clear mold.
- Achieve a Flawless Surface: For 3D-printed prototypes, sand away all layer lines, starting with 400-grit sandpaper and working up to 1500-grit. For a truly mirror-like finish, use a polishing compound afterward.
- Repair Any Defects: Fill small cracks or gaps with a transparent epoxy resin to prevent them from creating voids in your mold.
- Plan for Complex Shapes: If your prototype has deep undercuts, consider splitting it into sections. Mark the parting lines clearly so your mold halves will align perfectly later.
Step 2: Set Up the Mold Frame
A well-built frame ensures a clean, evenly thick mold.
- Assemble a Leak-Proof Frame: Use acrylic sheets to build a box around your prototype. The walls should be 5-10mm higher than the prototype’s highest point. Seal all edges with acrylic sealant or strong tape.
- Position the Prototype: Place the prototype in the center of the frame and secure it to the base with a small piece of low-tack double-sided tape.
- Check for Level: Use a level tool to ensure the prototype and the frame are perfectly flat. An uneven setup will result in a mold with varying wall thickness, which can affect transparency and strength.
Step 3: Mix and Degas the Silicone
This step is critical for preserving transparency.
- Measure Precisely: Weigh the silicone base and its curing agent according to the manufacturer’s exact ratio. For additive silicone, this is often a 1:1 ratio by weight.
- Mix Slowly and Deliberately: Stir the two components together along the wall of your container. Stir slowly for 2-3 minutes. Stirring too fast whips in air bubbles, which will appear as ugly white spots in your final mold.
- Vacuum Degas: Place the mixture in a vacuum chamber at -0.1MPa for 1-2 minutes. You’ll see the mixture foam up as air is pulled out, and then collapse back down. If bubbles remain, repeat the process. Skipping degassing is the number one reason for failed transparent molds.
Step 4: Pour and Cure the Silicone
Now you use the transparency to your advantage.
- Pour Slowly and Strategically: Tilt the frame at a 45-degree angle and pour the silicone in a thin, steady stream against the inner wall of the frame. This minimizes bubble formation. Watch through the acrylic frame as the silicone flows and fills the details around your prototype.
- Guide Silicone into Details: For very fine features, use a toothpick to gently guide the silicone into grooves or cavities. The transparency lets you see exactly what you’re doing.
- Remove Final Bubbles: After pouring, gently tap the frame on the table. You’ll be able to see any remaining surface bubbles through the clear silicone. Pop them with a toothpick.
- Cure Undisturbed: Place the frame on a flat, level surface in a clean, temperature-controlled room (20°C-25°C). Let it cure for the full recommended time, typically 24 hours for additive silicone. Do not move it during this time.
Step 5: Demold and Finish
The moment of truth.
- Demold Gently: Remove the frame. Apply a tiny drop of silicone oil to the seam between the prototype and the mold. Then, carefully peel the silicone away from the prototype, pulling at a 45-degree angle. The transparency lets you see if any area is sticking so you can ease it apart.
- Trim and Polish: Use a sharp knife to trim off any excess silicone (flash). You can lightly polish the mold’s surfaces with 2000-grit sandpaper to enhance clarity, but be careful not to over-sand and lose detail.
What Are the Critical Precautions for Success?
Transparent silicone is more sensitive to its environment than opaque types. Pay attention to these factors.
- Control Your Environment: Maintain a steady room temperature of 20°C-25°C. If it’s too hot, the silicone cures too fast, trapping bubbles. If it’s too cold, it cures slowly and can turn cloudy. Keep humidity below 60%, as high moisture can react with some silicones and cause surface cloudiness.
- Ensure Material Purity: Never mix additive and condensation silicone systems—they will react badly. Use clean tools and work in a dust-free area. A single speck of dust will be visible as a dark spot in your clear mold.
- Maintain Your Mold Properly: After each use, clean the mold with warm, soapy water. Harsh solvents like acetone will damage the silicone. Dry it completely before storing it flat, away from direct sunlight, which can cause yellowing over time.
Where Are Transparent Silicone Molds Most Useful?
The ability to see through the mold opens up unique applications.
- Optical Manufacturing: Creating prototypes for lenses or light guides, where internal bubbles would ruin light transmission. You can inspect the cast part for flaws before demolding it.
- Medical Devices: Making molds for hearing aid shells or dental models. The transparency lets you verify that every fine anatomical detail is captured without defects.
- Food and Crafts: Producing molds for chocolate or clear resin art. You can watch the material flow and ensure there are no air pockets that would mar the final piece.
- Electronics: Casting prototypes for transparent device covers or light pipe components, where visual clarity is a functional requirement.
Conclusion
Transparent silicone mold flipping elevates mold-making from a blind process to a visually guided craft. By using high-clarity, additive-cure silicone and following a meticulous workflow—from a flawless prototype to careful degassing and pouring—you can create molds that are not only functional but also offer a real-time window into the casting process. This visibility is invaluable for ensuring precision and avoiding defects in critical applications like optics, medicine, and fine art. Mastering this technique gives you an unmatched level of control over the quality of your replicated parts.
FAQ
Why did my transparent silicone mold turn cloudy after curing?
Cloudiness is usually caused by one of three things: high humidity during curing (use a dehumidifier), impurities in the silicone (clean your tools and workspace better), or using the wrong type of silicone. You can sometimes restore clarity by gently polishing the mold surface with a little silicone oil.
How many times can I reuse a transparent silicone mold?
A well-made additive-cure (platinum) transparent silicone mold can last for 30 to 50 casting cycles with proper care. Clean it gently after each use and store it flat away from sunlight. Condensation-cure molds have a shorter life, typically 10 to 20 cycles, due to higher shrinkage.
Can I use this process to cast parts that will be used in high heat, like near a car engine?
Yes, but you’ll need a special high-temperature transparent silicone designed to withstand service temperatures up to 200°C-300°C. Standard transparent silicone will degrade and lose its clarity above 100°C. Always check the material specifications before you start.
Discuss Your Projects with Yigu Rapid Prototyping
At Yigu Technology, we’ve helped numerous clients master transparent silicone mold flipping for their most demanding projects. We know that the key to a perfect mold is a perfect master, which is why we offer high-precision 3D printing and CNC machining services to create flawless prototypes. Our team can advise you on the best materials—whether you need medical-grade clarity, high-temperature resistance, or optical transparency—and guide you through the entire process to ensure your molds are flawless. If you have a project where precision and visibility are paramount, let’s talk about how we can help you achieve perfect results.