Silicone molding transforms raw silicone into useful products. From kitchen spatulas to medical devices and automotive seals, this process shapes the flexible, durable parts we use daily. But with several methods available, how do you know which one fits your project? This guide breaks down the key silicone molding techniques, walks through each process step by step, and helps you match methods to your specific needs.
What Are the Main Silicone Molding Methods?
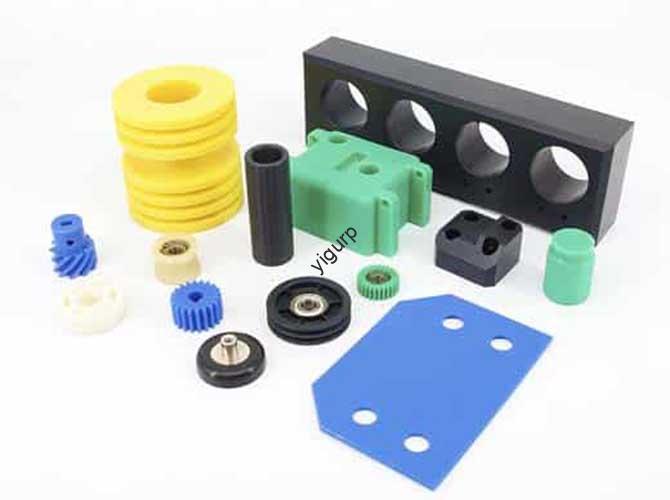
Six core methods dominate silicone manufacturing. Each serves different volumes, complexities, and applications.
Compression Molding
Compression molding uses heat and pressure to shape silicone in a closed mold. It’s the go-to method for high-precision parts.
How it works: A pre-measured silicone blank goes into the open mold. The press closes, applying heat and pressure. Silicone flows to fill the cavity. Heat cures it into shape. Then the mold opens and the part comes out.
Key features: High precision, suitable for complex geometries, excellent for mass production. Cycle times run 5-15 minutes depending on part thickness.
Best applications: High-precision seals, automotive gaskets, O-rings, and parts needing tight tolerances.
Critical controls: Mold temperature between 160-200°C, pressure from 5-50MPa, and precise vulcanization time.
Real-world example: An automotive supplier produces 50,000 engine gaskets monthly using compression molding. Each gasket holds dimensional tolerance within ±0.1mm. The process delivers consistent parts across multi-year production runs.
Injection Molding
Injection molding works like plastic injection molding but with silicone. It’s automated, fast, and efficient.
How it works: Liquid or solid silicone feeds into a heated barrel. A screw pushes it forward, generating heat and pressure. The material injects into a closed mold under high pressure. It cures quickly, then the mold opens and ejects the part.
Key features: High efficiency, low scrap rate, fully automated. Cycle times run 30-90 seconds—much faster than compression molding.
Best applications: Miniaturized parts like electronic buttons, keypads, seals for small devices, and complex geometries with tight tolerances.
Critical controls: Injection speed needs staged control. Mold vacuum exhaust prevents air traps. Plasticization temperature must stay precise.
Cost consideration: Higher initial mold investment than compression, but lower per-part cost at high volumes.
Extrusion Molding
Extrusion creates continuous profiles with consistent cross-sections. Think tubes, strips, and cords that run indefinitely.
How it works: Silicone compound feeds into an extruder barrel. Heat softens it. A screw pushes it through a die that shapes the profile. The continuous length then passes through a heating tunnel to cure, then cools and cuts to length.
Key features: Continuous production, uniform cross-sections, efficient for long runs. Can produce kilometers of material without stopping.
Best applications: Silicone pipes, sealing strips, tubes, cords, and custom profiles for construction and industrial use.
Critical controls: Die design determines shape accuracy. Barrel heating needs segmented control. Laser diameter monitors check dimensions in real time.
Gate Molding
Gate molding, also called liquid silicone casting, works well for small batches and prototypes.
How it works: Liquid silicone mixes with catalyst, then pours into a mold through a gate opening. The material cures at room temperature or with gentle heat. After curing, the mold opens to reveal the part.
Key features: Flexible, low-cost for small runs, no expensive machinery needed. Works at room temperature with simple equipment.
Best applications: Transparent crafts, mold prototypes, custom jewelry, short-run parts up to 100 units.
Critical controls: Vacuum defoaming removes bubbles before pouring. Layered infusion prevents defects in thick parts.
Coating and Impregnation
This method applies thin silicone layers to substrates or impregnates materials with silicone.
How it works: Fabric, paper, or other base material passes through a silicone bath or under a coating head. Rollers control thickness. Heat cures the coating. For impregnation, the substrate soaks in liquid silicone until saturated.
Key features: Creates thin, uniform coverage. Bonds silicone to other materials.
Best applications: Fabric coating for technical textiles, PCB waterproof films, biomedical coatings on devices.
Critical controls: Coating thickness requires precise adjustment. Adhesion testing verifies bond strength. Centrifugation speed controls impregnation depth.
Special Molding Methods
Advanced techniques solve specific manufacturing challenges.
Cold runner molding: Keeps silicone in the runner system cool while the mold cavity heats. This eliminates waste from cured runner material. Ideal for expensive silicones where scrap reduction matters.
3D printing-assisted molding: Combines printed molds with silicone casting. Great for complex textures and short runs without traditional tooling costs.
Co-molding: Bonds silicone to metal or plastic inserts in a single operation. Creates hybrid parts like overmolded handles or sealed electrical connectors.
How Does Each Molding Process Work Step by Step?
Let’s walk through three common methods in detail.
Compression Molding Step by Step
Step 1: Material preparation
Weigh raw silicone, fillers, and vulcanizing agents according to your formula. Mix everything evenly in a refiner until uniform.
Step 2: Plasticization
Process the compound through rollers to reduce Mooney viscosity. This improves flow during molding. The thin-pass method works well—passing material through tightly spaced rollers multiple times.
Step 3: Preforming
Cut the compound into blanks that roughly match your part shape. Correct blank size ensures the mold fills completely without excess flashing.
Step 4: Mold vulcanization
Place blanks into the preheated mold. Close the press and apply pressure. Heat cures the silicone. Typical conditions: 160-200°C, 5-50MPa pressure, hold time determined by part thickness.
Step 5: Post-treatment
Remove the part from the mold. Trim excess flash material. Some parts need secondary vulcanization in an oven to remove volatiles and boost stability.
Injection Molding Step by Step
Step 1: Feeding
Automated systems feed silicone compound into the machine barrel. Materials come as pellets, strips, or liquid depending on the system.
Step 2: Plasticization
Barrel heaters soften the silicone. A rotating screw mixes and moves it forward. Temperature zones vary by silicone type—consult material data sheets for exact settings.
Step 3: Injection
The screw moves forward, injecting softened silicone into the closed mold cavity. High pressure ensures complete filling. Injection speed often changes during the stroke—fast initially, slower as the cavity fills.
Step 4: Packing and cooling
Pressure holds until the silicone initially cures. Brief cooling stabilizes the shape before ejection.
Step 5: Demolding
Automated ejector pins push the part out. Robotic arms may remove parts for complex operations. Most injection molded parts need no manual trimming.
Extrusion Molding Step by Step
Step 1: Die design
Create a die with an opening matching your desired cross-section. Round for tubes, rectangular for strips, custom shapes for profiles.
Step 2: Heating and extrusion
Barrel heats in zones: front for plasticization, middle maintains temperature, rear aids forming. The screw pushes material through the die at controlled speed.
Step 3: Monitoring
Laser diameter gauges check dimensions continuously. If size drifts, the system adjusts screw speed or line speed automatically.
Step 4: Traction and cutting
Pull rollers move the extruded profile through the cooling and curing sections. At the end, automatic cutters slice to programmed lengths.
What Problems Occur and How Do You Fix Them?
Even good processes encounter defects. Here are common issues and solutions.
Bubble Holes
What happens: Small voids or bubbles appear inside the part or on the surface.
Root causes: Air trapped during mixing. Gases released during vulcanization expand before escaping.
Solutions: Use vacuum defoaming before molding to remove trapped air. Apply gradient heating during vulcanization—this avoids sudden gas expansion. For thick parts, lower initial temperature lets gases escape before surface cures.
Glue Shortage
What happens: Parts come out incomplete, with missing sections or thin areas.
Root causes: Silicone flows poorly. Not enough material injected. Gates positioned poorly.
Solutions: Increase injection pressure for molding processes. Optimize gate position to improve flow. Preheat silicone slightly to reduce viscosity. Verify blank weight in compression molding matches part volume.
Sticky Surface
What happens: Parts feel tacky or sticky after curing. They may attract dust or fail to release from molds.
Root causes: Incomplete vulcanization—material didn’t cure fully. Mold surface contamination transfers to parts.
Solutions: Extend vulcanization time or raise temperature slightly. Clean molds thoroughly with solvents like isopropyl alcohol before each production run. Check that your catalyst hasn’t expired or lost activity.
Dimensional Deviation
What happens: Parts measure outside specified tolerances. They may be too large, too small, or warped.
Root causes: Uneven curing shrinkage. Inconsistent mold temperature across the cavity.
Solutions: Design molds with 1.5-3% shrinkage allowance—the exact number depends on your silicone. Ensure uniform mold heating by placing temperature sensors in multiple locations. Balance heating circuits to eliminate hot and cold spots.
How Do You Select Materials and Equipment?
Match your choices to product requirements.
| Application | Recommended Silicone | Supporting Equipment |
|---|---|---|
| Food-grade kitchen tools | FDA-certified liquid silicone | Vacuum casting equipment prevents contamination |
| High-precision seals | Silicone with vapor-phase silica filler | Precision compression molding machine |
| Conductive electronic parts | Precipitation-method conductive silicone | Vertical injection machine with static elimination |
| High-temperature industrial parts | Phenyl silicone rubber (resists 300°C) | Extruder with laser diameter monitoring |
| Transparent crafts | Additive liquid silicone | Manual casting tools, vacuum chamber |
| Medical devices | Biocompatible medical-grade silicone | Cleanroom-compatible equipment |
Material Selection Tips
For food contact: Always choose FDA-certified silicones. These contain no toxic additives. Use dedicated equipment to avoid cross-contamination with industrial grades.
For high precision: Vapor-phase silica fillers boost hardness and dimensional stability. They cost more but deliver tighter tolerances.
For conductivity: Precipitation-method conductive silicones balance conductivity and processability. Test thoroughly—conductivity varies with filler loading.
For heat resistance: Phenyl silicone maintains properties up to 300°C. Standard silicones degrade above 200-250°C.
Equipment Considerations
Molds: Steel for long runs (100,000+ parts). Aluminum for prototypes and short runs. Temperature control matters more than material choice.
Presses: Compression molding needs 5-50MPa pressure capability. Injection molding requires precise shot control. Extrusion needs consistent screw speed.
Auxiliary equipment: Vacuum chambers remove bubbles. Laser gauges monitor dimensions. Robotic arms automate part removal.
Conclusion
Silicone molding encompasses multiple methods, each suited to different applications. Compression molding delivers precision parts at volume. Injection molding offers speed for miniaturized components. Extrusion creates continuous profiles efficiently. Gate molding serves small batches flexibly. Coating applies thin layers to substrates. Special methods solve unique challenges. Success depends on matching the method to your volumes, complexity, and quality requirements. With proper material selection and process control, silicone molding produces reliable parts across countless industries.
FAQ
Which silicone molding method is best for small batches of 50-100 parts?
Gate molding (liquid casting) works best. It requires minimal tooling investment and uses simple equipment. Use additive liquid silicone for transparent parts. Vacuum defoaming ensures bubble-free quality. This approach costs 80-90% less than production tooling for small runs.
How do you ensure food-grade safety in silicone kitchenware?
Start with FDA-certified liquid silicone containing no toxic additives. Use dedicated production equipment separate from industrial-grade processing. After production, conduct leachate testing to verify food safety. Look for compliance with FDA 21 CFR 177.2600 or equivalent regional standards.
What’s the main difference between compression and injection molding for silicone?
Compression molding uses pre-formed blanks placed in an open mold, then heated and pressed. It suits complex, high-precision parts but cycles slower (5-15 minutes). Injection molding injects material into a closed mold under pressure. It cycles faster (30-90 seconds) with lower scrap rates but requires higher mold investment.
Can you mold silicone directly onto metal or plastic parts?
Yes, through co-molding or insert molding. Place the metal or plastic insert in the mold before injecting or compressing silicone. The silicone bonds during curing, creating a hybrid part. Surface preparation of inserts affects bond strength—primers or mechanical roughening often help.
How do you prevent bubbles in silicone molded parts?
Use vacuum defoaming before pouring or injecting silicone. For compression molding, apply vacuum during the early cure stage. Design molds with proper venting so trapped air escapes. Adjust injection speed to avoid turbulent flow that introduces air. For thick parts, cure at lower temperature initially so gases escape before surface sets.
Discuss Your Projects with Yigu Rapid Prototyping
Silicone molding expertise transforms product concepts into reliable manufactured parts. At Yigu Technology, we guide clients through method selection, material choices, and process optimization. Whether you need prototypes for validation or full production runs, our team delivers quality silicone components across medical, automotive, consumer, and industrial applications. Contact us to discuss your project requirements and discover how our silicone molding capabilities support your success.