Introduction
Imagine you have a single, perfect prototype—maybe a 3D-printed design for a new product or a hand-sculpted piece of art. You need five, ten, or fifty copies for testing, small-batch sales, or a classroom project. Investing in expensive metal tooling doesn’t make sense, but you need every copy to be identical and capture all the fine details. This is exactly where silicone duplicate molds shine. They are flexible, high-precision tools that let you replicate complex shapes quickly and affordably. This guide walks you through everything: what they are, how to make them, where to use them, and how to solve common problems.
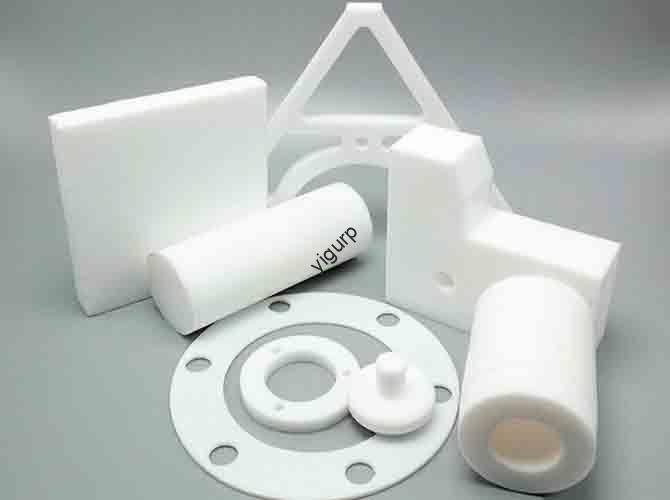
What Exactly Are Silicone Duplicate Molds?
A silicone duplicate mold is a flexible negative imprint of a master prototype, made from liquid silicone rubber. Once the silicone cures, you can fill that cavity with materials like polyurethane resin, epoxy, or even wax to create exact copies of your original part. The magic lies in the silicone’s elasticity, which allows it to bend and stretch, making it possible to remove cast parts with complex features—like undercuts—that would be impossible to get out of a rigid mold.
How Do They Differ from Other Mold Types?
To understand their value, it helps to see how they stack up against common alternatives.
| Mold Type | Material Flexibility | Detail Accuracy | Typical Reusability | Best Batch Size |
|---|---|---|---|---|
| Silicone Duplicate Mold | High – Flexible and stretchy | Excellent (±0.1mm), captures fine textures | 20 – 50 cycles | Small-batch (1-100 units) |
| Gypsum (Plaster) Mold | Low – Brittle and rigid | Good (±0.5mm), but loses fine detail over time | 5 – 10 cycles | Very small-batch (1-10 units) |
| Resin Mold | Medium – Semi-rigid | Good (±0.2mm) | 10 – 20 cycles | Small-batch (1-50 units) |
| Metal Mold | Very low – Completely rigid | Excellent (±0.05mm) | 1000+ cycles | Mass production (1000+ units) |
Example: Think of a jewelry designer with a wax pendant covered in tiny engraved patterns. A gypsum mold would be too brittle and would likely break the pattern or the mold itself. A silicone mold, however, will flex to release the pattern perfectly, keeping every engraved line crisp for dozens of castings.
How Do You Make a Silicone Duplicate Mold Step by Step?
The process is straightforward but requires attention to detail. Each step builds on the last.
Step 1: Prepare the Master Prototype
The master is the blueprint. Its surface quality is the single most important factor in the final mold’s accuracy.
- Source Your Master: This could be a 3D-printed model, a CNC-machined part, a hand-sculpted clay or wax original, or even an existing finished product you want to copy.
- Perfect the Surface: Sand the master to remove any layer lines (from 3D printing) or imperfections. For a smooth finish, work your way up to 1500-grit sandpaper. Then, clean it thoroughly with isopropyl alcohol to remove all dust and oil.
- Apply a Release Agent: This is a non-negotiable step. It creates a thin barrier so the silicone doesn’t chemically bond to the master. You can use a specialized mold release spray, petroleum jelly, or silicone oil. Apply it thinly and evenly.
Step 2: Set Up the Mold Frame and Mix Silicone
Now you’ll create the container for your liquid silicone.
- Build a Containment Box: Place your prepared master on a flat surface and build a wall around it using Lego bricks, acrylic sheets, or cardboard. Leave a gap of at least 5-10mm between the master and the walls. This space will become the mold wall.
- Choose Your Silicone: The two main types are:
- Condensation Silicone: Cheaper, mixes at a ratio of about 100:2 to 100:5. It cures slower (4-8 hours) and can shrink slightly over time. Good for simple parts.
- Addition Silicone (Platinum Silicone): More expensive, but cures faster (2-4 hours) with zero shrinkage, making it the choice for high-precision parts with fine details.
- Mix Carefully: Mix the silicone base and curing agent slowly and deliberately. Stirring too fast whips in air bubbles, which are the enemy of a good mold.
Step 3: Pour, Cure, and Demold
This is where the mold takes shape.
- Pour Slowly to Avoid Bubbles: Tilt your containment box and pour the silicone in a thin, steady stream against the wall, not directly onto the master. This helps the silicone flow and push air out.
- Degas for Perfection (Optional but Recommended): If you have a vacuum chamber, place the poured mold inside for a minute or two. This pulls out any remaining trapped air bubbles, ensuring a flawless mold surface.
- Let It Cure: Leave the mold undisturbed at room temperature (20°C-25°C) for the time specified by the manufacturer. Avoid moving it or placing it in a drafty area, as temperature changes can cause uneven curing.
- Demold Gently: Once fully cured, remove the frame and carefully peel the silicone away from the master. Peel at a 45-degree angle to avoid tearing the mold. If the mold is complex, you may have cut it into two halves before removing the master.
Step 4: Cast Your First Replicas
With your mold ready, you can start making parts.
- Prepare Your Casting Material: Common choices include fast-curing polyurethane resins for functional parts, strong epoxy resins for durable items, or simple gypsum for cheap, decorative castings.
- Pour and Cure: Pour your chosen material into the silicone mold cavity. Again, pour slowly to avoid trapping air. Let it cure according to the material’s instructions.
- Demold Your Replica: Once cured, flex the silicone mold. Its elasticity will release the new part easily, even if it has complex features. You now have a perfect copy of your master.
Where Are Silicone Duplicate Molds Most Useful?
This process is a workhorse across many fields because it solves the specific problem of needing a small batch of high-quality parts.
- Product Design & Development: Designers use them to create 10-20 look-and-feel prototypes of a new electronic device housing for user testing, long before committing to expensive production tooling.
- Arts, Crafts & Jewelry: Artists replicate intricate sculptures, custom jewelry pieces, or detailed ceramic molds, ensuring every piece from a limited edition run is identical to the original.
- Education & Training: Engineering or medical schools can create multiple copies of a complex part—like a gear assembly or an anatomical model—so every student in a class can have one for hands-on learning.
- Small-Batch Manufacturing: For very small production runs (50-100 units), such as limited-edition collectibles or custom parts for vintage machinery, silicone molds are a cost-effective alternative to setting up a production line.
What Common Problems Ruin Molds and How Do You Fix Them?
Even with care, issues can happen. Here’s how to troubleshoot.
- Problem: Bubbles in the cured mold.
- Cause: Pouring the silicone too fast or not degassing.
- Fix: Next time, pour in a thin stream. If you see bubbles in a deep crevice of the master, use a toothpick to gently poke the silicone and release trapped air after pouring.
- Problem: The silicone stuck to the master.
- Cause: You forgot the release agent, or you used the wrong type.
- Fix: Unfortunately, a stuck mold is often ruined. For the next attempt, always apply a compatible release agent. Test it on a small area first if you’re unsure.
- Problem: The replica surface is rough or dull.
- Cause: The master prototype wasn’t smooth enough, or the silicone wasn’t fully cured.
- Fix: Spend more time sanding and polishing your master. Ensure the silicone cures for the full recommended time in a stable environment.
- Problem: The mold tore when demolding the master or a replica.
- Cause: Sharp undercuts, or pulling too hard and straight up.
- Fix: Redesign the master with gentler angles if possible. When demolding, always peel the silicone back at an angle, stretching it away from the part rather than yanking.
Conclusion
Silicone duplicate molds are an incredibly versatile and accessible tool for anyone who needs to make small batches of identical, high-quality parts. They bridge the gap between a single prototype and full-scale production, offering a unique combination of flexibility, detail, and reusability. By understanding the step-by-step process—from a perfectly prepared master to careful pouring and demolding—you can reliably create accurate replicas for product testing, artistic projects, or small-scale manufacturing. The key is respecting the details: a flawless master, the right silicone, and patience during curing are your formula for success.
FAQ
How many copies can I expect from one silicone mold?
With proper care, a standard condensation silicone mold will typically last for 20 to 30 casting cycles. A higher-quality addition-cure (platinum) silicone mold can often produce 40 to 50 good parts. Factors like the complexity of the part and the abrasiveness of the casting material will affect this.
Can I use a silicone mold to cast metal parts?
Only with specific, high-temperature silicone formulated to withstand molten metal. Standard silicone will melt or burn. If you need metal-like parts, you can use your silicone mold to cast resins filled with metal powder, which can be polished to look and feel like metal.
My silicone mold has a small tear. Can I repair it?
Yes, small tears are often repairable. Clean the area around the tear with alcohol and let it dry. Mix a small amount of fresh addition-cure silicone and carefully apply it to the tear, smoothing it out. Let it cure fully before using the mold again. For large tears or tears in critical detail areas, making a new mold is the best option.
Discuss Your Projects with Yigu Rapid Prototyping
At Yigu Technology, we use silicone duplicate molds every day to help clients bring their ideas to life. We know that the success of a project often hinges on the quality of the master prototype. That’s why we offer precision 3D printing and CNC machining services to create flawless masters, ensuring your molds capture every detail. Whether you need 5 copies for a crucial design review or 50 units for an initial market test, our team can guide you through material selection and the casting process. We take the guesswork out of replication, delivering consistent, high-quality parts on a fast timeline. If you have a project that needs small-batch production, let’s talk about how we can help you move forward with confidence.