Introduction
Prototypes and first samples are the two most important checkpoints in product development. They serve different purposes, but together they form the bridge between a rough idea and a product ready for mass production. Many teams confuse them or try to skip one stage to save time. That often leads to costly mistakes. This article explains exactly what prototypes and first samples are, how they differ, and how to use both effectively. You will learn the right workflow, see real industry examples, and understand why investing in both stages saves money and prevents disasters later.
What Exactly Are Prototypes and First Samples?
Clear definitions help you communicate better with your team and suppliers. Here is what these terms mean in professional product development.
Prototypes: Design Validation Tools
A prototype is a preliminary model that tests your product’s design, structure, function, or appearance. It helps you find and fix flaws before you invest in expensive production tools.
- Core purpose: Verify that your design works as intended. Does it fit together? Does it look right? Does it perform the basic function?
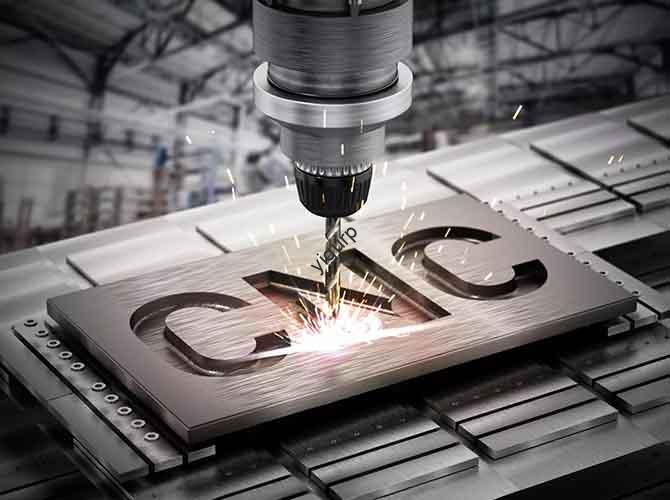
- Materials: You choose based on what you need to test. Options include 3D-printed plastic, CNC-machined aluminum, sheet metal, or even handmade models.
- Quantity: Usually one to three units. Enough for testing or showing stakeholders.
- Production method: Rapid processes like 3D printing, CNC machining, or manual fabrication. No production tooling required.
- Accuracy: Close to your design but allows small deviations. Typical tolerances range from ±0.1mm to ±0.5mm.
Real-world example: A team designing a wireless speaker created a 3D-printed plastic prototype to check if the battery and circuit board fit inside the housing. The prototype revealed that the original design was 2mm too narrow. They adjusted the CAD model and printed a new version in one day. Fixing this later would have meant re-cutting an injection mold costing 50,000 CNY.
First Samples: Production Validation Tools
A first sample, also called a first article, is the first batch of products made using your actual mass production tools and processes. It validates that your manufacturing setup can consistently produce good parts.
- Core purpose: Test the production process itself. Does the mold fill properly? Do the machines hold tolerance? Is the quality consistent?
- Materials: Identical to what you will use in mass production. For plastic parts, that means injection-molded ABS or PC. For metal parts, die-cast aluminum or stamped steel.
- Quantity: Usually one to five units. Enough to check dimensional accuracy and process stability.
- Production method: Uses final production techniques—injection molding, die casting, stamping, or welding—with the actual tools.
- Accuracy: Must meet final production specifications. Tolerances are typically ±0.05mm to ±0.1mm, with zero allowance for deviations.
Real-world example: After finalizing the speaker housing design, the team built an injection mold and ran first samples. The parts looked good but showed slight sink marks near the mounting bosses. Adjusting the injection pressure and cooling time eliminated the defect. Without first samples, they would have produced 10,000 defective housings.
What Are the Key Differences Between Prototypes and First Samples?
Understanding these differences prevents miscommunication with suppliers and avoids using the wrong tool for the job.
| Factor | Prototypes | First Samples |
|---|---|---|
| Primary objective | Validate design (appearance, structure, function) | Validate production process (molds, equipment, quality) |
| Materials | Chosen for testing needs, may differ from final | Identical to mass production materials |
| Production method | Rapid prototyping (3D printing, CNC machining) | Mass production processes (injection molding, die casting) |
| Tooling required | None | Production molds and dies |
| Quantity | 1-3 units | 1-5 units |
| Tolerance | ±0.1mm to ±0.5mm | ±0.05mm to ±0.1mm, must meet final specs |
| Stage in development | Early design phase | Pre-mass production, after mold/tool development |
| Cost per unit | Low to moderate (200-2,000 CNY) | High due to tooling amortization (5,000-50,000 CNY for the batch) |
What Is the Correct Workflow from Prototype to Production?
The relationship between prototypes and first samples is sequential. You cannot skip steps without increasing risk.
Phase 1: Prototype Stage – Fix Design Issues
Start with rapid prototyping to validate your design. This is where you make mistakes cheaply and fix them quickly.
Step 1: Create a prototype using the fastest method available. For a plastic housing, use 3D printing. For a metal bracket, use CNC machining.
Step 2: Test what matters. Check fit with internal components. Verify that buttons align with openings. Confirm that the assembly works.
Step 3: Iterate based on findings. If something does not fit, modify the CAD file and make a new prototype. Repeat until the design is perfect.
Outcome: A fully validated design ready for tooling development.
Time frame: One to two weeks for most projects.
Phase 2: Tooling Development
Once the design is frozen, build production tools. This takes time and money, so you want the design locked down.
- Injection molds: 30 to 60 days, 30,000 to 200,000 CNY depending on complexity.
- Die casting dies: 40 to 70 days, 50,000 to 300,000 CNY.
- Stamping dies: 20 to 40 days, 20,000 to 100,000 CNY.
Phase 3: First Sample Stage – Fix Production Issues
With tools ready, run first samples. This reveals problems in the manufacturing process itself.
Step 1: Produce one to five parts using the final tools and materials.
Step 2: Inspect everything. Measure critical dimensions with a CMM. Check surface finish. Test assembly with mating parts.
Step 3: Identify process issues. Is there flash at the parting line? Are there sink marks? Do dimensions drift across the batch?
Step 4: Optimize process parameters. Adjust injection temperature, pressure, cooling time, or cycle speed. Run another sample if needed.
Outcome: A validated production process ready for mass production.
Time frame: Two to four weeks including tooling adjustments.
Phase 4: Mass Production
Once first samples pass all tests, start full production. You now have confidence that the process will produce good parts consistently.
- Typical batch size: 1,000 to 100,000 units.
- Quality control: Monitor key dimensions and perform periodic testing.
What Do Real-World Examples Look Like?
Different industries follow the same workflow but with specific applications.
Consumer Electronics: Smartphone Case
- Prototype: A 3D-printed plastic shell tests button alignment and screen fit. A CNC-machined aluminum frame tests durability and weight. The team discovers the original design has sharp edges that catch on pockets. They round the corners in CAD and print a new version in two days.
- First sample: An injection-molded shell from the production mold checks for surface gloss and shrinkage. The first run shows slight warpage near the charging port. Adjusting the mold temperature solves the problem.
- Result: Mass production runs smoothly with zero fit issues.
Automotive: Dashboard Bracket
- Prototype: A sheet metal bracket made by laser cutting and bending tests mounting points and clearance. The prototype reveals that one hole is 3mm off from the vehicle mounting stud. The team updates the CAD file.
- First sample: A stamped bracket from the production die checks dimensional accuracy. CMM inspection confirms all holes are within ±0.1mm.
- Result: Production brackets install perfectly on the assembly line.
Medical Device: Surgical Forceps Handle
- Prototype: A resin model from a high-resolution 3D printer tests ergonomics. Surgeons grip it and confirm the shape works. They suggest adding texture for better grip.
- First sample: An injection-molded handle in medical-grade ABS checks for aseptic compatibility and surface smoothness. The textured surface matches the specification.
- Result: The device passes regulatory testing and moves to production.
What Are the Pros and Cons of Each Stage?
Knowing the strengths and weaknesses helps you plan your budget and timeline.
Prototypes
Pros:
- Low cost. No expensive tooling required.
- Fast iteration. Changes take hours or days, not weeks.
- Flexible. You can test appearance, function, or structure independently.
Cons:
- Not representative of final production quality. Materials and processes differ.
- Limited to small quantities. Cannot test production scalability.
- May miss issues caused by the production process itself.
First Samples
Pros:
- Fully representative of final products. Same materials, same processes.
- Reveals production flaws like mold errors or process inconsistencies.
- Validates that mass production can meet specifications consistently.
Cons:
- High cost. Requires upfront investment in molds and tooling.
- Slow iteration. Adjusting molds takes days or weeks.
- Only useful after design is finalized. Cannot fix major design flaws.
Conclusion
Prototypes and first samples serve two different but equally critical roles in product development. Prototypes validate your design quickly and cheaply, letting you iterate until everything works. First samples validate your production process, ensuring that molds, machines, and parameters produce consistent quality. The correct workflow is sequential: prototype first, then build tools, then run first samples, then scale to mass production. Skipping either stage is a gamble. A prototype saves you from design mistakes that would cost tens of thousands in tooling rework. First samples save you from production mistakes that would scrap thousands of parts. Together, they form the most reliable path from concept to customer.
Frequently Asked Questions
Can we skip prototypes and go straight to first samples?
Not recommended. Prototypes fix design flaws cheaply, often for a few hundred CNY. Skipping them risks discovering design issues after spending tens of thousands on molds. A design flaw found at the first sample stage requires expensive tooling modifications and delays your timeline by weeks.
How long does it take to make a prototype versus a first sample?
Prototypes take three to seven days using rapid methods like 3D printing or CNC machining. First samples take two to four weeks because you need to build molds or dies first, then run and test the samples. Tooling development itself takes 30 to 60 days before you can even run first samples.
Do first samples need to pass the same tests as final products?
Yes. First samples must meet the same standards for dimensional accuracy, material properties, and performance as mass-produced units. If a first sample fails any test, you must adjust the production process and run new samples until everything passes. This ensures that mass production will deliver consistent quality.
What quantity of prototypes should I order?
Order one to three prototypes for most projects. One unit lets you verify fit and appearance. Two or three units let you test assembly with mating parts or run destructive tests. There is usually no benefit to ordering more until you validate the design.
What is the most common mistake with prototypes and first samples?
The most common mistake is using prototypes to validate the production process or using first samples to validate the design. Prototypes made by 3D printing do not behave like injection-molded parts. First samples made with production tools cannot fix fundamental design errors. Use each for its intended purpose.
How much do prototypes and first samples typically cost?
Prototype costs range from 200 to 2,000 CNY depending on size, complexity, and material. First sample costs are higher because they include amortized tooling. A typical first sample batch of five parts might cost 5,000 to 50,000 CNY including mold costs spread across the project.
Discuss Your Projects with Yigu Rapid Prototyping
At Yigu Technology, we guide product teams through every stage of development. Our prototyping services deliver parts in three to seven days using 3D printing, CNC machining, and sheet metal fabrication. Once your design is validated, we support first sample production with expert process optimization and quality inspection. Located in Shenzhen’s manufacturing hub, we combine competitive pricing with technical expertise to help you move from concept to mass production smoothly. Whether you need one prototype or first samples for a complex assembly, our engineers ensure you get the right parts at the right time. If you have a project in development, reach out to us. Let’s discuss how we can support your journey from prototype to production.