You have an idea for a new product. Maybe it’s a simple battery storage box or a complex mechanical part. The next step isn’t ordering thousands of units. It’s building a prototype. Prototype making is the hands-on process of creating a physical model of your idea. This model lets you test the shape, check if it works, and find problems before you spend money on molds or production lines. Think of it as a low-cost safety net. This article breaks down why you need prototypes, the common ways to make them, and a simple step-by-step workflow to get it right.
What Are the Core Roles of Prototype Making?
Building a prototype isn’t just about seeing your idea in real life. It serves four clear purposes that save you time and money.
How Does Design Validation Help?
A drawing on a screen can be misleading. A prototype shows the real thing.
- Check the shape: Does the product look right from every angle?
- Test the assembly: Do the parts fit together without forcing? For a battery storage box, does the lid close perfectly? Do the internal slots actually hold the batteries?
- Find interferences: Does one part bump into another when it shouldn’t?
Real example: A team designed a battery box with a sleek, curved lid. The CAD looked great. But when we 3D-printed the prototype, the curve made the lid too shallow. It wouldn’t close over the batteries. We caught it, flattened the lid slightly, and fixed the problem before any mold was cut.
Why Is Functional Testing Critical?
A prototype isn’t just for looks. You need to know if it works.
- Simulate real use: Press the buttons. Open and close the lid. Shake it. Does it hold up?
- Test material limits: For a battery box made of PLA plastic, will it crack if you drop it? Will it melt if left in a hot car? A prototype lets you find out.
What Does Design Optimization Achieve?
The first version is rarely perfect. Prototyping lets you improve.
- Find the flaws: Maybe the battery box lid is too hard to open.
- Make it better: Add a small tab to the lid edge. Now it’s user-friendly. This small change costs nothing in CAD, but fixing it after mold-making would be expensive.
How Does It Help with Market and Stakeholder Demos?
A physical model convinces people better than a picture.
- Show investors: Hold a working prototype in a meeting. It feels real and builds confidence.
- Get customer feedback: Let potential users hold the battery box. Do they like the size? The color? Their input guides your final design.
- File for patents: You often need a working model or detailed drawings for patent applications.
What Are the Common Prototype Making Methods?
You have several ways to build a prototype. Each has its own strengths. The table below helps you choose.
| Method | Core Advantages | Best Materials | Ideal For | Example |
|---|---|---|---|---|
| 3D Printing | Fast (12-48 hours), low cost, handles complex shapes | PLA, ABS, Resin, Nylon | Small batches (1-10 units), early design checks | Printing a battery box to test if batteries fit in the slots |
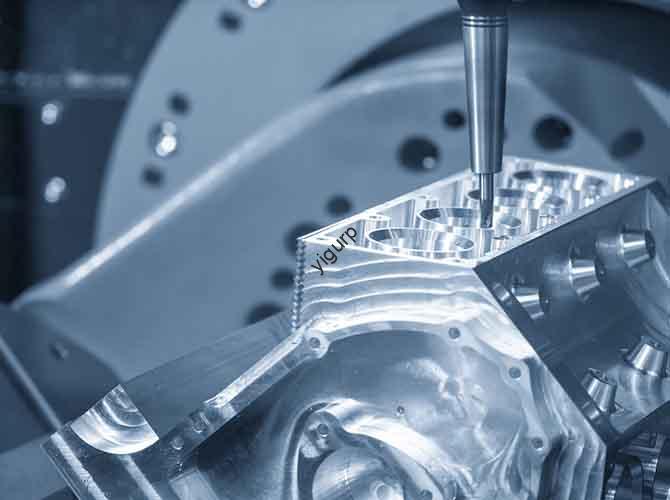
| CNC Machining | Very precise (±0.05mm), smooth finish, strong parts | Aluminum, Steel, PC, POM | Precision parts, metal prototypes, functional tests | Machining an aluminum battery box for a rugged industrial use test |
| Silicone Duplication | Low cost for 10-50 units, fast copying, keeps fine details | PU resin, Epoxy | Making multiple copies from a master | Making 20 copies of your 3D-printed battery box for user testing |
| Hand Crafting | Very cheap, super flexible, instant changes | Foam, Cardboard, Clay | Early concept models, quick size checks | Cutting a cardboard box to see if it fits in your bag |
What Is the Step-by-Step Prototype Making Workflow?
Follow this simple, repeatable process. It works for almost any product.
Step 1: Demand Analysis: What Do You Really Need?
Start by writing down your goals. This stops you from wasting time on the wrong things.
- Clarify the purpose: Is this for a quick size check? A functional test? A demo for investors?
- Set the requirements:
- Material: Do you need cheap PLA for a first look, or strong aluminum for a stress test?
- Size and precision: What are the main dimensions? For a battery box, maybe it’s 150mm x 100mm x 50mm. Do you need high precision (±0.1mm) or is ±0.5mm okay?
- Post-processing: Does it need a smooth, painted finish, or is a raw surface fine?
Step 2: Design Modeling: Create the Blueprint
Turn your idea into a digital 3D model. This is the foundation.
- Pick your software: Use SolidWorks for mechanical parts, Fusion 360 for general use, or Blender for complex, organic shapes.
- Add the details: For a battery box, model the slots (say, 50mm x 20mm each for AA batteries), the snap closure, and any hinge or latch.
- Think about making it: For 3D printing, avoid steep overhangs over 45 degrees if possible. For CNC machining, avoid holes that are very deep and narrow.
- Export the file: Save it as an STL for 3D printing, or a STEP file for CNC machining.
Step 3: Method Selection: Choose Your Path
Use the table in Section 2 to pick the best method for your goals, budget, and timeline.
- Scenario A: Need one battery box in 2 days for a quick fit test. Choose 3D printing.
- Scenario B: Need a strong metal battery box to test under a heavy load. Choose CNC machining.
- Scenario C: Need 30 identical battery boxes for a customer trial. Choose silicone duplication.
Step 4: Production and Post-Processing: Build and Refine
This is where your digital file becomes a physical object.
How Does Production Work for Each Method?
- 3D Printing: Load the STL file. Pick PLA filament. Set layer height (like 0.2mm) and infill (like 20% ). Hit print. A battery box might take about 8 hours.
- CNC Machining: Load the STEP file. Set spindle speed (e.g., 10,000 RPM) and feed rate. Clamp your aluminum block securely. Start the machine. A simple box might take 2 hours.
What Post-Processing Steps Are Common?
- Remove supports: For 3D prints, pull off any support structures with pliers.
- Smooth the surface: Use sandpaper, starting with 400-grit and moving to 1200-grit, to remove layer lines or tool marks. This is key if the prototype will be shown to people.
- Apply finishes: You can spray paint the battery box matte black for a better look, or add a non-slip coating to the bottom.
- Assemble parts: If your design has a lid and body, join them with snaps, screws, or a bit of glue.
Step 5: Testing and Validation: Does It Actually Work?
Now, test the prototype against the goals you set in Step 1.
| Test Type | What to Do | Example for a Battery Box |
|---|---|---|
| Size & Fit Test | Measure key dimensions with calipers. Try to assemble parts. | Check if slots are 50mm x 20mm. See if 10 batteries fit easily. |
| Functional Test | Simulate real use. Open/close it. Shake it. Apply some force. | Open and close the lid 50 times. Does the snap hold? Shake the box. Do the batteries fall out? |
| Durability Test | Drop it. Heat it up. Get it wet (if relevant). | Drop the box from 1 meter onto a carpet. Does it crack? Put it in a 60°C oven for 2 hours. Does the PLA warp? |
Step 6: Feedback and Optimization: Make It Better
Use what you learned in testing to improve the design.
- Gather feedback: Ask others to use it. What do they like? What’s annoying?
- Modify the design: If the lid was too hard to open, make the snap smaller in CAD. If the box slipped on the table, add some small rubber feet to the design.
- Iterate: Make a new prototype with the changes. Test again. Repeat until it’s right.
What Is a Real-World Example: Battery Storage Box Prototype?
Let’s put it all together with a simple example.
- Demand Analysis: Need a prototype to test if a box can hold 10 AA batteries, close securely, and be easy to open. Goal: Low cost, done in 2 days.
- Design Modeling: Use SolidWorks to model a box (150mm x 100mm x 50mm) with 10 internal slots, a snap lid, and a small tab to help open it. Export as STL.
- Method Selection: 3D printing in PLA is perfect for this. It’s fast and cheap.
- Production & Post-Processing: Print the parts (8 hours). Remove supports. Sand the edges quickly. Spray the bottom with a bit of rubberized coating for grip.
- Testing: Put 10 batteries in. They fit. Open and close the lid 50 times. The snap is secure. Drop it. No cracks. But… the lid tab is too small. It’s hard to grip.
- Optimization: Go back to the CAD model. Make the lid tab twice as big. Print just the new lid (2 hours). Test again. Now it’s easy to open. Problem solved.
What Are the Key Best Practices for Prototype Making?
Avoid common beginner mistakes with these simple tips.
Is “Good Enough” Really Good Enough?
Yes. A prototype is for learning, not for being perfect. Don’t spend days sanding a 3D-printed battery box to a mirror shine. Focus on making the slots the right size and the snap work correctly. The finish can come later.
Why Should You Test Early and Often?
Don’t wait until the whole prototype is done. For the battery box, you could pause the 3D printer halfway through and check if the battery slots are the right size. If they’re too small, you can stop, fix the file, and start again. This saves hours of wasted print time.
How Do You Choose Materials Wisely?
Match the material to the test. If you just need to check the size of a battery box, cheap PLA is fine. But if you need to test how the box handles heat, you’ll need ABS or polycarbonate, which have higher melting points. Using the wrong material gives you useless test results.
Why Should You Document Everything?
Keep notes. Save your design files with version numbers (like BatteryBox_v1.stl, BatteryBox_v2.stl). Write down the 3D printer settings you used (layer height, temperature). Record test results and feedback. This helps you remember what worked and avoid repeating mistakes.
Conclusion
Prototype making is the essential bridge between an idea and a real product. It lets you validate your design, test its function, and improve it based on real-world feedback, all before you commit to expensive tooling. The process is straightforward: define your needs, create a 3D model, choose the right method like 3D printing or CNC machining, build the part, and then test it thoroughly. Use the results to make your design better, and repeat as needed. Whether you’re making a simple battery storage box or a complex piece of machinery, mastering this workflow saves you time, money, and a lot of headaches later on.
FAQ
How much does prototype making cost for a small product like a battery storage box?
It depends entirely on the method. 3D printing in PLA is very affordable, typically (20 to )50. If you need a strong metal version via CNC machining, expect (100 to )300. A quick concept model made from cardboard or foam can cost as little as (5 to )20. For making multiple copies (10+), silicone duplication runs about (30 to )80 per unit.
How long does it take to make a prototype for a battery storage box?
3D printing is the fastest for a single part, usually taking 1 to 2 days including design and printing. CNC machining takes a bit longer, about 2 to 3 days, because of the setup time. A simple hand-crafted model from cardboard can be made in just a few hours. Silicone duplication takes the longest, 3 to 5 days, because making the mold takes time.
Can I use a 3D-printed prototype for mass production validation?
No, not for final validation. A 3D-printed prototype, especially in PLA, does not have the same strength, flexibility, or heat resistance as a part made through injection molding with production materials like ABS or polycarbonate. Use 3D printing for early design and fit tests. Later, make a prototype using the actual production material and process (like CNC machining the part from the right plastic) to do your final validation before making a mold.
Discuss Your Projects with Yigu Rapid Prototyping
Ready to bring your idea to life? At Yigu Rapid Prototyping, we help you navigate the prototype making process from start to finish. Whether you need a fast 3D-printed battery box for an initial fit check, a precision CNC-machined aluminum part for functional testing, or a small batch of silicone-duplicated models for customer trials, we have the expertise and equipment to deliver. Our team in Shenzhen works with you to choose the right method, optimize your design for manufacturing, and get quality prototypes in your hands quickly. Contact us to discuss your project and get a detailed quote.