Introduction
Have you ever had a product idea that felt perfect in your head, only to struggle when explaining it to others? That gap between imagination and reality is exactly where prototype making comes in.
I’ve spent years in product development, and I can tell you this: nothing beats the moment when a design on screen becomes something you can actually hold in your hands. It changes everything. Suddenly, abstract concepts become real objects you can touch, test, and improve.
Prototype making is simply the process of creating a physical model of your idea before mass production. It’s that critical step where designs meet the real world. Whether you’re designing a new smartphone case, a medical device, or an automotive component, understanding prototype making helps you avoid costly mistakes and create better products.
In this guide, I’ll walk you through what prototype making really means, why it matters, and exactly how to do it right. Let’s get started.
What Does Prototype Making Actually Mean?
At its simplest, prototype making transforms raw materials into physical models based on your design drawings or 3D files. These models represent your product idea in tangible form.
Unlike final products that get manufactured by the thousands, prototypes are usually one-offs or small batches. They exist to answer specific questions: Does this design actually work? Is it comfortable to hold? Will these parts fit together properly? Will it survive real-world use?
Prototype making isn’t limited to any single industry. Consumer electronics, automotive parts, medical devices, aerospace components, furniture—they all start as prototypes. From a simple plastic casing for a new gadget to complex mechanical assemblies, prototype making brings all kinds of designs to life.
The beauty of a good prototype is that it reveals things your computer screen never can. A 3D model might look perfect, but a physical part shows you the weight, the balance, the texture, and how light plays across its surfaces. These details matter enormously in product development.
Why Should You Bother Making a Prototype?
You might be thinking: with all the advanced 3D modeling software available today, can’t I just skip straight to production? Trust me, I’ve seen people try this. It rarely ends well.
How Does Prototype Making Validate Your Design?
Digital simulations are powerful tools, but they have limits. A prototype lets you hold your design, test it, and see it from every angle. That’s when real problems surface.
I remember working on a handheld device years ago. The 3D model looked sleek and modern. But when we made the first prototype, everyone who held it complained about the same thing: the edges dug into their palms during use. That issue never showed up in any software simulation. A simple prototype saved us from producing thousands of uncomfortable products.
Physical prototypes reveal what screens hide—things like awkward ergonomics, unexpected weight distribution, or parts that visually clash when assembled.
What Can You Learn From Functional Testing?
Prototypes let you test real-world performance in ways simulations can’t match. Will your medical device survive repeated sterilization cycles? Does your children’s toy meet safety standards when dropped from typical heights? How does your kitchen gadget handle exposure to heat and moisture?
These questions need physical answers. Functional testing with prototypes catches problems before they become expensive production mistakes.
How Do Prototypes Help With Stakeholder Communication?
Here’s something I’ve learned from countless product presentations: people struggle to visualize from drawings. Show them a physical prototype, and everything changes.
Investors understand your vision better. Team members give more specific feedback. Manufacturers spot potential production issues earlier. Clients get excited about what’s coming. A prototype bridges the gap between your vision and everyone else’s understanding.
Can Prototype Making Really Reduce Production Risks?
Absolutely, and the numbers back this up. Finding and fixing a design flaw during prototype stage might cost a few hundred dollars. Finding that same flaw after production tooling is made could cost tens of thousands.
Prototype making is insurance against expensive mistakes. Imagine investing in injection molds only to discover a fundamental design flaw. You’re looking at months of delays and thousands in wasted tooling. Prototypes help you catch these issues when they’re still cheap to fix.
What Does the Prototype Making Process Look Like?
Over years of developing products, I’ve refined a process that works consistently. Let me walk you through each step.
Step 1: How Do You Prepare Design Drawings and Define Requirements?
Everything starts with clear drawings and well-defined requirements. This foundation determines everything that follows.
Your design drawings need precise dimensions, material specifications, structural details, and notes about special features. Use CAD software like SolidWorks, AutoCAD, or Fusion 360. These tools let you create accurate 3D models and make changes easily.
But drawings alone aren’t enough. You need to define your prototype’s purpose clearly. Ask yourself:
Is this a visual prototype just to show appearance? A functional prototype to test performance? An engineering prototype to validate structural integrity? Your answer affects every decision that follows—material choice, manufacturing method, and testing criteria.
Get stakeholders involved here too. Engineers, designers, marketing teams, and even potential users can spot requirements you might miss. I’ve seen marketing people identify usability concerns that engineers never considered, simply because they think about products differently.
Step 2: How Do You Choose the Right Materials?
Material selection can make or break your prototype. The right material depends on your prototype’s purpose, expected use, and budget.
Here’s what typically works:
Plastics like ABS, PLA, and nylon are popular for good reason. They’re affordable, easy to machine, and versatile. ABS offers impact resistance for functional prototypes. PLA works great for visual models made with 3D printing. Nylon handles moving parts like gears and hinges.
Metals come into play when you need strength, durability, or heat resistance. Aluminum is lightweight and machines beautifully—perfect for aerospace or automotive prototypes. Steel offers higher strength for industrial components. Titanium, while expensive, provides an excellent strength-to-weight ratio for high-performance applications.
Wood still has its place, especially for early-stage prototypes or furniture designs. It’s cheap, easy to modify, and helps you understand scale and proportion before committing to more expensive materials.
Composites like carbon fiber offer premium performance when weight and strength both matter. They’re common in sports equipment, aerospace, and high-end automotive prototypes.
| Material Type | Best For | Common Methods | Why Choose It |
|---|---|---|---|
| ABS Plastic | Functional prototypes, consumer goods | CNC machining, 3D printing | Tough, machines well, cost-effective |
| PLA Plastic | Visual models, concept work | 3D printing | Biodegradable, smooth finish, cheap |
| Aluminum | Structural parts, aerospace | CNC machining, laser cutting | Light, strong, conducts heat well |
| Steel | Industrial components, high-strength needs | CNC machining, welding | Extremely durable, wear-resistant |
| Wood | Early models, furniture | Laser cutting, hand tools | Inexpensive, easy to modify |
| Nylon | Moving parts, gears | 3D printing, CNC machining | Flexible, wear-resistant |
Step 3: What Goes Into Modeling and Design Refinement?
With materials selected, you refine your design through modeling. This step bridges your initial concept and the final prototype.
Digital modeling in CAD software lets you create precise 3D representations. Modern CAD tools include simulation capabilities like finite element analysis (FEA) , which tests how your design handles stress, heat, or vibration virtually. This catches many issues before you ever cut material.
Sometimes I still recommend physical mockups with cheap materials like foam or cardboard. For ergonomic products especially, nothing beats holding a rough model in your hands. You feel the size, the weight, the grip. These insights often lead to refinements that digital work alone wouldn’t suggest.
Expect multiple iterations here. You might adjust wall thickness for strength. Modify curves for better ergonomics. Reposition features based on how people naturally hold the model. Each iteration improves the design.
Step 4: How Do You Handle Processing and Assembly?
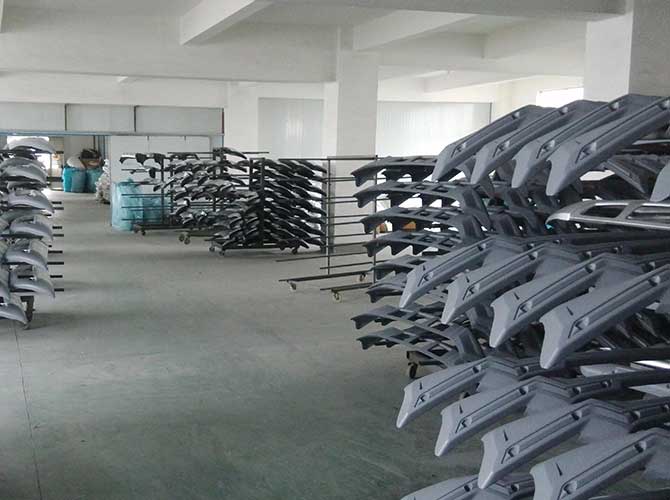
Now you actually make the prototype. The manufacturing method depends on your material, design complexity, and purpose.
CNC machining uses computer-controlled tools to cut precise shapes from solid material. It’s excellent for metal and plastic parts that need tight tolerances. The setup takes time, but results are accurate and repeatable.
3D printing builds parts layer by layer. It’s perfect for complex geometries and quick turnaround. Need a part overnight? 3D printing delivers. Surface finish might need work afterward, but for many prototypes, that’s acceptable.
Laser cutting offers precision for flat materials or simple 3D shapes. It’s fast and accurate for wood, acrylic, and some metals. Great for enclosures, panels, and structural components.
Manual fabrication still has its place. Hand tools let you create simple prototypes quickly without specialized equipment. For one-off parts where precision isn’t critical, sometimes a bandsaw and drill press are all you need.
After manufacturing individual parts comes assembly. This is where fit issues often appear. Holes that line up perfectly on screen might be slightly misaligned in reality. Parts designed to snap together might need more force than expected. Document these issues—they’re valuable design feedback.
Step 5: How Do You Test and Accept the Final Prototype?
Testing confirms your prototype meets requirements. Skip this step at your own risk.
Dimensional testing uses tools like calipers, micrometers, or coordinate measuring machines (CMMs) to verify every critical dimension matches your drawings. Even small deviations can affect assembly and function.
Functional testing puts the prototype through its paces. Does it perform as designed? A new door lock gets tested hundreds of times. A kitchen tool gets used in realistic cooking scenarios. A wearable device gets worn during typical activities.
Structural testing confirms the prototype can handle expected loads. Stress testing, impact testing, fatigue testing—whatever makes sense for your application.
User testing brings real people into the process. Watch them interact with your prototype. Listen to their feedback. Notice where they hesitate or struggle. These observations often reveal improvements you hadn’t considered.
Only when testing confirms everything meets requirements should you accept the prototype. Then you’re ready for next steps—whether that’s more refined prototypes or moving toward production.
What Key Considerations Can Make or Break Your Project?
Beyond the basic process, several factors consistently separate successful prototype projects from problematic ones.
Why Is Defining Clear Goals So Important?
Your prototype’s purpose should drive every decision. A visual prototype for a trade show has different needs than a functional prototype for durability testing. Be specific about what you’re trying to learn or demonstrate.
I’ve seen projects struggle because teams tried to do everything at once—perfect appearance, full functionality, production materials—all in the first prototype. That approach rarely works well. Instead, match your prototype’s sophistication to your current questions. Early prototypes can be rough. Save the polish for later iterations.
How Do You Balance Quality Against Cost?
Prototype costs vary enormously. A simple 3D-printed part might cost fifty dollars. A complex CNC-machined metal assembly might run thousands.
The key is spending money where it matters. If you’re testing fit and function, invest in precise dimensions and appropriate materials. If appearance is secondary, accept visible layer lines or tool marks. Put your budget toward what you actually need to learn.
Remember that prototype making is about reducing risk. Spending a few thousand dollars to validate a design before committing to hundred-thousand-dollar production tooling is money well spent.
Why Should You Think About Manufacturing Scalability?
If mass production is your goal, your prototype should reflect production realities. A design optimized for 3D printing might be impossible to injection mold. Features that work fine in small batches might drive costs through the roof at scale.
Consider your production method during prototype design. Talk with manufacturers early about their capabilities and constraints. What works in prototype might need redesign for production, but understanding those differences upfront saves headaches later.
Who Should You Involve in the Process?
Prototype making works best as collaboration. Engineers ensure technical feasibility. Designers maintain aesthetic vision. Manufacturers provide production expertise. End-users offer usability insights.
I’ve learned to bring diverse perspectives in early. A machinist might spot a feature that’s difficult to cut that an engineer never considered. A user might identify an ergonomic issue no one on the design team noticed. These insights are gold—and they’re free if you ask the right people at the right time.
How Do You Embrace Iteration Effectively?
Here’s a truth about prototype making: first attempts rarely get everything right. That’s not failure—that’s learning. Each iteration reveals something new and brings you closer to a better design.
Plan for multiple rounds. Test, learn, refine, repeat. The most successful product developers I know embrace iteration as essential, not as a sign something went wrong.
How Is Prototype Making Different From Traditional Manufacturing?
Understanding this distinction helps you approach each appropriately.
Traditional manufacturing focuses on producing large quantities efficiently. It invests heavily in tooling, molds, and dies designed for long production runs. Setup takes time, and design changes become expensive once production starts.
Prototype making focuses on small quantities for learning. It uses flexible methods that accommodate quick changes. Per-unit costs might be higher, but total investment stays lower because you’re only making a few. The ability to experiment and refine is built into the process.
Another difference: finish expectations. Production parts need consistent, high-quality finishes across thousands of units. Prototypes might show tool marks or layer lines, and that’s perfectly acceptable if the goal is testing function rather than appearance.
Think of prototype making as exploration and traditional manufacturing as execution. Both matter, but they serve different purposes at different stages.
Yigu Technology’s View on Prototype Making
At Yigu Technology, we’ve seen thousands of designs come through our doors. The ones that succeed almost always share one thing: the teams behind them understood the value of thoughtful prototype making.
Prototype making isn’t just about creating a part. It’s about learning—discovering what works, what doesn’t, and how to make things better before committing to production. Every prototype teaches you something, and that knowledge accumulates into better products and smoother development cycles.
Whether you’re refining a consumer product, validating an industrial component, or exploring a completely new concept, prototype making gives you answers you can’t get any other way. It turns abstract ideas into tangible reality, and that reality drives better decisions at every stage.
Frequently Asked Questions
How long does prototype making usually take?
Simple prototypes might take 2-3 days. Complex assemblies with multiple parts often need 2-4 weeks. Your design complexity, material choices, and manufacturing method all affect timing.
What’s the difference between a prototype and the final product?
A prototype exists to test and learn. It might use simpler materials or have rougher finishes. The final product is optimized for mass production, with consistent quality and market-ready appearance.
Can I use the same materials in prototypes as in production?
Yes, especially for functional testing where material properties matter. For early visual prototypes, cheaper alternatives often make sense to control costs.
How many prototype rounds should I plan for?
Most products benefit from at least 2-3 iterations. Complex or innovative designs might need more. Budget and timeline for multiple rounds—each one improves the result.
What’s the cheapest way to make a prototype?
3D printing with PLA plastic offers the lowest entry cost for many designs. For simple shapes, manual fabrication with readily available materials also keeps expenses down.
Discuss Your Projects with Yigu Rapid Prototyping
Ready to turn your design into a physical reality? At Yigu Rapid Prototyping, we’ve helped product creators across every industry bring their ideas to life. Our team combines technical expertise with practical experience to deliver prototypes that answer your specific questions.
Whether you need a simple visual model or a complex functional assembly, we’re here to help. Let’s talk about your project, your timeline, and what you’re trying to learn. Together, we’ll create a prototype plan that moves your product development forward.