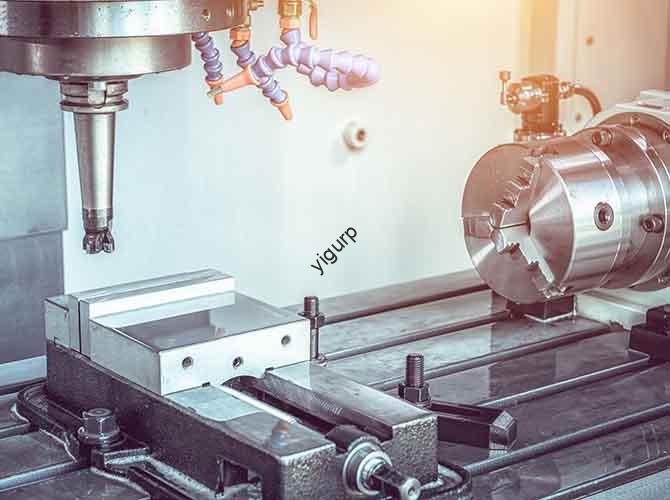
Bringing a new product to life involves countless small decisions. One that often gets overlooked is how you label or mark your prototype. Slapping on a sticker might seem fine for early tests. But what happens when you need to check if a logo looks right, or if a serial number will survive years of use? This is where prototype laser engraving becomes essential. It uses a focused laser beam to burn permanent, high-precision marks onto parts. Think text, logos, QR codes, or safety warnings. This process helps teams catch design flaws early, prove concepts, and ensure a smooth jump to mass production. This article explains how it works, why it matters, and how to use it without costly mistakes.
What Are the Core Roles of Prototype Laser Engraving?
Laser engraving isn’t just about making things look pretty. It serves three practical purposes in product development.
How Does It Help with Appearance Verification?
Before you make thousands of units, you need to know the design looks right. Engraving lets you simulate the final product’s look accurately.
- Check logo placement: You can engrave your brand logo on a phone case prototype to see if it’s centered and readable.
- Verify text clarity: Test product names like “Wireless Earbuds” or parameter labels like “128GB Storage” in the actual font and size.
- Get stakeholder buy-in: A prototype with a real, permanent mark looks more professional than one with a paper sticker. It helps secure approval from investors or managers.
Why Is Functional Marking Critical?
Beyond looks, marks often serve a job. Laser engraving creates marks that last.
- Traceability: Engrave unique serial numbers like “SN-2024-0001” or QR codes on each prototype. This lets you track which version had which design change during testing.
- Anti-counterfeiting: Permanent marks are hard to remove or fake, adding security.
- Safety compliance: Parts that handle high voltage need clear warnings like “High Voltage Hazard.” Engraving ensures these warnings don’t rub off.
How Does It Support Surface Treatment Testing?
The laser interacts differently with every material. Testing this early prevents disasters later.
- Check material reaction: See how aluminum alloy handles the laser. Too much power might warp thin edges. Test how ABS plastic reacts. Some plastics discolor or bubble if settings are wrong.
- Validate for production: If the final product will be laser marked, your prototype must prove the process works on that material. This avoids discovering issues after spending on molds and tooling.
What Is the Step-by-Step Process?
Getting a good engraving isn’t magic. It follows a clear workflow. Skipping steps leads to bad marks or damaged parts.
What Goes into Preliminary Preparation?
Good preparation prevents problems. Start with the artwork.
- Create vector art: Use software like Adobe Illustrator or AutoCAD. Text, logos, and codes must be in vector format (like .dxf or .ai). This keeps them sharp at any size. Define everything: font (say, Arial Bold), character size (like 2mm), and exact placement on the part.
- Plan for the material: Think about how the material behaves. A setting that works on stainless steel will burn a hole through ABS plastic. You’ll adjust this later, but knowing the material guides your planning.
How Do You Choose the Right Equipment and Settings?
The machine and its settings must match the material. Using the wrong one is a common mistake.
| Material Type | Recommended Laser | Typical Settings |
|---|---|---|
| Metals (steel, aluminum, titanium) | Fiber laser (20W-30W) | Power: Medium-High; Speed: Moderate; Frequency: 10-50 kHz |
| Plastics (ABS, PC, nylon) | Fiber laser (5W-10W) or UV laser for fine detail | Power: Low; Speed: Fast; Frequency: 20-40 kHz |
| Thin/Sensitive Materials (films, thin silicone) | UV laser (<5W) | Power: Very Low; Speed: High; Frequency: 30-50 kHz |
Real example: A client once asked us to engrave a QR code on a thin aluminum nameplate. Using standard metal settings (25W power, medium speed) melted a tiny hole right through the 0.3mm material. We switched to a UV laser at 4W power and high speed. The code was clear, and the plate was intact.
Why Is Precise Positioning So Important?
The part must not move during engraving. Even a 0.1mm shift can ruin the mark.
- Secure the part: Use custom jigs or fixtures. For a flat rectangle, a simple clamp block works. For a cylinder, you need a rotary attachment that spins the part under the laser.
- Set the origin: Tell the machine exactly where the top-left corner of your design sits on the physical part. Most software lets you jog the laser head to the spot and set that as the zero point.
What Happens During the Actual Engraving?
This step is automated but needs monitoring.
- Run the program: The laser head follows the preset path. It fires pulses that vaporize a microscopic layer of material. For metals, this creates a color change or slight depression. For plastics, it often creates a raised or recessed mark.
- Watch for issues: Look for smoke or sudden changes in the mark’s appearance. If something looks wrong, stop and adjust.
What Does Proper Post-Processing Look Like?
The part isn’t done when the laser stops.
- Clean the surface: Engraving leaves residue. Wipe the area with alcohol or a dedicated cleaning solution. This removes dust and reveals the true mark clarity.
- Inspect the mark: Check three things. Is the text crisp under a microscope or loupe? Is the depth sufficient (say, 0.05mm for plastic)? Is the position accurate to within ±0.1mm? Use a measuring microscope or CMM if needed.
What Are Common Problems and How Do You Fix Them?
Even with care, things go wrong. Here is a troubleshooting guide.
Why Are My Marks Unclear or Faint?
This is the most common complaint.
- Root causes: Laser power too low. Material is too reflective (like polished steel). Or the surface is dirty with oil.
- Solutions: Increase power by 5-10% on a test piece first. For reflective metals, try a metal marking spray that absorbs laser energy. Clean the surface with isopropyl alcohol before starting.
What Causes Excessive Burning or Melting?
Too much material removal ruins the part.
- Root causes: Power is too high. The laser is moving too slowly. Or the frequency is too low, putting too much energy into one spot.
- Solutions: Reduce power by 10-15%. Increase the engraving speed by 20%. Raise the frequency to 40-50 kHz to spread the energy out.
How Do You Fix Position Errors?
The mark is in the wrong place.
- Root causes: The prototype moved during engraving because it wasn’t clamped tight. Or the starting position was set wrong manually.
- Solutions: Use better fixtures. For high-volume or high-precision work, invest in a system with CCD camera alignment. The camera finds the part automatically and corrects the position.
What Are Real-World Examples of Laser Engraving?
Seeing it in action helps. Here are four industries where it’s vital.
- Electronics: Engineers engrave component numbers like “R123” on circuit board prototypes. This helps assemble and test the right parts.
- Medical Devices: Surgical tools need unique IDs like “SN-MED-0001” for tracking. Regulations often require permanent marks, making laser engraving the only choice.
- Automotive: Brackets get part numbers like “Part #A890” and production dates. Dashboard trims get brand logos engraved to check the look and feel.
- Mechanical Equipment: Metal housings get model numbers like “Model X7” and warnings like “Do Not Disassemble” that won’t wear off in a factory.
What Are the Pros and Cons?
Laser engraving is powerful, but it’s not the answer for everything.
Advantages
- High Precision: You can engrave text as small as 0.1mm with accuracy down to ±0.01mm. Perfect for tiny QR codes.
- Permanent: Unlike ink stamps or stickers, laser marks don’t fade, scratch off, or dissolve in solvents.
- Flexible: Change the design in software instantly. No need for new stamps or molds. Great for testing multiple logo versions.
- Eco-Friendly: No inks, chemicals, or consumables. Just the laser and the part.
Limitations
- Material Limits: Clear acrylic or glass can be tricky. The laser passes through without marking. Some soft rubbers melt instead of engraving.
- Single Color: The mark color comes from the material reacting. It’s usually dark gray on metal or beige on plastic. No bright colors like red or blue.
- Equipment Cost: A good fiber laser machine costs $10,000 to $50,000. For small projects, it’s cheaper to hire a service.
Conclusion
Prototype laser engraving is a practical tool for any product team. It lets you verify logos and text before production. It creates permanent serial numbers for tracking test units. And it tests how materials react to laser marking, preventing nasty surprises later. The process is straightforward: prepare your artwork, choose the right laser settings for your material, secure the part, run the job, and inspect the result. Watch out for common issues like unclear marks from low power or melting from high power. While it has limits—like single-color output and high machine costs—the precision and permanence it offers are unmatched. For most development projects, partnering with an experienced service provider is the smartest way to use this technology.
FAQ
Can prototype laser engraving be used on flexible materials like silicone?
Yes, but carefully. Standard fiber lasers can melt thin silicone (under 1mm). For these materials, a low-power UV laser (3W-5W) is better. It creates a shallow, clear mark without burning. Always test on a scrap piece first to find the right settings.
How long does a typical prototype laser engraving project take?
It’s fast. For a single part like a 5cm x 5cm plastic cover, the whole job takes about 30 minutes to 2 hours. Setup and file prep take about 10 minutes. The actual engraving is 5-10 minutes. Cleaning and inspection take the rest.
Is prototype laser engraving good for making thousands of parts?
No. It’s perfect for prototypes and small batches (1-100 units). For mass production (1,000+ units), manufacturers switch to faster methods. They might use pad printing or integrate a laser marker directly into the assembly line for speed.
Discuss Your Projects with Yigu Rapid Prototyping
Need a reliable partner for your next prototype run? At Yigu Rapid Prototyping, we handle all kinds of laser engraving jobs. From tiny serial numbers on medical devices to brand logos on automotive parts, we match the right laser and settings to your material. Our team in Shenzhen helps you avoid common pitfalls like burn marks or faint engravings. We also combine engraving with our CNC machining and 3D printing services to deliver complete, market-ready prototypes. Contact us to discuss your project and get a clear, detailed quote.