Introduction
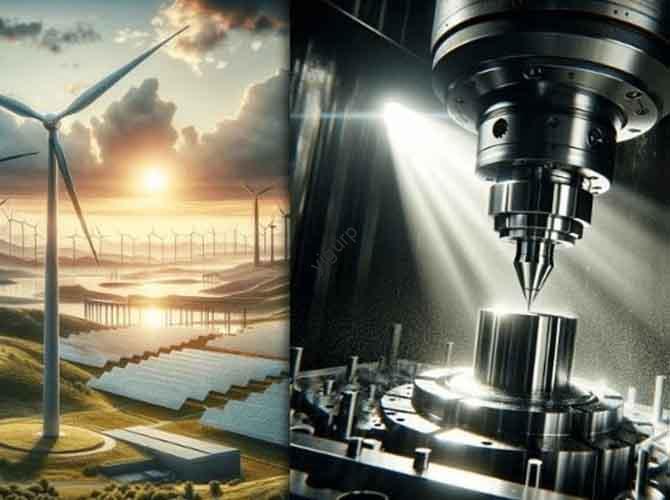
Professional hardware prototype machining is the bridge that turns a digital design into a physical metal part you can hold, test, and validate. Before any product goes into mass production, engineers need a working model—a prototype—to check fit, function, and performance. This process involves precision material removal or addition to create metal components that meet strict specifications. Whether you are developing an aerospace bracket, a surgical tool, or an industrial machine part, understanding how professional hardware prototype machining works saves you time, money, and headaches. This guide walks you through the core processes, material choices, precision control, surface finishes, and cost-saving tactics, all explained in plain English with practical examples.
The Core Machining Processes: Which One Fits Your Part?
Not all prototypes are made the same way. The shape, complexity, quantity, and material of your part determine the best machining process. Getting this choice right from the start keeps your project on track.
CNC Machining: The Workhorse for Precision
CNC machining uses computer-controlled tools to remove material from a solid block of metal. It is the most common process for professional hardware prototypes because it delivers high precision and works with almost any metal.
- Key advantages: Tolerances down to ±0.05mm, excellent surface finish, and the ability to create threads, holes, and flat surfaces.
- Best for: Solid metal parts like equipment housings, mechanical brackets, and heat sinks. It handles quantities from one to fifty pieces efficiently.
- Real-world example: A medical device company needed five prototype handles for a new surgical instrument. CNC machining produced them from stainless steel 304 in three days, allowing surgeons to test the ergonomics and strength before committing to production tooling.
Metal 3D Printing: Freedom for Complex Geometry
Metal 3D printing builds parts layer by layer from metal powder. It eliminates the need for tooling and opens up design possibilities that machining cannot achieve.
- Key advantages: Creates internal cavities, lattice structures, and organic shapes that are impossible to mill. No material waste.
- Best for: Complex parts like aerospace components with internal cooling channels, medical implants with porous surfaces, and custom gears. Typical part weight is 50 to 200 grams, and quantities are low—one to twenty pieces.
- Case study: An aerospace startup designed a bracket with a complex lattice core to reduce weight. CNC machining would have required splitting the part into multiple pieces and welding them together. Metal 3D printing produced it as a single piece, saving 40% weight and passing all stress tests.
Stamping: Speed for Thin-Walled Parts
Stamping uses a die to punch or form sheet metal into shape. It is fast and repeatable for parts with consistent thickness.
- Key advantages: High speed for medium to high volumes, low unit cost once the die is made, and good dimensional consistency.
- Best for: Thin metal sheets from 0.5mm to 3mm thick, such as electronic enclosures, automotive body panels, and connector shells. Suitable for quantities above fifty pieces.
- Practical tip: If you need one hundred prototype covers for a consumer electronics device, stamping is more economical than machining each one individually, even with the initial die cost.
Die Casting: Efficiency for Complex Housings
Die casting forces molten metal into a steel mold under high pressure. It produces complex shapes with thin walls and smooth surfaces.
- Key advantages: High production efficiency, excellent for transferring to mass production, and good mechanical properties.
- Best for: Complex three-dimensional shapes in non-ferrous metals like aluminum and zinc alloy. Ideal for quantities above one hundred pieces, such as automotive engine components and consumer electronics housings.
- Process comparison: For a prototype batch of two hundred aluminum housings, die casting costs less per piece than CNC machining because the mold cost is spread across all units.
How Do You Choose the Right Material for Your Prototype?
Material selection affects how your prototype performs, how easy it is to machine, and what it costs. Matching the material to your testing goals prevents over-engineering or under-performing.
Common Materials and Their Machining Characteristics
| Material | Key Properties | Machining Difficulty | Relative Cost | Best Processes |
|---|---|---|---|---|
| Aluminum Alloy (6061/6063) | Lightweight (2.7g/cm³), good thermal conductivity, easy to machine | Low | Low | CNC, die casting |
| Stainless Steel (304/316) | High strength, corrosion resistant, durable | Medium | Medium | CNC, 3D printing |
| Copper | Excellent electrical/thermal conductivity, malleable | Low to Medium | Medium-High | CNC, stamping |
| Titanium Alloy | High strength-to-weight ratio, biocompatible, corrosion resistant | High | High | CNC, 3D printing |
| Zinc Alloy | Low melting point, easy to cast, good dimensional stability | Low | Low-Medium | Die casting |
Material Selection Tips from Real Projects
- For functional testing of load-bearing parts: Use stainless steel 304. A client once tested an industrial robot arm bracket in aluminum, and it deformed under load, wasting two weeks. Switching to stainless steel gave accurate stress data and saved the project timeline.
- For appearance models: Choose aluminum alloy instead of titanium. Aluminum costs about one-tenth of titanium and machines faster. An electronics startup saved $3,000 on prototype casings by using aluminum with a brushed finish instead of titanium.
- For medical or food-contact prototypes: Select titanium alloy or 316 stainless steel. These materials resist corrosion from sterilization and are biocompatible. A surgical tool prototype in 316 stainless steel passed all regulatory screening tests without issues.
What Level of Precision Does Your Prototype Really Need?
Precision is about making sure every dimension matches your design. But not every feature needs ultra-high precision. Understanding tolerance levels helps you balance quality and cost.
Precision Levels and How to Achieve Them
| Precision Level | Typical Tolerance | Equipment Needed | Example Applications |
|---|---|---|---|
| Conventional | ±0.1mm | 3-axis CNC, standard tools | Brackets, simple housings |
| High Precision | ±0.05mm | 5-axis CNC, EDM | Aerospace parts, medical implants |
| Ultra-High | ±0.005mm | Grinding, laser machining | Sensor components, micro-connectors |
How to Verify Precision After Machining
You cannot assume a part is correct just because it came off a CNC machine. Inspection tools confirm the dimensions.
- Calipers and micrometers: For quick checks of length, diameter, and thickness. They measure to ±0.01mm and catch gross errors.
- Coordinate Measuring Machine (CMM) : For complex parts, a CMM scans hundreds of points and creates a 3D map. It confirms that every hole, surface, and angle meets your tolerance. A recent project for an aerospace fuel system component used CMM inspection to verify all 150 critical dimensions.
- Surface roughness tester: Measures smoothness. For parts with moving contact or fluid flow, aim for Ra ≤0.8μm. A hydraulic valve prototype failed its first test because the surface was too rough; a quick polish to Ra 0.6μm solved the leak.
Surface Treatments: More Than Just Looks
Surface treatments protect your prototype from corrosion, improve wear resistance, and can add color or branding. Choosing the right treatment depends on how the part will be used.
Common Surface Treatments and Their Benefits
| Treatment | Purpose | Cost per Piece (CNY) | Compatible Materials |
|---|---|---|---|
| Anodization | Corrosion resistance, color options, harder surface | 200 – 500 | Aluminum alloys |
| Electroplating | Conductivity, corrosion resistance, shiny finish | 500 – 2,000 | Stainless steel, copper, zinc |
| Sandblasting | Matte finish, hides machining marks, better grip | 200 – 400 | Aluminum, steel, titanium |
| Polishing | Mirror finish, reduced friction | 100 – 300 | All metals |
| Laser Engraving | Logos, part numbers, patterns | 100 – 300 | All metals |
Practical Advice on Surface Finishes
- Skip unnecessary treatments: An internal bracket that no one sees does not need electroplating. Basic sandblasting at 200 CNY cleans it up and prevents rust for a fraction of the cost.
- Match treatment to function: A client making electrical connectors needed gold plating on contact surfaces to ensure conductivity, but the outer shell only got nickel plating for corrosion resistance. This split approach saved 40% on surface finishing costs.
- Hide machining marks with texture: If your prototype has visible tool marks, sandblasting or bead blasting creates a uniform matte finish that hides imperfections. This trick saved a consumer product prototype from being scrapped when minor milling marks were visible under bright light.
How Can You Reduce Costs Without Sacrificing Quality?
Professional hardware prototypes can be expensive, but smart choices keep your budget under control. The key is knowing where to compromise and where to invest.
Design Optimization Strategies
- Simplify geometries: Remove decorative grooves or non-functional curves that add machining time. One client cut 25% from their CNC cost by eliminating unnecessary fillets and pockets from a bracket design.
- Combine multiple parts: If you have three separate components that bolt together, consider designing them as one integrated piece. This reduces machining operations and assembly labor. A robotics company saved $1,200 on a prototype by merging three aluminum parts into one complex CNC-machined block.
Process Selection Tactics
- For one to ten pieces: Stick with CNC machining. It avoids tooling costs and delivers parts quickly. Metal 3D printing only makes sense if the geometry is too complex for milling.
- For fifty or more thin-walled parts: Switch to stamping. The mold cost might be 3,000 CNY, but spread over fifty units, it beats CNC machining on price per part.
- For simple shapes in soft materials: Consider waterjet cutting or laser cutting for flat parts, then bend them. This hybrid approach can cut costs by 50% compared to full CNC machining.
Surface Treatment Shortcuts
- Use anodization for aluminum: It is the most cost-effective finish, providing corrosion protection and color at 200 to 500 CNY per piece.
- Skip plating for internal parts: If the part is inside the assembly and never exposed, basic sandblasting or even as-machined finish is enough. This saved a client 1,500 CNY on a batch of ten prototypes.
- Polish only critical areas: Instead of polishing the entire surface, focus on areas that matter—like sealing surfaces or visible faces. The rest can stay as-machined.
Getting Accurate Quotes to Avoid Surprises
Hidden costs often appear when quotes are vague. Follow this process to get clear pricing:
- Provide 3D CAD files: Submit STEP, IGS, or STL formats. 2D sketches miss details and lead to misunderstandings.
- Specify everything in writing:
- Material: “6061 aluminum, 5mm thick”
- Tolerance: “±0.1mm on all external dimensions”
- Surface: “Black anodization, Ra ≤1.6μm”
- Quantity: “10 pieces for testing, with option for 50 more”
- Ask for a cost breakdown: Request separate line items for material, machining, setup, and surface treatment. If surface treatment is 40% of the total, you know where to negotiate or find alternatives.
Conclusion
Professional hardware prototype machining is about making smart decisions at every step. Start by clarifying what you need the prototype for—is it a functional test, a visual model, or a pre-production sample? Then choose the process that matches: CNC machining for solid parts with tight tolerances, metal 3D printing for complex internal structures, stamping for thin-walled parts in higher volumes, or die casting for complex housings. Pick materials that align with your testing goals without over-spending—aluminum works for most applications, while titanium and stainless steel are reserved for demanding environments. Set realistic precision targets, inspect your parts properly, and apply surface treatments only where they add value. By following these guidelines, you get professional hardware prototypes that perform as intended, arrive on time, and fit your budget.
Frequently Asked Questions
When should I choose metal 3D printing over CNC machining for hardware prototypes?
Choose metal 3D printing when your design has internal features that CNC tools cannot reach, like lattice structures, curved internal channels, or undercuts. It is also ideal for very small parts weighing 50 to 200 grams and for quantities of one to five pieces where mold costs are not justified. For solid parts with simple geometry and quantities above ten, CNC machining is faster and more cost-effective.
How does material choice affect machining time and cost?
Harder materials like titanium alloy slow down machining speeds. CNC feed rates for titanium are 50% to 70% slower than for aluminum, increasing labor costs. Material cost also varies widely—titanium costs about twenty times more than aluminum. For a 100-gram part, switching from aluminum to titanium could raise the material cost from 3 CNY to 60 CNY, plus additional machining time. Choose aluminum or 304 stainless steel for most projects unless the application demands titanium’s strength or biocompatibility.
What is the most cost-effective surface treatment for aluminum alloy prototypes?
Anodization is the most cost-effective option for aluminum. It costs 200 to 500 CNY per piece, provides excellent corrosion resistance, and allows color customization. For internal parts or non-visible surfaces, sandblasting at 200 to 400 CNY hides machining marks and provides a clean finish without the extra cost of anodization. Only use electroplating if you need enhanced electrical conductivity or a specific metallic color that anodization cannot achieve.
How do I ensure my prototype meets precision requirements?
Start by specifying clear tolerances on your 2D drawing or in your CAD file. Communicate these to your machining partner before production. After machining, use inspection tools: calipers for quick checks, a CMM for complex parts, and a surface roughness tester for finish quality. Request an inspection report from your supplier, especially for critical dimensions. If you need ±0.05mm precision, confirm that the machine shop uses equipment capable of holding that tolerance, such as 5-axis CNC centers.
What information should I include when requesting a quote?
Include a 3D CAD file in STEP or IGS format, specify the exact material grade and thickness, list all critical tolerances, describe the required surface treatment, and state the quantity needed. Also, mention if the prototype is for functional testing or visual approval, as this affects process choices. The more details you provide, the more accurate your quote will be, and the lower the risk of unexpected costs later.
Discuss Your Projects with Yigu Rapid Prototyping
At Yigu Technology, we understand that every prototype tells a story about your product’s future. Our team works closely with engineers and product designers to turn concepts into metal parts that perform. Whether you need CNC-machined aluminum brackets, 3D-printed titanium implants, or stamped stainless steel enclosures, we provide the expertise to guide your material choices, process selection, and precision requirements. Located in the heart of China’s hardware manufacturing hub in Shenzhen, we combine local supply chain advantages with rigorous quality control. If you have a project in mind or need advice on your next prototype, reach out to us. Let’s discuss how we can bring your design to life with professional hardware prototype machining that meets your standards and your timeline.