Introduction
If you have an idea for a new toy, turning that concept into a physical prototype is the most critical step in the development process. The method you choose will directly impact how much it costs, how fast you get your model, and how well it represents your final vision. Whether you are designing a detailed action figure, a simple wooden block, or a small batch of plush animals, there is a processing method suited to your needs. This guide breaks down the core methods—3D printing, CNC machining, silicone molding, and handcrafting—and provides a clear framework for choosing the right one based on your toy’s complexity, budget, and timeline.
What Are the Core Processing Methods for Toy Prototypes?
Each method works differently and is best suited for specific types of toys and production volumes. Understanding their core principles and workflows is the first step.
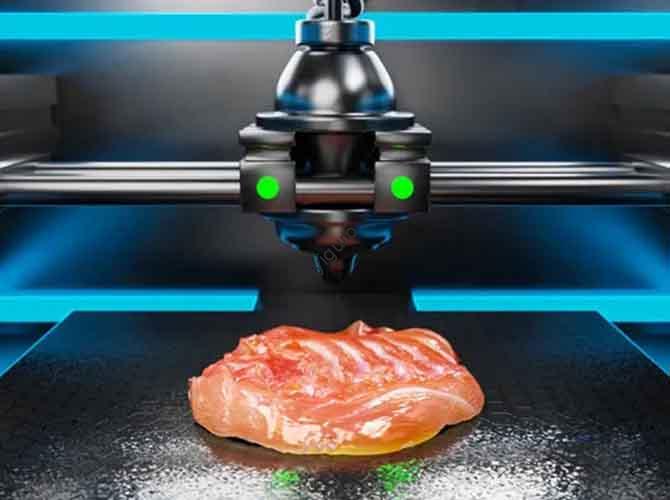
3D Printing
- Core Principle: Builds a 3D model layer by layer from a digital file, using materials like plastic filament (PLA, ABS) or liquid resin.
- Step-by-Step Workflow:
- Model Preparation: Export your 3D CAD file as an STL and add supports for any overhanging parts.
- Parameter Setting: Choose layer thickness (e.g., 0.1mm for smooth surfaces) and infill percentage.
- Printing: The printer builds the object automatically.
- Post-Processing: Remove supports, sand, and polish to smooth out layer lines.
- Ideal Toy Types: Complex shapes like action figures with movable joints, intricate puzzle pieces, or highly detailed miniatures.
- Key Advantages: Fast turnaround (4-24 hours), no need for expensive molds, and excellent for capturing fine details.
CNC Fine Carving
- Core Principle: Uses computer-controlled cutting tools to carve a part from a solid block of material like wood, plastic, or metal.
- Step-by-Step Workflow:
- Design Import: Convert your 3D model into G-code, the instructions for the machine.
- Material Fixing: Secure the material block to the machine bed.
- Toolpath Optimization: Set cutting depth and speed to ensure a clean cut without damaging the material.
- Carving & Finishing: The machine carves the part. The surface is then sanded or sandblasted for a smooth finish.
- Ideal Toy Types: High-precision parts like mechanical gears, wooden blocks, or durable components like a toy car’s axle.
- Key Advantages: Ultra-high precision (up to ±0.05mm), produces very durable parts, and works with rigid materials.
Silicone Molding & Replication
- Core Principle: A master prototype is used to create a flexible silicone mold. Liquid resin is then poured into this mold to create multiple copies.
- Step-by-Step Workflow:
- Master Prototype: Create a high-quality master, often using 3D printing.
- Silicone Mold Production: Encasing the master in liquid silicone, which cures to form a mold.
- Demolding & Replication: Remove the master and pour PU resin into the mold to create copies.
- Trimming & Assembly: Cut off excess material and assemble any multi-part toys.
- Ideal Toy Types: Small-batch production of 10-50 units, like dolls, toy animals, or collectible figurines.
- Key Advantages: Very cost-effective for small batches, preserves all details from the master, and allows for fast replication (3-5 days per batch).
Handcrafting
- Core Principle: Manually shaping materials like clay, wood, foam, or fabric using tools and techniques like carving, sculpting, and sewing.
- Step-by-Step Workflow:
- Material Selection: Choose your medium, such as clay for sculpting or fabric for a plush toy.
- Shaping & Sculpting: Manually form the material into the desired shape.
- Finishing: Sand, paint, and add details like eyes or clothing.
- Ideal Toy Types: Artisanal, one-of-a-kind toys like custom plush bears, hand-painted figurines, or traditional wooden toys.
- Key Advantages: No special equipment needed, highly customizable, and perfect for unique, non-replicable items.
How to Compare and Choose the Right Method?
Selecting the best method involves weighing several key factors against your project’s specific needs.
| Factor | 3D Printing | CNC Fine Carving | Silicone Molding | Handcrafting |
|---|---|---|---|---|
| Batch Size | 1–10 units | 1–20 units | 10–50 units | 1–5 units |
| Toy Complexity | High (undercuts, hollow parts) | Medium (best for simple, rigid shapes) | High (replicates complex master) | Medium (limited by manual skill) |
| Cost (Per Unit) | $5–$50 | $20–$200 | $3–$15 | $10–$100+ |
| Precision | ±0.1–0.5mm | ±0.05–0.1mm (Highest) | ±0.1–0.3mm | ±1–5mm (Lowest) |
| Timeline | 4–24 hours | 1–3 days | 3–5 days (for a batch) | 1–7 days |
| Best For | Rapid iteration of complex designs | High-precision mechanical parts | Small-batch replication of detailed toys | Unique, artisanal, one-off toys |
Decision-Making Examples
- Scenario 1: A startup needs 5 prototypes of a complex action figure with movable joints in 3 days.
- Choice: 3D Printing (resin SLA) . It is fast, captures fine details like textured armor, and avoids the high cost of mold-making for just five parts.
- Scenario 2: A manufacturer wants 30 copies of a simple wooden toy car for market testing.
- Choice: Silicone Molding. First, create a single master by CNC machining wood. Then, use a silicone mold to replicate 30 copies in PU resin for a low per-unit cost.
- Scenario 3: An artist wants a one-of-a-kind plush toy with custom embroidery.
- Choice: Handcrafting. This is the only way to achieve the level of customization needed for fabric selection, sewing, and unique embroidery details.
What Are the Critical Post-Processing Steps?
Post-processing is what turns a raw prototype into a presentable, functional, and safe model.
Surface Finishing
- Sanding & Polishing: This removes visible layer lines from 3D prints or tool marks from CNC machining. It involves using progressively finer grit sandpaper (e.g., from 200 to 1000 grit) to create a smooth surface. This is essential for safety, as it removes any sharp edges.
- Coloring & Decoration: This brings the prototype to life. Methods include spray painting for even color, water transfer printing for applying complex patterns like camouflage, and hand painting for small, detailed features like eyes.
Assembly & Functional Testing
- Component Assembly: Multi-part toys need to be put together. This can involve using non-toxic glue for permanent bonds or small screws for parts that may need to be disassembled.
- Functional Validation: This step tests how the toy works. For a toy car, you would test if the wheels spin freely. For an electronic toy, you would verify that buttons work and sounds play correctly. Joints should be tested for durability by moving them repeatedly.
Safety Compliance
For any toy, especially those intended for children, safety is paramount.
- Edge Blunting: All sharp edges must be removed. This is often done by filing or sanding them down to a minimum radius.
- Small Part Check: Any part small enough to be a choking hazard must be securely attached. Testers use a standard “choking hazard tester” (a cylinder about 31.75mm in diameter) to check if parts can be swallowed. If they fit, they must be glued or fastened permanently.
What Are Common Problems and Troubleshooting Tips?
Even with the right method, issues can arise. Here is how to fix some common problems.
- Problem: Visible layer lines on a 3D-printed toy.
- Solution: Reduce layer thickness in the printer settings. After printing, sand thoroughly starting with coarse grit paper and moving to fine grit, then polish.
- Problem: Rough surface on a CNC-machined part.
- Solution: The cutting tool may be dull and needs replacing. Try reducing the cutting speed or feed rate. A final sandblasting can also create a uniform matte finish.
- Problem: Silicone mold deforms during replication.
- Solution: Use a silicone with a higher hardness rating (e.g., 70A-80A). Always apply a release agent to the master model before making the mold.
- Problem: Uneven paint coverage on a handcrafted toy.
- Solution: Apply several thin coats of paint, allowing each coat to dry fully. Using an airbrush for large areas can provide a much more even finish than a brush.
Conclusion
Choosing the right method for your toy prototype is a balancing act between complexity, quantity, budget, and time. 3D printing is unmatched for speed and creating complex, one-off designs. CNC machining is the choice for high-precision, durable parts. Silicone molding is the most cost-effective way to produce small batches. And handcrafting remains essential for unique, artisanal creations. By carefully considering your project’s specific needs and following the decision-making framework in this guide, you can select the most efficient and effective path from your idea to a tangible, testable, and safe toy prototype.
Frequently Asked Questions
1. Can I combine different methods for one prototype?
Yes, absolutely. This is a common and effective approach. For example, you might 3D print a complex head for a doll, CNC machine its simple body from wood, and handcraft its fabric clothes. This lets you use the best method for each part.
2. What is the most cost-effective method for 10 to 15 detailed dolls?
Silicone molding is the best choice. First, create a single, highly detailed master using 3D printing. Then use that master to make a silicone mold, which you can use to cast 10 to 15 copies in PU resin. This is significantly cheaper than 3D printing each copy individually.
3. How do I ensure my CNC-machined toy has no sharp edges?
You need to address this in two stages. First, design your part with rounded edges (a radius of at least 0.5mm) in your 3D model. After machining, use a deburring tool and sandpaper to smooth any sharp edges left by the cutting process.
4. What is the fastest way to get a single prototype of a simple toy?
FDM 3D printing with a common plastic like PLA is typically the fastest and cheapest way. You can often have a simple prototype printed in just a few hours for a very low cost.
5. Are the materials used in these methods safe for children’s toys?
The raw materials (like PLA, ABS, or PU resin) are not automatically child-safe. Safety comes from proper post-processing and finishing. You must ensure all surfaces are smooth, edges are blunted, small parts are securely fastened, and any paints or coatings used are non-toxic and compliant with safety standards like ASTM F963 or EN 71.
Discuss Your Projects with Yigu Rapid Prototyping
At Yigu Rapid Prototyping, we specialize in helping toy developers and manufacturers bring their ideas to life. Our team of engineers has extensive experience across all the major prototyping methods and can guide you to the most efficient and cost-effective solution for your specific toy concept. We can help with everything from initial design for manufacturability (DFM) reviews to material selection, prototyping, and ensuring your models meet safety standards. If you have a toy idea you’d like to discuss, contact us today.