Creating a physical version of your favorite anime character is a rewarding challenge. An anime prototype is a detailed, high-quality model that captures the look and feel of a character from a show, game, or movie. Unlike a simple 3D print, this process focuses on artistic accuracy—getting the facial expression right, the clothing folds perfect, and the colors exact. This guide breaks down the entire process into six clear stages. Whether you’re a beginner or a hobbyist looking to improve, you’ll learn how to turn a 2D image into a stunning 3D collectible.
1. Preliminary Preparation: How Do You Lay the Foundation for Accuracy?
Before you touch any software or printer, you need a clear plan. This stage prevents mistakes that are hard to fix later.
How Do You Define the Core Requirements?
First, decide exactly what you are making. Use a simple checklist.
- Prototype form: What pose will the character be in? Standing, fighting, or sitting? For a Tanjiro prototype from Demon Slayer, you might choose a fighting stance holding his sword.
- Size and scale: What scale will you use? Common scales for collectibles are 1:7 (around 20-25cm tall) or 1:8. A 1:7 scale Tanjiro would be about 22cm tall.
- Purpose: Is it just for display? Or do you want movable joints to change the pose? This affects how you design the internal structure.
What References Should You Gather?
You cannot rely on memory. You need exact references.
- Official sources: Find anime stills and official character “setting sheets.” These show the character from multiple angles and often include details like clothing patterns and weapon dimensions.
- Supporting materials: Look at official posters and art books.
- Organize your files: Create a folder on your computer with subfolders like “Face Details,” “Clothing Textures,” and “Sword Patterns.” This saves you from searching for a reference later.
2. 3D Modeling: How Do You Turn 2D Art into a 3D Form?
This is where you build the digital model. It’s the most skill-intensive part of the process.
Which Software Should You Use?
Different tools are good for different tasks.
| Software | Key Strengths | Best For | Skill Level |
|---|---|---|---|
| ZBrush | Excellent for sculpting fine details like hair strands and wrinkles. | Character faces, detailed textures on clothing. | Intermediate to Advanced |
| Blender | Free and powerful. Good for both modeling and rendering. | Full character models, simple props. Great for learning. | Beginner to Advanced |
| Maya / 3ds Max | Strong tools for creating complex structures and moving parts. | Models with internal joints, robot armor, or intricate props. | Advanced |
What Are the Best Practices for Modeling an Anime Character?
Follow these rules to make a model that prints well.
- Control the proportions: Use the scale rulers in your software. In a 1:7 scale model, the character’s head should be about 3cm tall to look correct.
- Add the details: In ZBrush, use “Alpha Brushes” to stamp fabric textures onto the clothing. This adds realism.
- Split the model into parts: Don’t model the character as one solid piece. Split it into a head, torso, arms, legs, and accessories like a sword. This makes sanding and painting much easier. Leave a tiny 0.1-0.2mm gap between parts so they fit together tightly after printing.
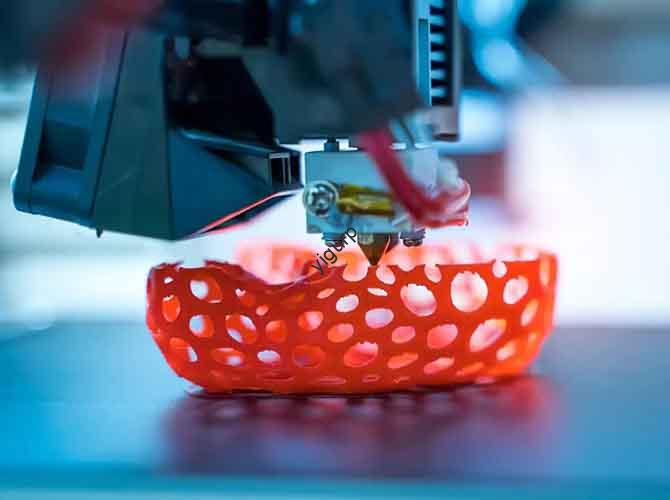
3. 3D Printing Preparation: How Do You Set Up for Success?
Now you need to prepare your digital model for the printer.
What Slicing Parameters Should You Use?
“Slicing” software like Cura converts your 3D model into instructions for the printer.
| Parameter | Recommended Setting | Why It Matters |
|---|---|---|
| Layer Height | 0.1mm for detailed parts (face), 0.2mm for larger parts (torso). | Thinner layers capture fine details like eye pupils. Thicker layers print faster. |
| Infill Density | 20-30% | This makes the model strong enough to handle without being too heavy or using too much material. A hollow sword handle would be weak. |
| Support Structure | 40-60% density | Supports are needed for overhanging parts like outstretched arms or floating hair. They are removed after printing. |
| Printing Speed | 40-60 mm/s | Slower speeds (40mm/s) give better quality for small, delicate parts like fingers. |
Which Material Should You Choose?
Your choice affects the final quality.
- PLA: The most common and easiest material to print. It has a matte finish and is great for beginners and larger parts. It’s a good choice for a character’s body or large props.
- Resin: Used in SLA printers. It’s much more expensive but captures incredibly fine details. The surface is smooth right out of the printer. This is the best choice for faces and small details.
- Specialty resins: You can get translucent resins for parts that should glow, like a magical effect or a character’s eyes.
4. 3D Printing and Post-Processing: How Do You Refine the Model?
Printing takes time. Post-processing is where the model starts to look good.
What Should You Watch for During Printing?
- Level the bed: Make sure the printer’s build plate is perfectly level. If it’s not, the first layer won’t stick, and the print will fail, especially for small parts like feet.
- Control temperature: For PLA, the print head should be between 190-230°C. For resin, the printed part needs to be washed in alcohol and then cured under a UV light for a few minutes.
What Are the Key Post-Processing Steps?
- Remove supports: Use tweezers or small pliers to carefully snap off the support structures. Be gentle around delicate areas like hair.
- Sand everything: This is the most important step for a smooth finish.
- Start with coarse sandpaper (100-200 grit) to remove obvious layer lines and support marks.
- Move to medium grit (400-600 grit) to smooth the surface.
- Finish with fine grit (1000-1500 grit) to make it feel smooth to the touch.
- Fill gaps: If you see small cracks between parts you glued together, fill them with modeling putty. Let it dry, then sand it smooth.
5. Painting and Assembly: How Do You Bring the Prototype to Life?
This stage adds color and makes the character recognizable.
What Is the Correct Coloring Process?
Follow a layered approach for a professional finish.
- Apply primer: Spray the whole model with a thin coat of gray or white primer. This helps the paint stick and reveals any small scratches you missed during sanding.
- Base colors: Use an airbrush or hand brushes to apply the main colors. For Tanjiro, this means painting his green and black checkered haori (jacket). Try to match the official colors exactly. You can use color codes like Pantone 362C for that specific green.
- Detail painting: Use fine brushes or 0.3mm fine-tip markers for small areas like the eyes, mouth, and patterns on the sword. Add shadows to clothing folds using slightly darker shades of the base color.
- Protect with varnish: Once the paint is dry, spray the model with a clear varnish. Use matte varnish for skin and cloth to reduce shine, and semi-gloss varnish for weapons and eyes to make them look slightly wet and reflective.
How Do You Assemble and Add Final Details?
- Glue carefully: Use instant glue (cyanoacrylate) for small parts like fingers. Use a slower-setting epoxy (AB glue) for large joints like attaching the torso to the legs.
- Add extra details: Apply water-slide decals for complex patterns, like the “Water Breathing” lettering on Tanjiro’s sword. You can also add a tiny dot of white paint to the eyes to create a highlight, making them look alive.
6. Finished Product Acceptance: How Do You Know It’s Right?
Before you call it done, do a final check.
- Check accuracy: Compare your prototype to your reference images. Does the face look like the character? Are the colors right?
- Test function: If you designed movable joints, gently move them. Do they work without being too loose or too tight?
- Inspect surface quality: Look closely under good light. Are there any sanding scratches showing through the paint? Any dust specks or paint drips?
Conclusion
Making an anime prototype is a journey that blends technical skill with artistic vision. It starts with careful planning and gathering the right references. You then build a digital model in software like ZBrush or Blender, paying close attention to proportions and splitting the model into parts. Preparing the file for printing with the right layer height and support settings is critical for success. After printing, the real work begins with sanding, filling, and smoothing. Finally, the model comes to life through a careful process of priming, painting, and assembly. While it takes time and patience, the result is a unique, high-quality collectible that captures the spirit of the character you love.
FAQ
My printed prototype has visible layer lines. How can I fix this?
Layer lines are normal, especially with FDM printers. Use progressively finer sandpaper, starting around 400 grit and working up to 1500 grit, to smooth them down. After sanding, apply a thin coat of primer. The primer will fill any remaining small lines and give you a smooth surface for painting.
Can I use an FDM printer for an anime prototype with very fine details like the eyes?
You can, but it’s challenging. For the best results on fine details, a resin printer is much better. If you must use an FDM printer, set the layer height to 0.1mm or even 0.08mm. Print the face slowly. After printing, sand the face very carefully. You can then paint the pupils using a fine-tip marker or a very small brush.
How do I stop the paint from chipping off my prototype?
The most important step is to always apply a primer first. The primer creates a surface that paint can grip. Also, use water-based or acrylic paints; they are more flexible than some other types and less likely to chip if the model is handled. Finally, protect your work with a coat of varnish.
Discuss Your Projects with Yigu Rapid Prototyping
Ready to bring your favorite character to life? Or do you need help with the technical side of 3D modeling and printing? At Yigu Rapid Prototyping, we have the expertise to assist with complex projects. Whether you need advice on the best resin for capturing fine facial details, help with printing large parts without warping, or a partner to handle the entire production of a small batch of figures, we can help. Our team in Shenzhen understands the precision and care required for high-quality prototypes. Contact us to discuss your project and get a detailed quote.