Introduction
Die casting transforms molten metal into precise, complex parts at remarkable speed. It is the backbone of high-volume manufacturing for automotive, electronics, and hardware industries. The core principle is simple: force molten metal into a mold at high speed, then hold it under pressure until solidifies. But executing that principle reliably requires mastering a dozen critical parameters and process steps. Temperature off by 10°C, pressure drop of 5 MPa, or timing error of 0.1 seconds can scrap entire batches. This guide breaks down the fundamental principle, step-by-step process, parameter optimization, and quality control strategies of die casting—helping you master this efficient manufacturing technology.
What Is the Core Principle of Die Casting?
Fundamental mechanism
Die casting’s core logic is “force-driven filling + pressure-assisted solidification.”
High-speed injection: Molten metal—aluminum alloy heated to 660-720°C —injects into a precision metal mold cavity at speeds of 5-50 m/s . This ensures metal flows quickly to fill even tiny details like 0.5mm thin walls or embossed patterns before solidifying.
High-pressure holding: After cavity fills, the machine maintains pressure at 20-150 MPa for 1-10 seconds . This compresses the molten metal, eliminates internal pores, and improves part density—critical for high-strength parts like automotive engine brackets.
Power source
The hydraulic system of the die-casting machine is the key power provider. It drives the injection punch to push molten metal into the mold cavity—generating injection force. It controls mold clamping force to keep the mold closed during high-pressure injection, preventing metal leakage.
For large-scale production, modern machines use servo-hydraulic systems —reducing energy consumption by 30% compared to traditional systems while ensuring stable pressure output.
Critical conditions
Four core parameters must be strictly controlled:
| Parameter | Definition | Typical Range (Aluminum) | Impact on Quality |
|---|---|---|---|
| Molten metal temp | Temperature before injection | 660-720°C | Too low: poor fluidity, incomplete fill; Too high: grain coarsening, reduced strength |
| Mold temperature | Temperature of mold before injection | 180-250°C | Too low: fast solidification, cold shuts; Too high: slow cooling, low efficiency |
| Injection pressure | Pressure to push metal into mold | 20-150 MPa | Too low: internal pores, low density; Too high: mold damage, metal overflow |
| Filling time | Time to fill entire cavity | 0.01-0.5 sec | Too long: metal solidifies mid-flow; Too short: turbulence, air entrapment |
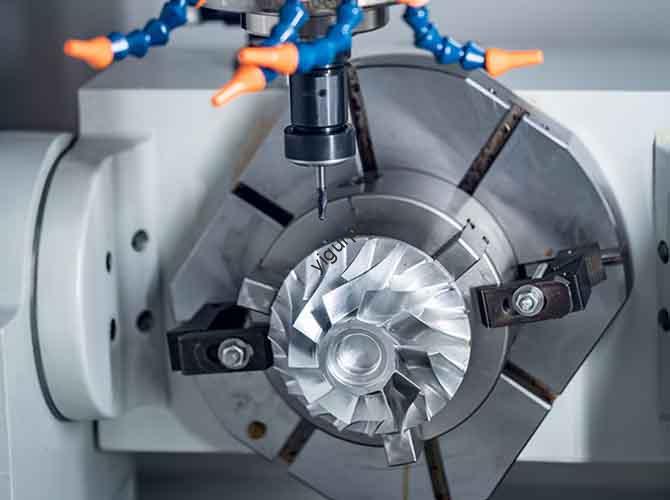
What Is the Step-by-Step Die Casting Process?
Step 1: Raw material preparation and melting
Material selection: Choose die-casting-specific alloys. ADC12 for high fluidity, 6061 for high strength. Match alloy to part performance needs.
Melting: Heat alloy in crucible furnace to 660-720°C . Monitor with temperature sensor in real time—avoid overheating.
Degassing and refining: Add scouring agents like hexachloroethane to remove hydrogen (major cause of porosity) and impurities like slag. For high-precision parts, use vacuum degassing —reducing hydrogen content by 80% .
Quality check: Use metal sample analyzer to verify alloy composition—ensure no excess impurities like lead or cadmium.
Step 2: Mold preparation and pre-treatment
Mold installation: Fix pre-machined metal mold—made of H13 hot-work steel for wear resistance—to machine’s fixed and moving platens. Align carefully to avoid metal leakage.
Mold preheating: Heat mold to 180-250°C using electric heaters or hot oil circulation. Use thermocouples to ensure uniform temperature within ±10°C .
Release agent spraying: Spray water-based or oil-based release agent on mold cavity surface. This: 1) prevents metal sticking; 2) extends mold life by reducing thermal shock; 3) improves part surface finish.
Quality check: Inspect mold cavity for scratches or residue—repair scratches over 0.1mm deep to avoid surface defects.
Step 3: High-pressure injection
Metal feeding: Pour molten aluminum into machine’s pressure chamber.
Injection execution: Hydraulic system drives punch to push metal into mold cavity at 5-50 m/s . For complex parts like electronics enclosures, use two-stage injection : Low speed at 5-15 m/s for initial filling (reducing turbulence), high speed at 15-50 m/s for final filling (ensuring detail replication).
Quality check: Monitor injection pressure in real time—abnormal spikes may indicate mold blockages. Stop immediately to avoid machine damage.
Step 4: Pressure holding and cooling
Pressure holding: Maintain 20-150 MPa pressure for 1-10 seconds . This compresses molten metal, eliminating shrinkage holes and improving density.
Cooling: Let part solidify inside mold. Cooling time depends on part thickness: 5-15 seconds for thin parts like 1mm phone casings; 15-60 seconds for thick parts like 10mm automotive brackets.
Quality check: Use infrared thermometer to confirm part temperature drops to 300-400°C for aluminum before mold opening—too high causes deformation.
Step 5: Mold opening and part removal
Mold opening: Hydraulic system pulls moving platen back, opening mold.
Ejection: Ejection mechanism—pins or plates—pushes part out of mold cavity. For fragile parts like thin-walled electronics, use multiple small ejection pins instead of single large pin to avoid cracking.
Trimming: Remove excess material—gate, riser, flash—using trimming press or CNC router. For high-precision parts, use laser trimming achieving cutting accuracy of ±0.05mm .
Quality check: Inspect part for surface defects like burrs or scratches—burrs over 0.03mm must be removed.
Step 6: Post-treatment
Post-treatment enhances part performance and aesthetics. Choose based on part needs:
| Treatment | Purpose | Application Scenarios |
|---|---|---|
| Heat treatment | Annealing: eliminate internal stress; Aging: improve strength (6061 gains 40% after T6) | High-strength parts: automotive drive shafts, aerospace components |
| Surface treatment | Sandblasting: matte finish hides minor defects; Polishing: mirror finish for decor; Anodizing: protective alumina film for corrosion; Electroplating: add metal layers for wear or decoration | Sandblasting: industrial pump housings; Polishing: faucet handles; Anodizing: outdoor street lamp brackets; Electroplating: automotive door handles |
Quality check: For anodized parts, test corrosion resistance via salt spray test —must pass 48 hours without rust.
What Common Defects Occur and How Do You Fix Them?
Cold shuts
Unfused metal seams on part surface.
Root causes:
- Molten metal temperature too low
- Mold temperature too low
- Filling time too long—metal solidifies mid-flow
Solutions:
- Increase molten metal temperature by 10-20°C
- Raise mold temperature by 20-30°C
- Shorten filling time by 0.01-0.05 seconds —increase injection speed
Porosity
Tiny holes inside the part.
Root causes:
- Inadequate degassing—high hydrogen content
- Injection speed too fast—turbulence traps air
- Holding pressure too low—no pore compression
Solutions:
- Extend degassing time by 2-5 minutes or use vacuum degassing
- Reduce injection speed by 5-10 m/s —use two-stage injection
- Increase holding pressure by 10-20 MPa
Shrinkage holes
Large holes in thick part sections.
Root causes:
- Holding time too short—metal shrinks without pressure
- Cooling time too short—part not fully solidified
- Mold cavity design flawed—thick sections with no risers
Solutions:
- Extend holding time by 1-3 seconds
- Increase cooling time by 5-10 seconds
- Modify mold design—add risers (metal reservoirs) to thick sections
| Defect | Causes | Solutions |
|---|---|---|
| Cold shuts | Low metal temp, low mold temp, long fill | +10-20°C metal, +20-30°C mold, faster injection |
| Porosity | Poor degassing, fast speed, low hold | Longer degas, -5-10 m/s speed, +10-20 MPa hold |
| Shrinkage | Short hold, short cool, no risers | +1-3 sec hold, +5-10 sec cool, add risers |
Industry Experience: Die Casting in Action
An automotive supplier produced engine brackets with 8% scrap from porosity. Investigation showed inadequate degassing—hydrogen content was high. Switching to vacuum degassing reduced hydrogen by 80%. Porosity scrap dropped to 1.5% . Brackets passed all strength tests.
An electronics manufacturer needed phone frames with 0.6mm walls. Cold shuts appeared at 15% rate. Analysis showed mold temperature at 160°C—too low. Raising to 220°C and increasing injection speed eliminated cold shuts. Scrap dropped to 2% .
A machinery component maker had shrinkage holes in 10mm thick brackets. Holding time was 4 seconds—too short. Extending to 8 seconds and adding risers in mold design eliminated shrinkage. Parts now pass X-ray inspection.
Conclusion
Mastering die casting principle and process means understanding how high-speed injection and pressure-assisted solidification work together, then controlling every parameter within tight ranges. Molten metal temperature at 660-720°C , mold at 180-250°C , injection pressure at 20-150 MPa , filling time at 0.01-0.5 seconds . Each process step—material prep, mold pre-treatment, injection, holding, cooling, ejection, post-treatment—has specific quality checks. Common defects like cold shuts, porosity, and shrinkage have proven causes and solutions. With proper control, die casting delivers precise, complex parts at high volume with low per-unit cost —making it essential for modern manufacturing.
Frequently Asked Questions
Why is mold preheating necessary? Can I skip it to save time?
No—mold preheating is critical. Cold molds cause molten metal to solidify too fast, leading to cold shuts and poor part strength. Skipping preheating saves 5-10 minutes per mold but increases scrap rates by 20-30% —costing more long-term.
For aluminum die casting, what’s the difference between ADC12 and 6061? Which should I choose?
ADC12 has high fluidity—ideal for complex, thin-walled parts like electronics enclosures—but lower strength. 6061 has higher strength and corrosion resistance—suitable for load-bearing parts like automotive brackets—but lower fluidity. Choose ADC12 for complex shapes, 6061 for strength or outdoor use.
How do I detect internal porosity in die-cast parts?
Use X-ray inspection for critical parts like aerospace components, or hydrostatic testing for pressure-containing parts like pump housings. Small pores under 0.1mm can be fixed via impregnation—filling with resin. Large pores over 0.1mm usually require rework or scrap—better to prevent with proper degassing and holding pressure.
What causes parts to stick in the mold?
Usually insufficient release agent, mold too hot, or undercuts in mold design. Ensure release agent coverage is complete, keep mold temperature within spec, and check draft angles.
How long do die casting molds last?
H13 steel molds last 80,000-150,000 cycles for aluminum. Regular maintenance and coatings extend life. Mold cost amortizes across high volumes.
What is the most common quality mistake?
Ignoring degassing. Hydrogen in molten aluminum causes porosity that weakens parts and ruins surfaces. Proper degassing is non-negotiable for quality castings.
Discuss Your Projects with Yigu Rapid Prototyping
Ready to apply die casting principles and process control to your parts? At Yigu Rapid Prototyping, we master the fundamentals. We control molten metal temperature within ±5°C , mold temperature within ±10°C , and injection pressure precisely . We use vacuum degassing to eliminate porosity and two-stage injection for complex shapes. We inspect with X-ray and CMM to verify quality. Whether you need automotive components, electronic enclosures, or industrial parts, we deliver with consistent results. Contact our team today to discuss your project and see how proper die casting principle and process drive your success.