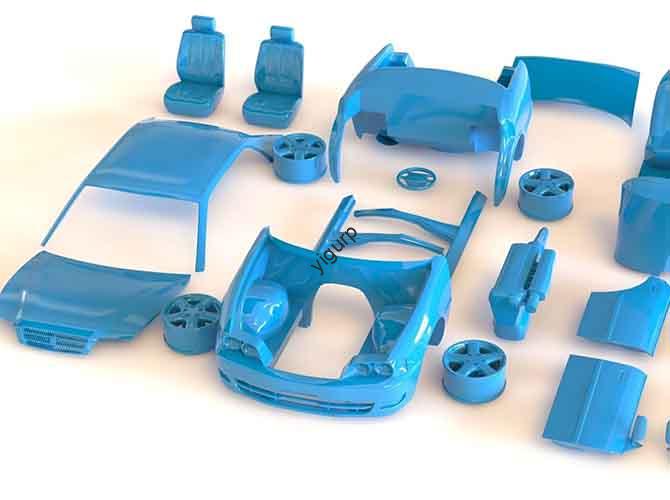
If you’ve ever tried 3D printing, used CAD design tools, or even browsed 3D model sites, you’ve likely seen the STL format. It’s the most common file type for turning digital 3D models into physical objects—used by hobbyists, engineers, and businesses alike. This guide breaks down everything you need to know about STL: what it is, how it works, why it’s essential, and how to use it without headaches. Whether you’re printing your first toy or prototyping a new product, you’ll finish this guide feeling confident in working with STL files.
What Exactly Is 3D STL Format?
Let’s start with the basics. STL stands for Stereolithography, named after the first 3D printing tech invented by Chuck Hull in 1987. Back then, Hull created STL to translate digital designs into physical parts for his 3D printer. Today, it’s a universal standard—but its core job hasn’t changed: to simplify 3D shapes for manufacturing.
At its core, an STL file uses a mesh of connected triangles to show the surface of a 3D object. It doesn’t store complex data like color, texture, or internal structure. It only focuses on the shape—the part that matters for 3D printing. Think of it like a digital “skin” wrapped around your design; each triangle is a small piece of that skin.
Is STL the Same as Other 3D Files?
No—this is a common mix-up. Unlike formats like OBJ (which stores color) or STEP (which holds engineering data), STL is purely for surface geometry. For example, if you design a phone case in CAD and export it as an STL, any logos or color details will disappear. All that’s left is the shape the printer needs to build.
Why Use STL for 3D Printing?
With so many 3D file formats available, why is STL still the go-to? The answer lies in three key benefits: simplicity, compatibility, and reliability. These solve real problems for anyone working with 3D printing—from hobbyists to pros.
Is STL Universal for Printers?
Almost every 3D printer on the market uses STL as its main input. This includes budget FDM printers like the Creality Ender 3 and high-end SLA printers used by businesses. STL’s triangle mesh is easy for slicing software (the tool that turns 3D models into printer layers) to read. For example, if you own an Ender 3, you’ll need to export your model as an STL before loading it into Cura (Creality’s slicer). Without STL, you’d face compatibility issues—like trying to play a video on a device that can’t read its format.
Does STL Work With All Design Tools?
Yes—STL is compatible with every major 3D design tool. This includes free options like Tinkercad and Blender, and professional software like Autodesk Fusion 360, SolidWorks, and Rhino. This means you can start a design in Blender (for free), tweak it in Fusion 360 (for engineering), and export it as an STL to print—no conversion headaches.
Take a freelance product designer, for example. They might get a client’s sketch in SolidWorks, export it as an STL to send to a 3D printing service, then import that same STL back into Blender to make a presentation. STL lets them move seamlessly between tools.
Is STL Good for Rapid Prototyping?
STL is perfect for rapid prototyping—especially in industries like aerospace, automotive, and healthcare where speed matters. Its simplicity lets you go from design to physical prototype in hours. Let’s look at a real example:
EcoParts, a small startup, designs sustainable packaging using 3D-printed molds. They use Fusion 360 to create mold designs, export them as STLs, and slice them with PrusaSlicer for their Prusa i3 printers. Their founder says: “STL lets us go from digital design to physical mold in under a day. If we used a more complex format, we’d lose hours to software crashes—time we can’t afford as a small business.”
Another example: a medical device company testing a new prosthetic socket. They iterate on the design in CAD, export each version as an STL, and 3D print it quickly to test fit. STL speeds up their entire process.
How Does STL’s Triangle Mesh Work?
To master STL, you need to understand its most important part: the triangle mesh. This mesh is what defines your object’s shape—and it’s simpler than you might think.
What Is a Triangle Mesh?
An STL file doesn’t store a smooth shape. Instead, it uses tiny triangles (called “facets”) to approximate smoothness. The more triangles you have, the more detailed and smooth your print will be. Here’s a quick breakdown:
- A basic cube only needs 12 triangles (2 per face).
- A complex object like a human skull needs 1 million+ triangles to capture fine details.
Each triangle has two key parts:
- Vertices: Three X, Y, Z coordinates that mark the triangle’s corners. These tell the printer exactly where to put material.
- Normal Vectors: A hidden line pointing outward from the triangle. This tells the printer which side is “outside” the object—critical for avoiding print errors.
Why Do Watertight STLs Matter?
A “watertight” STL is one where all triangles connect perfectly—no gaps, overlaps, or missing faces. Think of it like a balloon: if there’s a hole, it can’t hold its shape. A non-watertight STL causes problems during slicing or printing—parts might be missing, or the printer might print extra material.
For example, if you download a free STL of a mug from an online library, the handle might have a small gap. When you slice it, the slicer won’t recognize the handle as part of the mug—and it won’t print. To fix this, use software like Meshlab or Netfabb to close gaps and merge overlapping triangles.
How to Choose STL Resolution?
Resolution (or “fidelity”) is how many triangles are in the mesh. Higher resolution means more detail but larger file sizes. Lower resolution means less detail but smaller files. The key is to choose the right resolution for your project. Here’s a guide:
| Resolution | Triangle Count | Best For | File Size |
|---|---|---|---|
| Low | 10,000–100,000 | Simple objects (brackets, basic toys) | 1–10 MB |
| Medium | 100,000–1,000,000 | Most consumer prints (figurines, phone cases) | 10–50 MB |
| High | 1,000,000+ | Detailed parts (jewelry, dental crowns) | 50+ MB |
Pro tip: Don’t default to high resolution. For a large storage bin, high resolution won’t make a difference—but it will slow down your workflow. Save it for small, detailed parts where smoothness matters.
How to Create, Find, & Convert STL Files?
Now that you know the basics, let’s get practical. Here’s a step-by-step guide to getting STL files and using them—whether you’re a beginner or a pro.
How to Create an STL From Scratch?
To design a custom object, use 3D modeling software. Below are step-by-step guides for two popular tools: one free, one professional.
Free Software (Blender)
Blender is great for hobbyists and artists. It’s free and powerful:
- Open Blender and delete the default cube (press X).
- Use the “Add” menu to create your object (e.g., “Mesh > Sphere”).
- Edit the shape with tools like “Extrude” (pull parts) or “Scale” (resize).
- When done, go to File > Export > Stl (.stl).
- Check “Selection Only” if you want to export one object.
- Adjust “Resolution” (higher = more triangles).
- Click “Export STL” and save the file.
Professional Software (Fusion 360)
Fusion 360 is used by engineers for precise models:
- Open Fusion 360 and create a new “Design” file.
- Use the “Sketch” tool to draw a 2D outline (e.g., a circle for a cup).
- Use “Extrude” to turn the 2D sketch into a 3D shape.
- Go to File > Export > Export As.
- Select “STL” from the dropdown menu.
- Adjust “Mesh Quality” (High for details, Medium for most projects).
- Click “Export” and save the file.
Pro tip: After exporting, open the STL in Meshlab to check for errors. This saves time later when slicing.
Where to Find Pre-Made STLs?
You don’t have to design everything from scratch. Thousands of pre-made STLs are available online. Below are the best platforms:
| Platform | Type | Best For | Key Features | Example STLs |
|---|---|---|---|---|
| Thingiverse | Free | Beginners, hobbyists | 10M+ free models, community-driven | Phone stands, toys, kitchen gadgets |
| MyMiniFactory | Free/Paid | Quality-focused prints | Curated, tested for printability | Figurines, cosplay parts |
| Cults3D | Paid | Designers, pros | Premium models, commercial use | Jewelry, mechanical parts |
| GrabCAD | Free/Paid | Engineers, manufacturers | Industrial-grade models | Gears, brackets, machine parts |
Case Study: Sarah, a hobbyist, wanted a custom cookie cutter. She searched Thingiverse for “Christmas tree cookie cutter” and found a free STL with 500+ positive reviews. She downloaded it, sliced it with Cura, and printed it in 30 minutes—saving hours of design time.
How to Convert Other Formats to STL?
If you have a model in OBJ, STEP, or IGES, you can convert it to STL. Here are the most reliable methods:
Free Online Tools (Small Files)
Tools like Convertio or Zamzar work for quick conversions:
- Go to Convertio.com and select “STL” as the output.
- Upload your file (e.g., an OBJ character model).
- Click “Convert” and wait for it to finish.
- Download the STL file.
Note: Avoid online tools for files over 100MB—they may time out or reduce quality.
Desktop Software (High Quality)
For better control, use Meshlab (free) or Autodesk 3ds Max (paid):
- Open Meshlab and go to File > Import Mesh to load your file.
- Meshlab will strip color/texture (STL doesn’t support it).
- Go to File > Export Mesh As and select “STL”.
- Choose “Binary” (smaller) or “ASCII” (human-readable) and save.
Example: A mechanical engineer gets a STEP file of a gear from a client. They import it into Fusion 360, check dimensions, and export it as an STL for 3D printing. The conversion preserves the gear’s precise shape—so it fits perfectly with other parts.
Common STL Issues & Fixes
Even with good tools, STL files can have errors that ruin prints. Below are the most common problems, why they happen, and how to fix them—step by step.
How to Fix Non-Watertight Geometry?
Non-watertight STLs have gaps or holes in the mesh. They happen from incomplete designs or corrupted downloads. Here’s how to fix them with Meshlab:
- Open your STL in Meshlab.
- Go to Filter > Quality Measures > Compute Geometric Measures.
- Check “Non-manifold edges”—if above 0, you have gaps.
- Go to Filter > Repair > Close Holes.
- Adjust “Hole Size” (Small for tiny gaps, Large for bigger ones).
- Click “Apply” and save the fixed STL.
How to Fix Inverted Normals?
Inverted normals are triangles pointing inward. This makes the printer skip parts of the model. Here’s how to fix them with Cura:
- Load your STL into Cura.
- Go to Prepare > Preview and look for red areas (Cura highlights inverted normals).
- Right-click the model and select Fix Model > Flip Normals.
- Check the preview—red areas should disappear.
How to Fix Overly Large Files?
STLs with too many triangles cause slicing crashes and slow print times. They happen when you export with high resolution unnecessarily. Fix with Meshlab:
- Open your STL in Meshlab.
- Go to Filter > Remeshing > Simplification: Quadric Edge Collapse Decimation.
- Adjust “Target number of faces” (e.g., reduce from 1M to 500K).
- Check “Preserve Boundary” to avoid distorting the shape.
- Click “Apply” and save the simplified STL.
Before/After: A 2MB toy car STL (500K triangles) becomes 500KB (100K triangles). The print looks the same, but slicing time drops from 10 minutes to 2 minutes.
STL vs. Other 3D Formats: Which to Use?
STL is great, but it’s not always the best choice. Knowing when to use other formats saves time. Below is a comparison of common formats:
| Format | Strengths | Weaknesses | Best For |
|---|---|---|---|
| STL | Universal, simple, small file size | No color/texture, approximate geometry | 3D printing, rapid prototyping |
| OBJ | Supports color/texture, multi-object | Larger files, not all printers accept | Artistic designs, visualizations |
| STEP | Precise engineering data, editable | Large files, needs conversion for printing | Industrial manufacturing, mechanical parts |
| IGES | Cross-CAD compatibility, complex surfaces | Very large, slow to process | High-precision engineering |
| 3MF | Supports color/metadata, reliable | Less widely adopted, larger files | Modern 3D printing, multi-color prints |
Real-World Example: A furniture designer creates a chair. They use SolidWorks (STEP file for precise dimensions) and Blender (OBJ file for texture). For prototyping, they convert both to STL. For final production, they send the STEP file to a CNC manufacturer.
Yigu Technology’s Take on STL
At Yigu Technology, we see STL as the backbone of accessible 3D printing—especially for small businesses and hobbyists. Our team works with clients across industries, and STL remains the most reliable format for connecting digital design to physical production.
We recommend STL for rapid prototyping because it’s fast to process and works with every printer in our workshop. For example, a client needing a phone case prototype can send an STL, and we’ll have a physical part ready in under 2 hours. This speed is impossible with more complex formats.
While we use newer formats like 3MF for advanced projects, we believe STL will stay essential. Its simplicity makes 3D printing accessible to everyone—regardless of technical skill. We also help clients fix common STL issues (like non-watertight meshes) to save time and material waste.
Conclusion
3D STL format is the unsung hero of 3D printing. It’s simple, universal, and reliable—making it the go-to choice for beginners and pros alike. By understanding what STL is, how its triangle mesh works, and how to fix common issues, you can streamline your 3D printing workflow and get better results.
Whether you’re printing a toy, prototyping a product, or designing industrial parts, STL is the bridge between your digital ideas and physical objects. Use this guide to master STL, choose the right resolution, fix errors, and know when to use other formats. With STL in your toolbelt, you’ll be able to turn any 3D design into a real thing—quickly and easily.
FAQ: Common STL Questions
What’s the difference between ASCII and Binary STL? ASCII STL is human-readable (open in a text editor) but larger. Binary STL is compressed (smaller, faster) but not editable in text. For most users, binary STL is better—unless you need to adjust vertex data (rare for beginners).
Can STL files store color or texture? No. STL only stores surface geometry. Use OBJ or 3MF for color/texture, then convert to STL for printing (color/texture will be lost).
How do I check if my STL is watertight? Use Meshlab: Go to Filter > Quality Measures > Compute Geometric Measures. If “Non-manifold edges” is 0, it’s watertight. Use “Close Holes” to fix gaps.
What’s the ideal STL file size? It depends on complexity. Small parts (keychains): 1–10 MB. Medium parts (figurines): 10–50 MB. Avoid files over 100 MB—they slow slicing and cause crashes.
Do all 3D printers use STL? Almost all—from budget FDM printers to high-end SLA printers. A few newer printers support 3MF, but STL is still the universal standard.
Discuss Your Projects with Yigu Rapid Prototyping
Whether you’re a hobbyist, designer, or business owner, Yigu Rapid Prototyping is here to help with your 3D printing needs. We specialize in turning STL files into high-quality prototypes and final parts—fast. Our team can help you fix STL errors, choose the right resolution, and select the best printing technology for your project.
Contact us today to discuss your STL designs, rapid prototyping goals, or any 3D printing questions. We’ll work with you to turn your digital ideas into physical reality—efficiently and affordably.