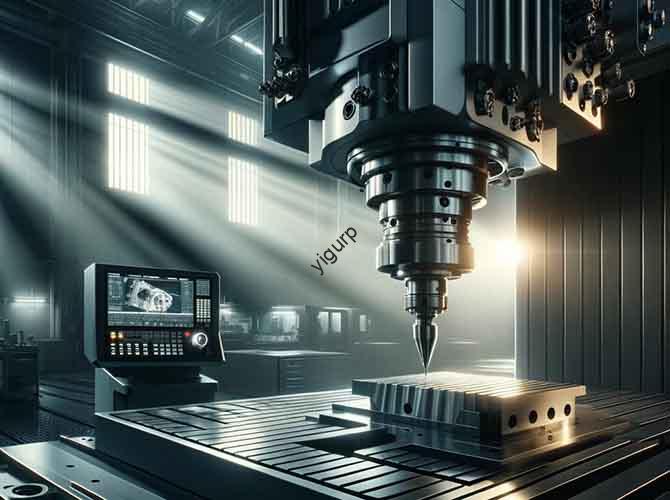
A standard prototype shows you the shape. But it doesn’t show you the shine of a chrome finish, the warmth of a gold plating, or how that reflective surface holds up to fingerprints. If your final product will have a plated metal finish, you need to test that look and feel before you cut a mold. This is where electroplating prototypes come in. These are physical models—often made from 3D-printed resin or machined plastic—that get a thin metal coating through an electroplating process. They let you verify the color, texture, and even the durability of your surface finish. This article walks you through exactly what they are, how to make them step by step, and how to avoid common pitfalls.
What Exactly Are Electroplating Prototypes?
Let’s start with a clear definition and why they matter.
An electroplating prototype is a base model—usually made via 3D printing or CNC machining—that has a thin metal layer applied to its surface. This layer mimics the look and feel of a mass-produced part. The coating can be chromium for a mirror shine, nickel for a durable satin finish, or gold for a luxury appearance.
The main purposes are simple:
- Verify the look: Does the chrome match your brand’s design language?
- Test assembly: Does the plated part, now slightly thicker, still fit with other components?
- Check durability: Will the coating scratch or peel during normal use?
- Show investors: A shiny, realistic prototype sells your idea better than a dull grey one.
Key traits that set them apart:
- Realistic appearance: They replicate the exact metallic texture of the final product.
- Better surface durability: The metal layer resists scratches and corrosion better than painted prototypes.
- Material flexibility: You can plate over resin, ABS plastic, PC, and even some metals.
What Is the Step-by-Step Production Process?
Making an electroplated prototype is a linear process. Each step affects the final result. Rushing leads to bubbles, peeling, or uneven color.
Step 1: How Do You Make the Base Prototype?
The base model must be high quality. Surface flaws here become magnified after plating.
- Using 3D printing: Best for complex shapes or very small batches (1-5 pieces). Use high-precision photoresist resins, like those from SLA or DLP printers. They give a smoother surface (Ra ≤ 3.2μm) that’s easier to prepare. Avoid standard PLA or resins with fillers like carbon fiber. They react poorly with plating chemicals.
- Using CNC machining: Best for parts needing high precision or a rigid structure, like electronics housings. Good materials are engineering plastics like ABS, PC, or nylon. You can also machine metal bases like aluminum or brass, though the process differs slightly. After machining, you must sand the surface by hand, moving from 400-grit to 1200-grit sandpaper, to remove all tool marks.
Real example: A client once sent a beautifully printed resin part for a smartwatch case. It looked perfect. But during plating, bubbles appeared everywhere. We traced it back to the resin—it was a cheap, fast-curing type with amino groups that reacted with the acid bath. We reprinted it in a proper SLA photoresist resin, and the second plating came out flawless.
Step 2: How Do You Prepare the Surface for Plating?
This stage is about making the base surface ready to accept and hold the metal coating.
- Sanding: You smooth out layer lines (from 3D printing) or tool marks (from CNC). Start with coarse 400-grit sandpaper and work up to fine 1200-grit. For resin, this is critical.
- Cleaning: Wipe the part with isopropyl alcohol to remove all dust and oil. Any dirt left behind will cause the plating to bubble or peel.
- Degreasing: For oily materials like machined ABS, use an ultrasonic cleaner with an alkaline solution at 40-60°C for 10-15 minutes. This pulls grease out of microscopic pores.
- Roughening: You need to make the surface slightly rough so the metal has something to grip.
- For plastics/resins: Use a mild chemical etch, like a 5% sulfuric acid bath for 5-8 minutes, or fine sandblasting.
- For metals: Skip sandblasting. Use a chemical etch with something like 10% hydrochloric acid for 3-5 minutes.
- Activation: You treat the surface with an activator (often another acid bath) to create a layer that will accept the conductive coating. This is essential for non-conductive materials like resin.
Step 3: How Does the Electroplating Itself Work?
This is the core of the process. For non-conductive bases, you have to make them conductive first.
How Do You Make Non-Conductive Bases Conductive?
You have two main options:
- Conductive paint: Spray 2-3 thin coats of silver-based conductive paint. Let each coat dry for about 30 minutes. This is cheap and works well for small prototypes.
- Vacuum coating (PVD): Use a machine to deposit a very thin layer of metal, like nickel or chromium, onto the surface. This gives better adhesion and conductivity than paint, but costs more.
How Do You Choose and Apply the Final Plating?
Pick the plating type based on your goal. Then, control the process tightly.
| Plating Type | Best For | Key Parameters to Control |
|---|---|---|
| Bright Chrome | Decorative parts with a mirror finish (buttons, trim). | Current density: 15-25 A/dm²; Temp: 40-50°C; Time: 20-30 min. |
| Imitation Gold | Luxury items (watch cases, jewelry prototypes). | Current density: 5-10 A/dm²; Temp: 25-35°C; Time: 10-15 min. |
| Pearl Nickel | Matte, anti-fingerprint parts (electronics shells). | Current density: 8-12 A/dm²; Temp: 50-60°C; Time: 15-20 min. |
Step 4: What Post-Treatment and Inspection Are Needed?
After plating, the part needs finishing and a thorough check.
- Post-treatment steps:
- Passivation: Dip the part in a solution (like 5% sodium dichromate) for 5-10 minutes. This boosts corrosion resistance, especially for chrome and nickel.
- Polishing: For a high-gloss look, use a mechanical polishing wheel with compound.
- Protective coating: Spray a thin layer of clear UV-cured paint to prevent the metal from oxidizing or scratching.
- Quality inspection checklist:
- Visual check: Look for defects like bubbles, scratches, or color spots. Use a 10x magnifying glass.
- Adhesion test: Do a cross-cut test (ASTM D3359). Press tape over a grid cut into the coating. If nothing peels, it passes.
- Thickness test: Use a magnetic thickness gauge for nickel on steel, or an eddy current gauge for chrome on plastic. Decorative coats are 0.02-0.1mm thick. Functional coats are 0.1-0.3mm.
- Corrosion test: A salt spray test for 24 hours should show no rust or blisters.
What Are the Key Precautions to Avoid Defects?
Electroplating is sensitive. Small mistakes cause big problems.
What Material Choices Cause Problems?
- For 3D printed bases: Use photoresist resins made for SLA/DLP. Avoid PLA and any resin with fillers like carbon fiber. They create uneven, unplateable surfaces.
- For CNC bases: ABS and PC are your best bets. They accept plating well. Avoid polypropylene (PP) , which resists chemical adhesion.
- The big no-no: Avoid resins with amino groups. They chemically react with the plating baths and ruin the finish.
How Should You Design Parts for Plating?
- Avoid deep, narrow holes: Plating solution can’t flow into holes deeper than 5mm or narrower than 2mm. They will remain unplated. If you must have holes, give them a 15-degree draft angle to help solution flow.
- Account for added thickness: The metal layer adds size. A part that is exactly 10mm wide will become 10.02mm to 10.1mm wide after plating. If it needs to fit into a slot, you must design the base prototype slightly smaller to account for this.
What Process Controls Are Critical?
- Prevent bubbles: Use ultrasonic cleaning before plating. Keep the plating solution stirred during the process so air doesn’t get trapped on the part.
- Ensure color consistency: If you plate parts in separate batches, use the same chemical bath and keep temperature and current density within ±2% of the original settings. Otherwise, colors can drift.
- Check the conductive layer: For resin parts, make sure the conductive paint is sprayed evenly. Thick edges or thin spots cause uneven plating.
What Are the Typical Application Scenarios?
Different industries use plated prototypes for different reasons.
- Design verification: A smartphone maker plates a prototype frame in brushed nickel. Designers hold it to see if the texture matches their vision before signing off on tooling.
- Assembly testing: An automotive engineer tests a plated interior trim piece. The 0.05mm chrome coating adds just enough thickness to make the snap-fit too tight. They catch it and adjust the design before the mold is cut.
- Marketing & exhibitions: A startup displays a gold-plated prototype of their new smart speaker at a trade show. It looks like a finished product for a fraction of the cost.
- Functional testing: A connector prototype with nickel-chrome plating gets plugged and unplugged 10,000 times. The test proves the coating won’t wear through in the product’s lifetime.
What Are the Alternatives to Electroplating Prototypes?
Electroplating takes time (7-15 days) and costs money ((200-)500 per unit). If you need something faster or cheaper, consider these options, but know the trade-offs.
| Method | How It Works | Pros | Cons | Best For |
|---|---|---|---|---|
| Vacuum Coating (PVD) | Deposits a thin metal layer in a vacuum chamber. | Faster (3-5 days), cheaper ((50-)150). Eco-friendly. | Poor adhesion; can peel. Limited colors. | Short-term exhibit models. |
| Metallic Paint | Spray paint mixed with metal flakes. | Very cheap ((20-)50), fast (1-2 days). | Looks flat, not metallic. Scratches easily. | Temporary display pieces. |
| Metal Foil | Stick on self-adhesive metal film. | Instant (1 hour), cheapest ((5-)20). | Bubbles on curves. Not durable. | Urgent demos, internal reviews. |
Conclusion
Electroplating prototypes are essential for any product that will have a plated metal finish. They let you verify the look, feel, fit, and durability of that finish before you commit to expensive molds. The process is detailed: start with a smooth, high-quality base made from the right resin or ABS plastic. Prepare the surface meticulously through sanding, cleaning, and etching. Apply a conductive layer, then the final chrome, nickel, or gold plating. Finish with inspection. Watch out for common defects like bubbles and poor adhesion by choosing the right materials and designing parts with plating in mind. Yes, it costs more and takes longer than a raw prototype. But the insight you gain about your product’s final surface is invaluable, saving you from costly mistakes in mass production.
FAQ
Can electroplating prototypes be used for functional testing like conductivity or corrosion resistance?
Yes, they can. For functional tests, you need a thicker plating layer (0.1-0.3mm) and the right metal. Use copper for conductivity tests. Use a stainless steel or nickel plating for corrosion tests. You can then run standard tests like salt spray or measure electrical resistance.
How long does it take to make an electroplating prototype, and what is the cost?
Expect a total lead time of 7 to 15 days. This includes making the base prototype, the plating process itself, and final inspection. The cost typically ranges from (200 to )500 per unit. The price varies based on the part’s size, the type of plating (gold is more expensive than chrome), and the base material.
What should I look for when choosing an electroplating prototype supplier?
Focus on three things. First, their experience with your base material—ask if they regularly plate resin or ABS. Second, ask for a small test sample before you send your final design. This proves their adhesion and color match. Third, check if they comply with environmental standards like RoHS, which restricts heavy metals in the plating process.
Discuss Your Projects with Yigu Rapid Prototyping
Need a prototype with a flawless, production-like finish? At Yigu Rapid Prototyping, we specialize in creating high-quality electroplated prototypes. Whether you need a chrome-plated automotive trim for assembly testing or a gold-plated electronics housing for a trade show, we help you select the right base material and plating process. Our team in Shenzhen manages the entire workflow—from precision SLA 3D printing or CNC machining to surface preparation and final plating. We’ve helped clients fix adhesion issues and perfect their color match before mold cutting, saving significant time and money. Contact us to discuss your project and get a detailed quote.