Introduction
Creating a new massager is a delicate balance. It needs to feel good against the skin, deliver the right amount of pressure or vibration, and operate quietly enough to be relaxing. Whether you are designing a simple vibration massager or a complex roller device with gears, the prototype is your first chance to see if the design works. The CNC machining massager prototype process has become a go-to method for product teams because it is incredibly reliable. But what gives it this reputation for reliability? This article takes you through the entire process. We will look at why CNC machining is so good at creating the precise, complex parts a massager needs, and how it helps you test and perfect your design before mass production.
What Key Advantages Does CNC Offer for Massager Development?
Massagers have unique requirements. They often have complex shapes to fit the body, moving parts that must work smoothly, and soft components that touch the skin. The CNC machining process is well-suited to handle all of these. Here are its four main advantages.
Creating Complex Internal and External Shapes
A modern massager is more than just a plastic case. Inside, there might be a system of gears to transfer motion from a motor to the massage heads. The outer shell needs to be ergonomically shaped to fit the neck, back, or feet. CNC machines can cut these complex shapes from solid material with ease. For example, they can machine gear teeth with the precision needed for smooth, quiet meshing. They can also create thin-walled shells, sometimes less than 1.5mm thick, that are lightweight yet strong. This is much harder to achieve with methods like 3D printing.
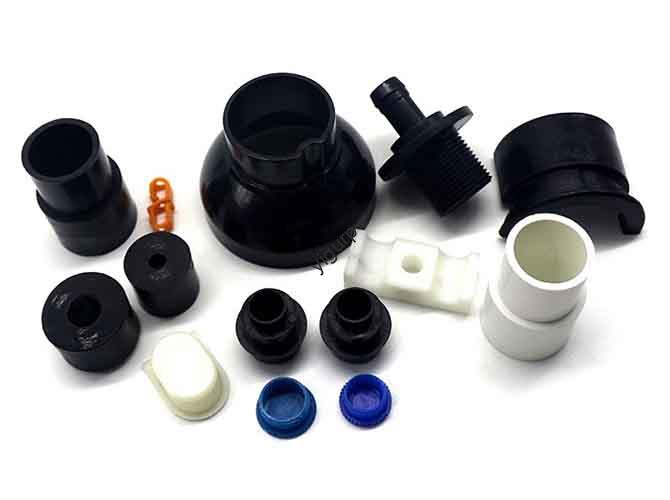
Working with the Perfect Material for Each Part
A massager is made of many materials, each chosen for a specific reason. The shell needs to be tough and look good. The gears need to be strong and quiet. The massage heads that touch the skin need to be smooth and sometimes soft. The CNC process lets you use the right material for every job:
- ABS or PC plastic for the main shell, providing impact resistance and a nice finish.
- Aluminum alloy for gear brackets, because it is light, strong, and helps dampen noise.
- Stainless steel for roller shafts, ensuring they are durable and rust-proof.
- Silicone for soft, skin-friendly massage heads, made from a CNC-machined mold.
Holding Tight Tolerances for Smooth Operation
For a massager to feel right, all its moving parts must fit together perfectly. If the gears are misaligned, the massager will be noisy. If the massage heads are not balanced, the vibration will feel uneven. CNC machining delivers the precision needed, holding tolerances within ±0.05mm. For gears, the gap between meshing teeth must be controlled to within 0.03mm to keep noise down. For vibration massagers, the amplitude deviation must be less than 0.1mm to ensure a consistent feeling across all massage heads.
Testing Real Performance Immediately
A prototype that just sits on a shelf is of limited use. You need to know how it performs. You need to switch through the massage modes, feel the vibration intensity, and listen for any strange noises. Because CNC machining uses real engineering materials, you can assemble a fully functional prototype. You can install the actual motor, gears, and battery. You can turn it on and test it. This immediate functional testing is a huge advantage, often cutting R&D time by 30% . You find out what works and what doesn’t long before you invest in production tooling.
How Does the CNC Machining Massager Prototype Process Work Step by Step?
Reliability comes from a consistent, well-planned process. Here is how the CNC machining process for massagers unfolds, stage by stage.
Step 1: Designing the 3D Model and Splitting Components
The journey starts with a detailed CAD model. You design every part of the massager in software like SolidWorks or UG. This includes:
- The Shell: Model the ergonomic curves so it fits comfortably in the hand or against the body. Add details like anti-slip grips.
- The Massage Heads: Design the specific type. Rollers need precise cylindrical surfaces. Vibrators need flat mounting areas. Air-pressure bags need cavities.
- The Internal Structure: Lay out the positions for the motor, gears, circuit board, and battery. You need to ensure there is enough space for assembly, typically leaving a 0.1 to 0.3mm gap between parts.
Complex models are then split into individual parts that can be machined separately, such as the upper shell, lower shell, and the bracket that holds the massage heads.
Step 2: Planning the Tool Paths
The 3D model is brought into CAM software. Here, a programmer plans exactly how the CNC machine will cut each part. They choose the tools and the order of operations:
- Roughing: A large flat cutter, like a 10mm one, quickly removes the bulk of the material, leaving a small 0.3mm allowance for the final pass.
- Finishing: Smaller, more precise tools take over. A 2mm ball nose cutter creates the smooth curves of the shell. A tiny 0.5mm engraving tool carves out fine details like logo grooves or slots for the massage heads.
- Special Operations: Deep cavities for the battery might need long tools. Very small holes for gear shafts might be finished with electrical discharge machining (EDM) for ultimate precision.
The software then simulates the entire cutting process to check for any problems, like a tool colliding with the part.
Step 3: Selecting and Preparing Materials
With the design finalized, you select the materials. Here is a typical material map for a massager prototype:
| Component | Recommended Material | Preparation and Key Reason |
|---|---|---|
| Shell and Grips | ABS or PC Plastic | Cut into blanks, roughly 150x100x50mm. Clean the surface for good paint adhesion later. |
| Massage Rollers | Stainless Steel 304 | Anneal the material first to make it easier to machine. Cut into cylinders, like 20mm diameter. |
| Gears and Brackets | Aluminum Alloy 6061 | Cut to size. Deburr all edges so the gears mesh smoothly and quietly. |
| Soft Massage Heads | Silicone | First, machine a precision metal mold from aluminum. Then, use this mold to cast the silicone parts. |
Step 4: Clamping and Positioning
Holding the workpiece securely is vital for accuracy. For large, thin shells, a vacuum adsorption platform is ideal. It holds the part flat without any physical clamps that could bend it. Small, precise parts like gears are held in custom fixtures. A laser edge finder then sets the machine’s zero point with an accuracy of ±0.01mm.
Step 5: Rough Machining
The machine begins cutting at a higher speed to remove material quickly. This phase focuses on the large surfaces, like the outside of the shell or the bottom of the battery compartment. The goal is to get close to the final shape fast, while still protecting more delicate features.
Step 6: Finishing and Detailing
Now the machine slows down to create the final surfaces. This is where the part gets its precision. It machines the shell curves to a smooth Ra0.8 finish so it feels nice to hold. It cuts the slots for the massage heads to a precise depth, accurate to within 0.02mm. It finishes the gear teeth to their final shape with a tolerance of ±0.03mm. It might even drill small 3mm heat dissipation holes near the motor to prevent overheating.
Step 7: Post-Processing and Surface Treatment
Once machining is done, the parts are finished by hand. Deburring with fine sandpaper removes any sharp edges or tiny tool marks. Then, the parts get their final look and feel:
- Plastic shells often get a matte spray to resist fingerprints, or a soft-touch coating for a more luxurious grip.
- Metal gears and brackets are anodized to prevent corrosion. Stainless steel rollers are polished to a smooth Ra0.4 finish for comfortable skin contact.
- Silicone parts go through a secondary vulcanization process at 120°C, which improves their flexibility and durability.
Step 8: Assembly and Functional Testing
Finally, all the pieces come together. The motor, gears, battery, and circuit board are installed inside the shell. The massage heads are attached. Then, the prototype is put through its paces with a series of tests:
| Test Type | Purpose | Pass Criteria |
|---|---|---|
| Massage Performance Test | Checks if the intensity is even and modes switch correctly. | Vibration amplitude varies by less than 0.1mm across heads. All 5+ speed modes switch smoothly. |
| Noise Test | Ensures the massager is quiet enough for relaxation. | Noise level stays below 60 decibels , even on the highest setting. (This is quieter than a normal conversation.) |
| Durability Test | Simulates long-term use to find weak points. | After running continuously for 100 hours , there is no visible gear wear and no massage heads have come loose. |
How Does CNC Compare to Other Prototyping Methods?
It is useful to see how CNC machining measures up against alternatives like 3D printing. The table below provides a clear comparison for massager development.
| Evaluation Metric | CNC Machining | 3D Printing | Silicone Duplication |
|---|---|---|---|
| Precision | ±0.05mm (Essential for gears and moving parts) | ±0.1–0.3mm (Can cause uneven massage or noisy gears) | ±0.2–0.5mm (Not accurate enough for internal mechanisms) |
| Material Options | Real plastics, metals, and silicone molds. | Only plastic filaments. No metal for gears, no real silicone. | Only epoxy or resin. Parts lack durability and feel. |
| Surface Quality | Smooth (Ra0.4–0.8). Comfortable and ready to use. | Rough, layered texture. Needs a lot of sanding and filling. | Smooth, but cannot reproduce fine details like gear teeth. |
| Functional Testing | Fully functional prototype, ready for immediate testing. | Parts are weak and often need drilling/tapping to assemble. | Only for visual checks, not for functional testing. |
| Cost for 5-10 Units | Lower per unit. Programs and molds are reusable. | Higher. Lots of failed prints and manual labor add cost. | Higher. Molds break down after only a few casts. |
This comparison shows why CNC machining is the more reliable choice for creating a functional massager prototype that you can actually test and learn from.
What Key Precautions Ensure a Successful Massager Prototype?
To get the best results, there are a few critical details to watch during the CNC process. Here are three important precautions.
Protect Thin Shells and Delicate Gears
Massager shells can be very thin to keep the device lightweight. When machining these, use a low cutting force (under 250N) and a high spindle speed (around 10,000 rpm) to prevent the plastic from deforming. For small, precise gear holes (like 2mm diameter), consider using EDM instead of standard drilling. This ensures the holes are perfectly round and accurately positioned, which is essential for quiet gear operation.
Machine Silicone Molds with Extreme Accuracy
If your massager uses soft silicone heads, the quality of those heads depends entirely on the mold. The aluminum mold must be machined to a tolerance of ±0.02mm. This ensures the silicone parts come out exactly the right size and shape. After molding, carefully trim away any excess silicone (called flash) with a very sharp knife. Be gentle, so you don’t damage the soft surface of the massage head.
Calibrate All Assembly Clearances
After all parts are machined, you need to check how they fit together. Use a feeler gauge to measure the gap between the motor and its bracket. The ideal clearance is about 0.1mm. If it is too tight, the motor’s vibration might transfer directly to the shell, making the whole device buzz uncomfortably. If it is too loose, the motor might rattle. If needed, perform a very light secondary grinding pass to adjust the fit.
Conclusion
The CNC machining massager prototype process earns its reputation for reliability by delivering on what matters most: precision, material authenticity, and functional readiness. Its ability to machine complex internal mechanisms like gears to within ±0.03mm, combined with the use of real production materials, means you get a prototype that truly represents your final product. This allows you to conduct meaningful tests on massage performance, noise levels, and durability. By following the detailed workflow and taking key precautions, you can identify and fix design flaws early. This process saves you time and money, and gives you the confidence to move forward, knowing your massager will provide the comfort and relaxation users expect.
FAQ
How long does the CNC machining massager prototype process take?
The typical timeline is 8 to 15 days. A simple vibration massager with a plastic shell might be ready in 8-10 days. A more complex design with multiple stainless steel rollers, internal gears, and custom silicone heads can take 12-15 days.
What is the typical cost for a CNC machined massager prototype?
Costs depend on complexity and materials. A plastic-only prototype, like a basic vibration massager, generally ranges from $110 to $250 per unit. A more advanced prototype with stainless steel rollers, aluminum gears, and custom silicone massage heads can cost between $280 and $560 per unit.
Can this process make customized massage heads for specific applications, like for the face or feet?
Yes, absolutely. We use advanced 5-axis CNC machines to create custom massage heads for any body part. For a facial massager, we can make tiny, 8mm rollers and coat them with soft silicone. For a foot massager, we can make larger, 30mm textured rollers. The process is very flexible.
Discuss Your Projects with Yigu Rapid Prototyping
Are you developing a new massager and need a reliable partner for prototyping? At Yigu Rapid Prototyping, we specialize in the CNC machining massager prototype process. Our team of experienced engineers can help you refine your design, select the optimal materials, and create a fully functional prototype that you can test and hold. We understand the importance of comfort, quiet operation, and durability in a massager.
Contact Yigu Rapid Prototyping today to discuss your project. Let’s work together to turn your massage device concept into a reality you can feel.