Creating a high-fidelity garment steamer prototype is a vital bridge between a design concept and a market-ready appliance. Unlike a simple model, a professional prototype must handle high temperatures, maintain steam tightness, and feel comfortable in the user’s hand.
By using CNC machining, engineers can validate the mechanical logic of a steamer using production-grade materials. This process catches structural flaws—such as water tank leaks or poor handle ergonomics—before you invest in expensive injection molds. This article provides a comprehensive, step-by-step look at the professional workflow used to turn digital files into functional hardware.
Preliminary Preparation: Lay the Foundation for Machining
Success starts long before the machine turns on. In the world of rapid prototyping, preparation is where you prevent 90% of future assembly errors.
1.1 3D Modeling and Structural Design
We use professional CAD software like SolidWorks or UG NX to create a detailed digital twin. Since a garment steamer involves water, heat, and electricity, the model must be precise.
- Appearance Simulation: We replicate the full housing, including the 1.5–2L water tank, the base, and the ergonomic handle.
- Functional Simplification: We optimize internal channels. For example, we simplify the steam pipe path to avoid complex undercuts that are difficult for a CNC tool to reach.
- Sealing Grooves: We design specific grooves for silicone O-rings in the water tank interface. If these grooves are off by even 0.05mm, the steamer will leak steam during testing.
- Wall Thickness: We maintain a tank wall thickness of 1.5–2mm. This provides enough pressure resistance to handle hot water without warping.
1.2 Material Selection: Matching Properties to Components
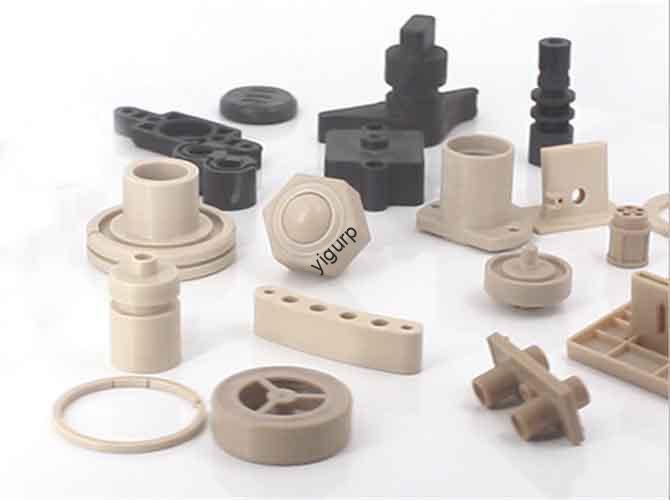
A garment steamer uses a mix of plastics and metals. Choosing the right “blank” material ensures the prototype behaves like the final product.
| Component | Recommended Material | Key Properties | Processing Requirement |
| Water Tank | Transparent Acrylic | 90% Light transmission | Polish to transparency |
| Base & Bracket | Aluminum Alloy 6061 | High strength, lightweight | Anodize for corrosion |
| Handle / Panel | ABS Plastic | Easy to machine, low cost | Spray matte PU paint |
| Steam Nozzle | Polycarbonate (PC) | Heat resistant (up to 120°C) | Precision hole drilling |
| Seals | Silicone Rubber | Waterproof, 200°C limit | Molded to fit grooves |
Case Study: We recently helped a client who used ABS for a steam nozzle prototype to save cost. The nozzle melted during a 30-minute stress test. We replaced it with PC (Polycarbonate), which has a much higher heat deflection temperature, allowing the client to complete their functional validation safely.
CNC Machining Process: From Setup to Production
The CNC phase is the core of the workflow. It requires a balance between rapid material removal and fine surface finishing.
2.1 Machine and Tool Preparation
We utilize high-precision three-axis or multi-axis CNC machines with a positioning accuracy of ±0.01mm.
- Coolant Strategy: For aluminum bases, we use a constant flow of emulsion to prevent the metal from sticking to the tool. For plastics like ABS or Acrylic, we use compressed air to keep the material cool without melting the surface.
- Tool Choice: We use carbide milling cutters for roughing out the water tank shape and ball nose cutters to create the smooth, ergonomic curves of the handle.
2.2 Programming and Simulation
We import the CAD files into Mastercam to plan the toolpaths. Before cutting, we run a digital simulation.
- Interference Check: We ensure the tool doesn’t hit the machine table when carving the deep cavity of the water tank.
- Overcutting Prevention: We double-check that the finishing pass won’t make the tank walls too thin, which could lead to cracks under pressure.
2.3 Clamping and Execution
Proper clamping is critical for thin-walled parts. If you squeeze a plastic water tank too hard in a vice, it will warp. We use vacuum suction cups or bolt platens with soft rubber pads to distribute pressure evenly.
| Material | Stage | Speed (rpm) | Feed (mm/tooth) | Coolant |
| Aluminum Base | Finishing | 2,000–2,500 | 0.12 | Emulsion |
| Acrylic Tank | Finishing | ≤2,000 | 0.15 | Compressed Air |
| ABS Handle | Finishing | 1,800–2,200 | 0.15 | Compressed Air |
Critical Tip: For Acrylic water tanks, we keep the speed below 2,000 rpm. Excessive heat causes the plastic to “cloud” or crack, which ruins the visibility of the water level.
Post-Processing: Enhance Functionality and Aesthetics
Parts straight off the machine often have tool marks. Post-processing turns these raw parts into a professional product.
3.1 Surface Treatment and Finishing
- Polishing: We use 800–2000 mesh sandpaper followed by acrylic-specific polish to make the water tank crystal clear.
- Painting: We spray the handle and base with matte PU paint. This hides tool marks and gives the plastic a premium, soft-touch feel.
- Anodizing: The aluminum bracket is anodized in silver or black. This protects it from the humid environment of a steamer.
- Precision Drilling: We use laser cutting or micro-drills to create the 0.5–1mm steam holes in the nozzle grid for uniform steam distribution.
3.2 Assembly and Debugging
We assemble the prototype in a logical order, starting from the inside out.
- Seal Installation: We fit the silicone O-rings into the machined grooves.
- Water Logic: We connect the water tank to the base and check for a “secure click” fit.
- Steam Path: We attach the steam pipe to the nozzle using waterproof glue and let it cure for 24 hours.
- Interface: We snap the control panel into the handle and test the button feedback.
Key Precautions: Avoid Common Issues
In our experience as product engineers, these three areas are where most prototypes fail:
- Heat Accumulation: When machining Acrylic, we use “segmented processing.” This means we cut for 10 minutes and then pause. This prevents heat buildup that causes the tank to warp.
- Tool Wear: A dull cutter will leave burrs in the sealing grooves. We replace finishing tools every 50 hours to ensure the groove stays within a ±0.03mm tolerance.
- Accuracy Compensation: For parts as thin as 1.5mm, we always leave a 0.1mm allowance during roughing. This offsets the slight movement caused by the clamping force.
Yigu Technology’s Perspective
At Yigu Technology, we believe a prototype is more than a model—it’s a safety validator. We prioritize steam tightness and precision above all else. For water tanks, we use CNC finishing to ensure a wall thickness tolerance of ±0.05mm.
By using 3D scanning after machining, we verify every component against the original CAD file. This attention to detail helps our clients reduce their rework rates by 25% and gets their product to market 1–2 weeks faster. Whether you need a visual model for a trade show or a functional unit for lab testing, we tailor our machining process to your specific goals.
FAQ
How long does the entire CNC machining garment steamer prototype process take?
Typically, it takes 10–14 working days. This includes 2 days for modeling, 4 days for machining, 2 days for painting/polishing, and 3 days for assembly and testing.
Can I replace acrylic with ABS plastic for the water tank?
We don’t recommend it. ABS is opaque, so the user can’t see the water level. Also, Acrylic handles the heat and pressure of hot water (80–100°C) much better than standard ABS.
What causes steam leakage from the joints?
Leakage is usually caused by an uneven sealing groove. If the groove depth varies by more than 0.05mm, the silicone ring won’t seal properly. We fix this by using a specialized groove cutter to ensure a uniform depth.
How do you ensure the handle is comfortable?
We use ball nose cutters to create smooth, organic radii. During post-processing, we hand-sand the parting lines to ensure there are no sharp edges that might irritate the user’s hand.
Is CNC machining better than 3D printing for this?
For functional testing, yes. CNC machining allows you to use actual PC, ABS, and Aluminum. 3D printed parts are often too porous to hold steam pressure and may leak or melt.
Discuss Your Projects with Yigu Rapid Prototyping
Do you have a new garment steamer design that needs to move from a 3D sketch to a physical reality? At Yigu Technology, we specialize in the high-precision CNC machining required for complex home appliances. From crystal-clear tanks to heat-resistant nozzles, we have the expertise to make your project a success. Would you like me to review your 3D files and provide a free DFM (Design for Manufacturing) analysis to see how we can optimize your prototype?