Introduction
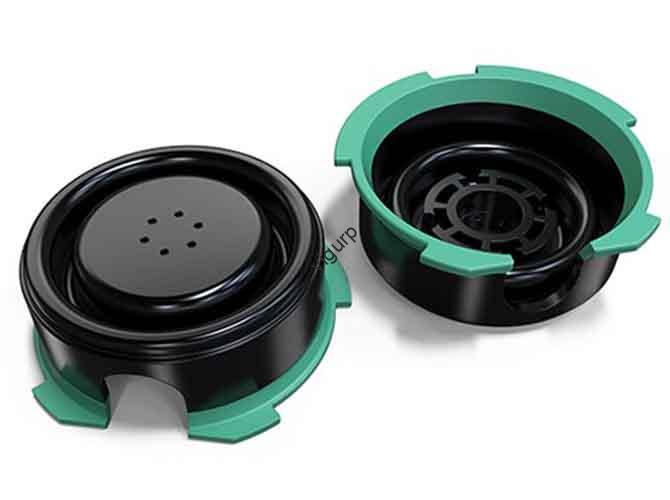
Creating a new electric eyebrow trimmer is a detailed job. This small device has big demands. It needs a cutter head sharp enough to trim hair, yet safe enough for sensitive skin. It must fit comfortably in the hand and often needs to be waterproof. Before you invest in mass production, you need a prototype that proves your design works. The CNC machining electric eyebrow trimmer prototype process is known for its effectiveness. But why is it the right choice for such a tiny, precise product? This article explains the entire process. We will look at how CNC machining handles the micro-sized parts, the different materials, and the functional tests that turn a design into a reliable grooming tool.
What Are the Main Benefits of CNC for Eyebrow Trimmers?
Electric eyebrow trimmers are all about the details. The gap between the teeth on the cutter head, the curve of the handle, the seal that keeps water out—every detail matters. The CNC machining process offers four key benefits that make it effective for this task.
Micro-Precision for a Safe Cutter Head
The most critical part of an eyebrow trimmer is the cutter head. If the teeth are too far apart, it will pull hair. If they are too close, it might not cut effectively. The edges must be sharp, but not so sharp that they irritate the skin. CNC machining delivers the needed micro-precision, with tolerances controlled within ±0.05mm. This allows us to create cutter head teeth with a precise gap of 0.1 to 0.2mm and rounded edges for safety.
Working with the Right Mix of Materials
An eyebrow trimmer is not made of just one material. The cutter head needs to be rust-resistant and hold a sharp edge. The handle needs to be lightweight and comfortable. The motor bracket needs to manage heat. The CNC process lets you use the perfect material for each part:
- Stainless steel 304 for the cutter head. It resists rust and can be polished to a smooth, skin-safe finish.
- ABS plastic for the handle and housing. It is light, tough, and can survive a drop.
- Acrylic for transparent covers, letting users see the battery level.
- Aluminum alloy for the motor bracket, as it is light and dissipates heat well.
Machining Complex, Ergonomic Curves
A trimmer handle must feel natural. It needs curves that fit the grip between thumb and finger. The holder for the cutter head can be very thin, sometimes under 1mm. CNC machines cut these complex curves and thin walls easily. They can also add functional details like anti-slip patterns (0.2mm deep) or tiny grooves for waterproof seals.
Testing the Real Product Immediately
A prototype must do more than look good. You need to know if the cutter head actually cuts hair without pulling. You need to test if the device is waterproof. You need to feel the vibration and hear the noise. Because CNC machining uses real materials, you can assemble a fully working prototype. You can install the motor and battery, turn it on, and run real tests. This can cut your R&D time by about 25% , helping you fix problems before tooling.
How Does the CNC Machining Electric Eyebrow Trimmer Prototype Process Work?
Effectiveness comes from a clear, step-by-step plan. Here is how the CNC machining process works for an electric eyebrow trimmer.
Step 1: Designing the 3D Model with Every Detail
The process starts in CAD software. You create a detailed model of every part. For an eyebrow trimmer, this means focusing on tiny but vital features:
- The Cutter Head: Model each tooth. Specify a 0.15mm gap between them. Design the edges to be slightly rounded.
- The Handle: Create an ergonomic curve that feels right in the hand. Add patterns for a non-slip grip.
- The Internal Parts: Design the slot for a small motor and the compartment for a AAA battery. Ensure everything has a small 0.1 to 0.3mm gap for easy assembly.
Step 2: Planning the Tool Paths
The 3D model is imported into CAM software. Here, a programmer plans the cutting sequence.
- Roughing: A larger flat cutter (like 8mm) removes the bulk of the material quickly, leaving a thin 0.3mm layer for the final cut.
- Finishing: Smaller tools take over. A 2mm ball nose cutter creates the smooth handle curves. A tiny 0.5mm engraving tool carves out the individual teeth on the cutter head.
- Optimization: The tool paths are chosen to minimize vibration during cutting, which is important for the delicate cutter head.
Step 3: Selecting and Preparing the Materials
Based on the design, the right materials are chosen and prepared.
| Component | Recommended Material | Key Reason for Choice |
|---|---|---|
| Cutter Head | Stainless Steel 304 | It resists rust and can be polished to a very smooth finish (Ra0.4) for safe skin contact. |
| Handle & Housing | ABS Plastic | It is lightweight (helps keep the whole trimmer under 50g) and tough enough to survive a 1-meter drop. |
| Transparent Covers | Acrylic | It lets over 92% of light through, making it easy to see the battery indicator. |
| Motor Bracket | Aluminum Alloy 6061 | It is light and conducts heat away from the motor, preventing overheating. |
Raw materials are cut into blanks, like a small block of ABS for the handle or a thin cylinder of stainless steel for the cutter head.
Step 4: Clamping and Positioning
Because the parts are so small, holding them correctly is vital. Tiny cutter heads and buttons are often held by a vacuum adsorption platform. This holds them flat without any clamping force that could bend them. A laser edge finder then sets the machine’s starting point with extreme accuracy, within ±0.01mm.
Step 5: Rough Machining
The machine starts cutting at a steady pace. It focuses on the larger surfaces, like the outside of the handle and the flat areas inside the housing. The goal is to get the basic shape right while protecting the areas where the small details will be machined later.
Step 6: Finishing and Micro-Detailing
Now the machine creates the final, user-critical features. This is where the trimmer comes to life. It machines the cutter head teeth to the exact 0.15mm spacing, accurate to ±0.02mm. A tiny 0.1mm tool is used to put a small radius on the tooth edges for safety. It cuts the waterproof sealing groove to a precise depth of 1.5mm. It engraves the anti-slip patterns on the handle.
Step 7: Post-Processing and Surface Finishing
After machining, the parts are finished by hand. Deburring with fine sandpaper removes any microscopic sharp edges, especially around the cutter head teeth and button holes. Then, the parts get their final surface treatment:
- ABS handles are sprayed with a matte finish to resist fingerprints.
- Acrylic covers are polished to make them perfectly clear.
- Stainless steel cutter heads are polished to a smooth Ra0.4 finish. The motor brackets are anodized to prevent corrosion.
Step 8: Assembly and Functional Testing
Finally, all the parts are assembled. The motor, battery, and cutter head are installed in the handle. Then, the prototype must pass a series of tests:
| Test Type | Purpose | Pass Criteria |
|---|---|---|
| Cutter Head Performance Test | Checks if it cuts hair efficiently and safely. | It should cut 95% of hairs in one pass. After 10 minutes of simulated use, there should be no redness on the skin. |
| Waterproof Test | Verifies it meets the IPX5 standard (resists water splashes). | After 10 minutes of being splashed from all directions, no water gets inside. |
| Vibration & Noise Test | Ensures it is comfortable and quiet to use. | Vibration should be low (under 0.3g). Noise should be below 55 decibels , which is quieter than a normal conversation. |
How Does CNC Compare to Other Prototyping Methods?
It helps to see how CNC machining stacks up against other ways of making prototypes. The table below compares them for an electric eyebrow trimmer.
| Evaluation Metric | CNC Machining | 3D Printing | Silicone Duplication |
|---|---|---|---|
| Precision | ±0.05mm (Perfect for tiny cutter head teeth) | ±0.1–0.3mm (Teeth may be uneven, causing hair pulling) | ±0.2–0.5mm (Not accurate enough for a functional cutter head) |
| Material Choice | Real metals and plastics. The cutter head is real stainless steel. | Only plastic filaments. Cannot make a sharp, rust-proof metal cutter head. | Only epoxy or resin. Parts are brittle and not waterproof. |
| Surface Safety | Smooth, deburred edges (Ra0.4). Safe for skin contact. | Rough, layered texture. Needs lots of sanding, but may still have sharp spots. | Smooth, but cannot create the fine, precise teeth of a cutter head. |
| Functional Testing | Fully functional prototype. Test cutting, waterproofing, and noise. | Parts are weak. The plastic “cutter head” cannot actually cut hair. | Only for visual checks. Cannot test moving parts. |
| Cost for 5+ Units | Lower per unit. The CNC program is reused. | Higher. Many failed prints and manual sanding add cost. | Higher. The silicone mold breaks down after only a few casts. |
This table shows why CNC machining is the most effective method for creating a functional, testable prototype of a precision device like an eyebrow trimmer.
What Key Precautions Ensure a Perfect Eyebrow Trimmer Prototype?
To get the best result, you must pay attention to a few critical details. Here are three important precautions.
Protect the Cutter Head’s Edges
The cutter head is the heart of the trimmer. When machining the stainless steel, use a low cutting force (under 200N) and a high spindle speed (12,000 rpm) to get a clean cut. After machining, the most important step is deburring. Use very fine 600-grit sandpaper to gently round the very tips of the teeth. You must remove every microscopic burr to ensure the cutter head is sharp for hair, but completely safe for skin.
Compensate for Plastic Shrinkage
Plastics like ABS shrink a tiny amount as they cool after machining, about 0.5% . To get the final part to the exact size you designed, you must add this shrinkage factor during programming. For example, if you need a handle that is exactly 60mm long, you program the machine to cut it to 60.3mm. It will then shrink to the perfect 60mm.
Calibrate the Waterproof Groove
The groove that holds the waterproof O-ring is critical. After machining, use a feeler gauge to check its depth. It must be exactly 1.5mm, accurate to ±0.02mm. If it is too shallow, the O-ring will not seal properly. If it is too deep, the O-ring might twist and leak. If the measurement is off, you can do a very light 0.01mm finishing pass to correct it.
Conclusion
The CNC machining electric eyebrow trimmer prototype process is effective because it masters the small things. Its ability to hold ±0.05mm precision allows for the creation of safe, precise cutter heads with perfectly spaced teeth. Its compatibility with real materials like stainless steel and ABS means you get a prototype that feels and functions like the final product. By following the detailed workflow—from CAD design through to functional testing for cutting performance, waterproofing, and noise—you can validate every aspect of your design. This process catches flaws early, saving time and money, and gives you the confidence that your trimmer will be both effective and safe for users.
FAQ
How long does the CNC machining electric eyebrow trimmer prototype process take?
The timeline is typically 6 to 12 days. A simpler design with a basic handle and cutter head might take 6-8 days. A more complex model with waterproofing, a transparent cover, and fine anti-slip patterns can take 10-12 days.
What is the typical cost for a CNC machined electric eyebrow trimmer prototype?
Costs vary based on materials and complexity. A plastic-only prototype (ABS handle, no metal cutter head) generally ranges from $70 to $170 per unit. A prototype with a real stainless steel cutter head and metal motor bracket costs more, typically between $170 and $350 per unit.
Can this process make very small, pen-sized eyebrow trimmers?
Yes, absolutely. We use advanced 5-axis CNC machines to create miniaturized designs. We can machine a pen-sized handle as small as 12mm in diameter and a micro-cutter head just 8mm long, all while maintaining the same ±0.03mm precision. The process also handles the tiny internal compartments for portable batteries.
Discuss Your Projects with Yigu Rapid Prototyping
Are you ready to develop a new electric eyebrow trimmer? Turning your concept into a precise, functional, and safe product requires a partner who understands the challenges of micro-machining. At Yigu Rapid Prototyping, we specialize in the CNC machining electric eyebrow trimmer prototype process. Our experienced engineers can help you refine your design, choose the best materials for the cutter head and handle, and create a fully functional prototype that you can test and hold.
Contact Yigu Rapid Prototyping today to discuss your project. Let’s work together to create an eyebrow trimmer prototype that is sharp, safe, and ready for the market.