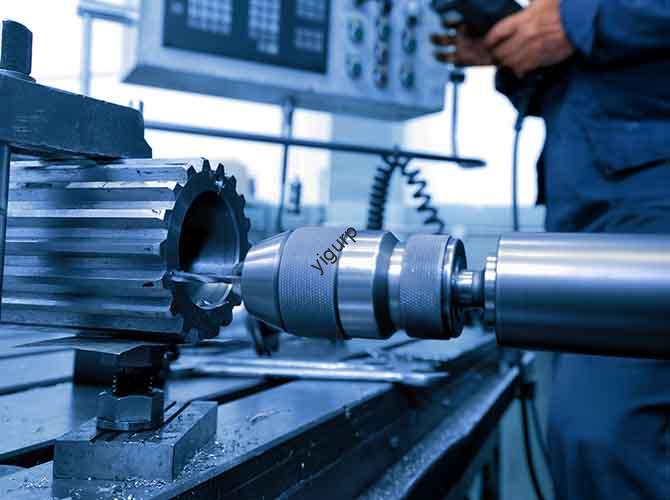
Introduction
If you run a CNC machine, you know the pain of setup. You spend hours aligning vises, indicating edges, and tramming workpieces. It is slow, tedious work. And every minute spent on setup is a minute not spent cutting metal. That is where a CNC fixture plate changes everything. Think of it as a precision foundation for your machine table. It is a flat plate with a grid of precisely located holes that lets you bolt down workpieces, vises, or fixtures in seconds instead of hours. You align it once, and then every part you put on it is automatically in the right spot. In this guide, I will show you exactly how these plates work, the different types available, how to pick the right one, and real examples of shops that saved massive time and money by adding one to their workflow.
What Exactly Is a CNC Fixture Plate and Why Should You Care?
A CNC fixture plate (sometimes called a subplate or tooling plate) is a flat, rigid plate that bolts directly to your CNC machine’s table. It is made from materials like aluminum or steel and machined to very tight tolerances—often within ±0.0005 inches of perfect flatness. The plate has a pattern of holes drilled into it, usually threaded, that act as mounting points.
Here is why it matters: Without a fixture plate, you have to indicate every single workpiece or vise you put on the table. You spend 30 minutes to 2 hours per job just making sure everything is square and in the right place. With a fixture plate, you do that work once. You align the plate to your machine when you install it. After that, anything you bolt to the plate is automatically aligned. You just clamp it down and go.
Real Shop Example: Time Saved Adds Up Fast
Last year, I consulted for a small job shop that made parts for medical devices. They were running 6 different jobs per week on their main CNC mill. Each job required about 45 minutes of setup time. That is 4.5 hours per week just in setup, or 18 hours per month.
We installed a 12×24-inch aluminum fixture plate on their machine. It took one hour to install and indicate perfectly. After that, setup time for each job dropped to 10 minutes. Their weekly setup time went from 4.5 hours to 1 hour. That freed up 3.5 hours per week of machining time—enough to take on an extra job every week. The plate paid for itself in less than a month.
What Are the Main Types of CNC Fixture Plates?
Not all fixture plates are the same. The right one depends on what you machine and how you work. Here are the most common types.
Tapped Hole Plates: The Workhorse
These plates have a grid of pre-tapped holes, usually with a common thread size like 1/4-20 or M8. You bolt your workpieces or vises directly into these holes.
- Best For: General machining, especially if you use standard clamps and vises.
- Pros: Very easy to use. Bolt anything anywhere on the grid. No need for special clamps.
- Cons: The threads can strip if you over-tighten. Limited flexibility for oddly shaped parts.
Slot Plates: For Irregular Shapes
Instead of holes, these plates have long, narrow slots. You can slide your clamps anywhere along the slot, which is great for parts that do not fit a standard grid pattern.
- Best For: Odd-shaped workpieces or large parts that need custom clamping positions.
- Pros: Infinite adjustment along the slots. Very flexible.
- Cons: You need slot-specific clamps. Slightly less precise than tapped holes.
Grid Plates: Best of Both Worlds
These combine tapped holes and slots in one plate. You get the precision of holes for standard work and the flexibility of slots for odd jobs.
- Best For: Shops that handle a wide variety of parts and need versatility.
- Pros: Very versatile. Handles almost any job.
- Cons: More expensive. Heavier than single-type plates.
High-Precision Ceramic Plates: For Extreme Accuracy
These are specialty plates made from ceramic. They are ultra-flat and do not expand or contract with temperature changes.
- Best For: High-tolerance work like medical implants or optical components.
- Pros: Unmatched accuracy. Zero thermal expansion. Resists wear.
- Cons: Very expensive (often over $1,000). Brittle—can crack if dropped.
How Do You Choose the Right Fixture Plate for Your Shop?
Picking the right plate is about matching it to your work. Here is a simple decision framework.
Match Size to Your Machine Table
Your plate should fit comfortably on your table without overhang. A plate that hangs over the edge can vibrate and cause poor cuts. Measure your table and leave at least an inch of clearance on all sides.
- Example: If you have a 16×32-inch table, a 12×24-inch or 14×30-inch plate is ideal.
Choose Material Based on Your Work
- Aluminum: Lightweight and affordable. Great for hobbyists or shops cutting wood, plastic, or aluminum. Easy to install because it is not too heavy.
- Steel: Much stronger and more durable. Ideal for cutting hard metals like steel or titanium. But heavy—a steel plate weighs about 10 to 15 pounds per square foot. Make sure your machine can handle the weight.
- Stainless Steel: Corrosion-resistant. Good for wet environments with lots of coolant.
- Ceramic: Only for high-precision, high-budget work.
Consider Hole Spacing
Most plates use a 1-inch or 25mm grid. This matches standard vise and clamp sizes. If you work with very small parts, look for a 0.5-inch grid. For large parts, a 3-inch grid might be better so you are not drilling unnecessary holes.
What Features Make a Fixture Plate High Quality?
A cheap, poorly made plate will cause more problems than it solves. Here is what to look for.
Flatness Tolerance
The plate must be flat. Really flat. Look for a tolerance of ±0.0005 inches per foot or better. A warped plate will make all your parts wrong. Reputable manufacturers provide a flatness certificate. Ask for it.
Hole Position Accuracy
The holes must be exactly where they are supposed to be, within ±0.001 inches. If they are off, your fixtures will not align. Some high-end plates use threaded inserts instead of tapping the plate directly. These inserts are replaceable if they strip, so the plate lasts longer.
Material Thickness
Thicker plates are more rigid and resist vibration. For small benchtop mills, 0.75 inches thick is enough. For industrial machines cutting steel, go with 1 to 1.5 inches thick.
Surface Finish
A smooth surface (roughness average Ra 0.8 or better) prevents burrs from messing up your workpiece alignment. Avoid plates with rough edges or visible tool marks.
Compatibility with Your Machine
Check that the plate has mounting holes that line up with your table’s T-slots. Most tables use T-slot sizes like 1/2-inch, 3/4-inch, or 1-inch. Make sure your plate’s mounting hardware fits.
How to Install and Calibrate Your Fixture Plate
Installing a fixture plate correctly is critical. A misaligned plate ruins all the benefits. Follow these steps carefully.
Tools You Will Need
- Precision level (accurate to 0.0005 inches per foot)
- Edge finder or touch probe
- T-slot bolts and washers
- Torque wrench
- Dial indicator with magnetic base
Step 1: Clean Everything
Clean your machine table thoroughly. Any chip or debris under the plate will cause misalignment. Use a lint-free cloth and isopropyl alcohol.
Step 2: Position the Plate
Set the plate on the table, lining up its mounting holes with your T-slots. Do not tighten the bolts yet. Leave them loose enough to move the plate.
Step 3: Level the Plate
Place your precision level on the plate. Check along the X-axis (lengthwise) and Y-axis (widthwise). Adjust by loosening or tightening the T-slot bolts until the level reads zero in both directions. This means the plate is perfectly flat relative to your machine’s axes.
Step 4: Torque the Bolts
Tighten the bolts with a torque wrench. Follow the manufacturer’s specs—usually 20 to 30 foot-pounds for aluminum, 30 to 40 for steel. Over-tightening can warp the plate.
Step 5: Set Your Work Offset
Now you need to tell your CNC where the plate is. This is called setting the work offset.
- Put an edge finder or probe in the spindle.
- Touch the probe to the corner of the plate (for example, the top-left hole).
- Record the X and Y coordinates in your machine’s work offset memory (like G54).
- Touch the probe to the plate surface and set Z=0.
Step 6: Save the Offset
Once calibrated, save these coordinates. You will never have to re-calibrate unless you remove the plate.
Pro Tips: How to Get the Most Out of Your Fixture Plate
A good plate is a tool. Using it well makes you faster and more accurate.
Use Quick-Change Fixtures
Pair your plate with quick-change vises or fixture kits. For example, set up five vises on your plate, each holding a part. You can machine them one after another with just a minute or two between parts instead of 10 minutes of setup each time.
Label Your Grid
Use a marker to label the holes. Write “X1-Y1,” “X1-Y2,” and so on. This saves time because you do not have to measure hole positions every time. Shops that label their plates often cut setup time by another 10 to 15 percent.
Batch Similar Jobs
Group jobs that use the same fixtures. Run all your aluminum parts in the morning, then swap fixtures for steel parts in the afternoon. This reduces how often you change clamps.
Maintain Your Plate
Clean it after every job. Chips and coolant buildup can make parts sit unevenly. Every few months, check flatness with a precision level. If it has warped (common with steel plates under heavy use), you may need to have it re-machined or replaced.
Common Mistakes to Avoid
Even experienced machinists make these errors. Do not let them happen to you.
Over-Tightening Bolts
Over-tightening strips threads or warps the plate. Always use a torque wrench. For a 1/4-20 hole in aluminum, tighten to 5 to 7 foot-pounds, not 10.
Ignoring Plate Weight
Steel plates are heavy. A 12×24-inch steel plate weighs about 180 pounds. If your machine table is rated for 200 pounds, that plate leaves almost no room for workpieces. Check your machine’s manual before buying.
Skipping Calibration
Some people assume the plate is “good enough” and skip setting the work offset. This is a mistake. Even the best plate can shift during shipping or installation. Always calibrate.
Using the Wrong Clamps
Weak clamps let parts move. For a heavy steel part, use clamps that apply at least 50 pounds of force. Check your clamp ratings.
Conclusion
A CNC fixture plate is one of the smartest investments you can make for your machining operation. It turns hours of setup time into minutes. It makes your parts more consistent because every workpiece references from the same precise foundation. It frees up your machine to actually cut metal instead of sitting idle while you indicate and align. Whether you choose a simple tapped aluminum plate for general work or a high-end ceramic plate for extreme precision, the principle is the same: align it once, and then let it work for you job after job. If you are tired of wasting time on setup, a fixture plate is the answer.
FAQ About CNC Fixture Plates
1. Can I use a CNC fixture plate on any machine?
Yes, as long as you can bolt it to your table. For mills, you bolt to the T-slots. For lathes, you need a lathe-specific plate that mounts to the spindle. Always check compatibility before buying.
2. How much does a good CNC fixture plate cost?
Prices range from (200 to over )1,500. A quality 12×24-inch aluminum plate for a small to mid-size mill runs (300 to )600. This is the sweet spot for most shops.
3. Do I have to remove the plate when I am not using it?
No. Most shops leave them on permanently. Just make sure the plate does not limit your machine’s travel. Check that the Z-axis can move freely above the plate.
4. Can I drill my own holes in a fixture plate?
Not recommended unless you have a very precise mill. Drilling your own holes will likely ruin the plate’s flatness and hole accuracy. Stick to pre-machined plates from reputable suppliers.
5. What is the difference between a fixture plate and a subplate?
The terms are often used the same way. Sometimes “subplate” refers to a smaller plate that mounts under a specific fixture, while “fixture plate” is the large base plate on the table. But in practice, most people use them interchangeably.
6. How do I stop parts from moving on the plate?
Use clamps or vises that match the part size and material. For small parts, consider using double-sided tape or low-melt glue if you cannot clamp them. But always test that the part stays secure before running the program.
Discuss Your Projects with Yigu Rapid Prototyping
At Yigu Rapid Prototyping, we have helped dozens of shops transform their workflow with the right fixturing solutions. We know that every machine, every shop, and every job is a little different. That is why we do not just sell plates—we help you figure out exactly what you need. Our team can advise on material selection, hole patterns, and even custom sizes if off-the-shelf plates do not fit your machine. We stock a range of high-precision aluminum and steel fixture plates, all machined to strict flatness tolerances and backed by our quality guarantee. Whether you are a one-person shop with a benchtop mill or a large facility running multiple industrial machines, we have a solution that will save you time and money. Contact Yigu today to talk about your setup, and let us find the perfect fixture plate for your work.