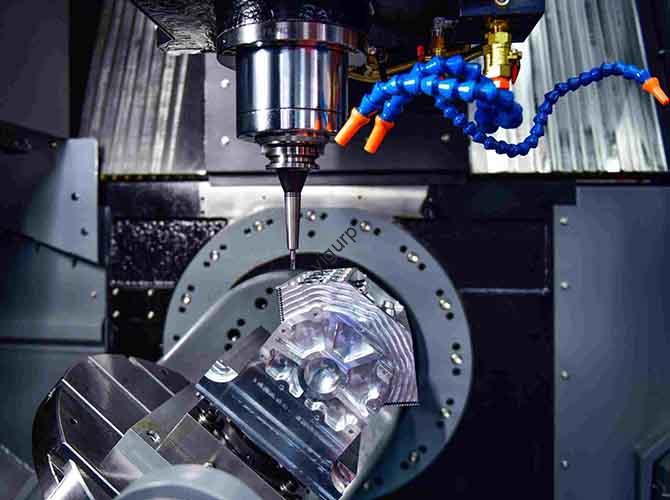
Getting rid of burrs is a constant battle in any CNC shop. These tiny, sharp edges are more than just a nuisance—they ruin part fit, create safety hazards, and eat into your profits through extra cleanup work and scrapped parts. This guide cuts through the complexity. We’ll explain exactly why burrs form, how to prevent them at the machine, and the smartest ways to clean them up when they do appear, so you can ship perfect parts every time.
Getting to Know the Different Kinds of Burrs
Think of burrs like weeds—you need to know what you’re dealing with before you can get rid of them. The type of burr tells you a lot about what went wrong in the process.
- The Common Thread: Long, stringy bits of material, often seen with aluminum or copper. They form when the tool pulls on the material instead of cutting it cleanly. These can wrap around tools and cause crashes.
- The Jagged Edge: Rough, tooth-like burrs common with stainless steel or titanium. They happen when the material hardens from the cutting process itself, making the tool work poorly. These are tough to remove and can cut fingers or damage seals.
- The Rolled Lip: Looks like a tiny folded flap of metal on the edge. It’s often from using a dull tool or wrong cutting angle on softer steels. This ruins the flatness of a part.
- The Corner Burr: Small, sharp points left in tight corners or at hole exits. This is usually a sign of a bad tool path where the cutter changed direction too sharply.
Why Do Burrs Even Happen?
Burrs are rarely caused by just one thing. They are usually the result of several factors in your setup not working together.
Is Your Tool to Blame?
Your cutting tool is ground zero for burr formation. A dull or worn tool is the top culprit. It mashes and tears the material instead of shearing it. Using the wrong tool shape for the job, like an angle that’s too steep or too shallow, can also push material out to the sides, forming a burr. Finally, if your tool holder or tool itself isn’t rigid enough, it will vibrate (chatter), leaving an uneven, burr-filled surface.
Are Your Cutting Settings Off?
Even with a perfect tool, wrong settings will make burrs.
- Feed Rate Too High: The tool is moving forward too fast. It can’t cut cleanly, so it just plows through and pushes excess material to the side as a big burr.
- Speed Too Slow or Too Fast: Running too slow lets material stick to the tool edge. Running too fast can make the tool unstable. Both lead to poor cuts and burrs.
- Cut Depth Problems: Taking too heavy of a cut leaves a damaged layer. If your finishing pass is too light, it won’t clean this layer off, leaving behind burrs.
Is the Material Fighting You?
Some materials are just naturally burr-prone. Soft, gummy materials like pure copper stretch and form long burrs. Hard materials like titanium work-harden quickly, making them resistant to clean cutting and promoting jagged burrs. Also, materials with internal flaws or uneven hardness from poor processing will machine unpredictably.
Could It Be Your Machine or Program?
Sometimes the issue is in the plan, not the execution.
- Bad Tool Paths: If your CNC program has the tool make a sharp 90-degree turn instead of a smooth rounded corner, the sudden change in force will rip out a burr.
- Poor Cooling: Not enough coolant lets heat build up. This softens the tool and expands the workpiece, ruining cut precision and encouraging burrs.
- Machine Wear: A machine with loose spindle bearings or sloppy guides will not hold the tool perfectly steady. This tiny movement is enough to create an inconsistent cut and leave burrs.
How Do You Prevent Burrs Before They Start?
It’s always cheaper to stop a burr than to remove one. Focus on these areas:
| Focus Area | Key Action | What It Fixes |
|---|---|---|
| The Right Tool | Use sharp, coated tools. Pick the best geometry (angles) for your material. Ensure tools are short and held tightly for maximum rigidity. | Prevents tearing and material push-off from dull or flimsy tools. |
| The Right Settings | Match feed rate and speed to tool & material specs. Use a lighter finishing pass to clean up the surface. | Stops the tool from plowing or smearing the material. |
| Smart Programming | Use smooth corner arcs instead of sharp angles in your tool paths. Plan entry and exit moves carefully. | Prevents the tool from jerking and ripping out material at corners. |
| Machine Health | Keep spindles and guides in good calibration. Use enough high-quality coolant, especially for tough metals. | Ensures the cut is stable, cool, and consistent from start to finish. |
What’s the Best Way to Remove Burrs You Already Have?
When prevention isn’t 100%, you need a cleanup plan. The best method depends on your part.
- Manual Work: Using files, scrapers, or sandpaper. It’s flexible and low-cost for prototypes or very complex parts, but it’s slow and depends heavily on the operator’s skill.
- Tumbling/Vibratory Finishing: Throwing parts in a tub with abrasive media. It’s great for high volumes of small parts and gives a uniform finish, but it can’t reach deep inside holes or very tight spaces.
- Thermal Energy (TEM): Burning off burrs with a quick, hot blast of gas. It’s incredibly effective for complex internal passages that other methods can’t touch. However, the equipment is expensive, and it’s not good for thin or delicate parts.
- Robotic/Automated Deburring: A robot arm uses a brush or small tool to follow a programmed path. This is perfect for consistent, high-volume production of the same part, removing human error.
A Real-World Fix: Solving Burrs on a Titanium Bracket
A shop machining aerospace brackets from titanium (Ti-6Al-4V) had a 25% scrap rate due to jagged burrs. The cost was huge.
The Problem: Burrs on hole edges. They found the root causes: tools wore out too fast, the cutting speed was too low (causing material to stick), and the CNC program had sharp corners.
The Solution:
- They switched to a tougher, coated tool material that lasted 4 times longer.
- They optimized the cutting speed and feed rate to prevent material buildup.
- They added smooth arcs to every sharp corner in the tool path.
- For final cleanup, they used a precise abrasive flow process.
The Result: The scrap rate plunged from 25% to under 3%, saving over $130,000 a year. Deburring time dropped from 15 to 3 minutes per part.
Conclusion
Beating burrs isn’t about one magic trick. It’s about a systematic approach across your entire process. Start by choosing the right tool and dialing in your speeds and feeds. Then, look at your CNC program for sharp turns that need smoothing. Finally, pick a removal method that fits your part’s shape and your production volume. By understanding the “why” behind burrs, you can fix the problem at its source, save money on rework, and deliver higher quality parts to your customers.
FAQ: Your CNC Burr Questions, Answered
Q: Is it possible to machine a part with zero burrs at all?
For very simple shapes under perfect conditions, yes. But for most real-world parts, especially complex ones, the goal is minimization. You aim to get burrs so small and few that cleanup is ultra-fast and easy.
Q: I get bad burrs when drilling holes. What’s the main cause?
This is often a combination of a dull drill bit and incorrect feed and speed. A dull bit pushes material instead of cutting it. Also, not pecking drilling (pulling the bit back to clear chips) in deep holes can cause chip packing, which leads to tearing and burrs at the hole exit.
Q: Are some CNC machines just better at preventing burrs?
Yes. Machines with high rigidity, precise spindles, and advanced controllers allow for smoother motion and more stable cutting. This directly leads to a cleaner cut with fewer burrs. An old, worn-out machine will struggle no matter what you do.
Q: What’s the biggest mistake shops make with burrs?
The biggest mistake is treating burrs as an unavoidable cleaning problem, not a preventable process problem. Throwing money at post-processing without fixing the root cause in the machining cycle is the most expensive approach long-term.
Discuss Your Projects with Yigu Rapid Prototyping
Struggling with persistent burrs that delay your projects and inflate costs? At Yigu Rapid Prototyping, we treat burr prevention as a core part of our engineering process. Our expertise in toolpath optimization, material science, and in-process monitoring helps us produce cleaner parts from the first run. We don’t just machine your part; we analyze your design for manufacturability and recommend adjustments to eliminate burr-prone features. Let’s discuss how we can bring precision and efficiency to your next project. [Contact Yigu Today for a Burr-Free Quote].