Introduction
If you are wondering what aluminum turning is and how to do it well, you are in the right place. Simply put, aluminum turning is a machining process that uses a lathe to shape aluminum workpieces by rotating them against a cutting tool. It is widely used in industries like aerospace, automotive, and consumer electronics because aluminum is lightweight, affordable, and relatively easy to machine. Unlike harder metals such as steel, aluminum’s low density and high thermal conductivity mean it requires specific tools, speeds, and feeds to avoid common problems like built-up edge (BUE) or tool wear. By the end of this guide, you will understand everything from choosing the right materials to troubleshooting common issues—whether you are a hobbyist just starting out or a professional machinist.
Understanding Aluminum as a Machining Material
Before diving into the turning process, it is crucial to know why aluminum is so popular and how its properties affect the work. Aluminum is a non-ferrous metal with a density of just 2.7 g/cm³ , which is about one-third that of steel. This light weight makes it ideal for parts where weight reduction is critical, like aircraft components or smartphone frames. It also has excellent thermal conductivity (237 W/m·K), which means the heat generated during turning dissipates quickly. This is both a benefit and a challenge. On one hand, it reduces the risk of overheating the workpiece. On the other, it can cause the cutting tool to lose heat, leading to built-up edge (BUE) if not managed properly.
Not all aluminum alloys are the same for turning. The most common types used in machining are:
- 6061-T6: This is a versatile alloy with good strength and excellent machinability. It is often used for general-purpose parts like brackets or housings. In my experience, 6061-T6 is a great starting point for beginners because it is forgiving—even if you slightly miscalculate your speeds, it rarely damages your tools.
- 7075-T6: This is a high-strength alloy used in demanding aerospace and automotive applications. It is harder than 6061-T6, so it requires sharper tools and slower feeds to avoid tool wear. I once worked on a project making motorcycle parts with 7075-T6. We had to switch to a carbide tool after just 50 parts because our high-speed steel (HSS) tool became too dull.
- 1100-H14: This is a nearly pure aluminum alloy with excellent machinability but very low strength. It is best for non-structural parts like decorative trim or food containers.
To help you compare, here is a table of key properties for these common alloys:
| Aluminum Alloy | Density (g/cm³) | Thermal Conductivity (W/m·K) | Machinability Rating* | Common Applications |
|---|---|---|---|---|
| 6061-T6 | 2.70 | 167 | 70-80 | Brackets, housings, automotive parts |
| 7075-T6 | 2.81 | 130 | 40-50 | Aerospace components, motorcycle parts |
| 1100-H14 | 2.71 | 220 | 90-95 | Decorative trim, food containers, heat sinks |
*Machinability rating: Based on a scale where 1100 aluminum is 100 (higher number means easier to machine).
What Essential Tools Do You Need for Successful Aluminum Turning?
Having the right tools is critical for aluminum turning. Unlike steel, aluminum tends to be sticky and can adhere to cutting tools, so the tool material, geometry, and coatings are very important.
Cutting Tools: Material Matters
The two most common tool materials for aluminum turning are carbide and high-speed steel (HSS) .
- Carbide tools are harder and more heat-resistant. This makes them ideal for high-speed turning of tougher alloys like 7075-T6. They last much longer—typically 5 to 10 times longer than HSS when machining aluminum—but they are also more expensive.
- HSS tools are more affordable and easier to sharpen. This makes them a good choice for hobbyists or low-volume projects with softer alloys like 1100-H14.
Coatings can also significantly improve tool performance. Titanium Nitride (TiN) coatings reduce friction, which helps prevent aluminum from sticking to the tool. I have found that TiN-coated carbide tools can double the tool life when turning 6061-T6 compared to uncoated tools. Another option is Diamond-Like Carbon (DLC) coatings, which are even more wear-resistant but come at a higher cost—best for high-volume production.
Tool Geometry: Avoiding Built-Up Edge
Tool geometry is just as important as the material itself. For aluminum, you need a tool with a positive rake angle (usually between 10 and 20 degrees). This reduces cutting forces and minimizes the risk of BUE. A larger rake angle makes the cut smoother, which is essential because BUE can leave a rough, torn surface on your workpiece. You also want a high relief angle (8 to 12 degrees) to prevent the flank of the tool from rubbing against the workpiece and creating friction.
For example, when turning a 6061-T6 shaft, I use a carbide tool with a 15-degree rake angle and a 10-degree relief angle. This setup cuts through the aluminum cleanly, and I rarely have to stop to clean BUE off the tool. In contrast, using a tool with a negative rake angle on aluminum almost always leads to BUE within the first 10 minutes of machining.
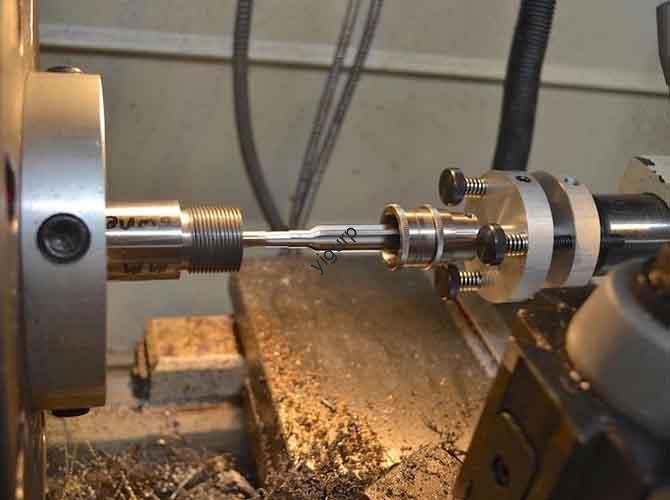
Lathe Setup: Stability Is Key
Your lathe needs to be stable to avoid chatter—the vibrations that cause rough surfaces and accelerated tool wear. First, make sure the lathe is mounted on a level surface and securely bolted down. Then, use a chuck or a collet to hold the workpiece firmly. Collets are generally better for small, round workpieces like rods because they provide even, 360-degree pressure, which reduces vibration. For larger workpieces, a three-jaw chuck works well, but you must always check for runout (wobble) before you start. Runout of more than 0.001 inches can ruin a precision part.
I once had a project turning a 7075-T6 cylinder for an aerospace client. The lathe wasn’t level, and within the first few cuts, I noticed chatter marks on the surface. After leveling the lathe and tightening the chuck, the chatter stopped, and the part came out with a smooth finish that met the client’s strict tolerances of ±0.0005 inches.
A Step-by-Step Guide to Aluminum Turning
Now that you have the right tools and understand the material, let’s walk through the actual process of aluminum turning. This guide is based on my experience machining 6061-T6 parts, but it can be adapted for other alloys with small adjustments.
- Step 1: Prepare the Workpiece. First, cut your aluminum to the rough length you need. It is a good idea to add an extra 1 to 2 inches to account for trimming later. Then, clean the workpiece to remove any oil, dirt, or the hard oxide layer that forms on aluminum. This oxide layer is very hard, and if it is not removed, it can damage your cutting tool. I usually use a wire brush or 200-grit sandpaper to clean the surface. For precision parts, I also wipe it down with a solvent like isopropyl alcohol.
- Step 2: Mount the Workpiece on the Lathe. Mount the workpiece securely in a collet or chuck. If you are using a chuck, tighten each jaw evenly to avoid causing runout. Then, use a dial indicator to check for runout and adjust the workpiece until the runout is less than 0.001 inches.
- Step 3: Set Up the Cutting Tool. Install the cutting tool in the tool post, making sure its tip is aligned with the exact centerline of the workpiece. If the tool is too high or too low, it will cause poor cutting performance and rapid tool wear. Use a center gauge to get the alignment perfect. Then, set your initial depth of cut. It is wise to start with a shallow cut, about 0.010 to 0.020 inches, for the first pass to test your setup.
- Step 4: Choose the Right Speeds and Feeds. Getting the speeds and feeds right is critical for aluminum turning. Aluminum has a low melting point, so you need high cutting speeds to avoid overheating the workpiece. However, too high a speed can cause chatter. Here are general guidelines based on alloy and tool material:
| Aluminum Alloy | Tool Material | Cutting Speed (SFM) | Feed Rate (IPR) | Depth of Cut (inches) |
|---|---|---|---|---|
| 6061-T6 | Carbide | 1000-1500 | 0.005-0.015 | 0.020-0.100 |
| 7075-T6 | Carbide | 800-1200 | 0.003-0.010 | 0.010-0.080 |
| 1100-H14 | HSS | 500-800 | 0.008-0.020 | 0.030-0.120 |
*SFM = Surface Feet per Minute; IPR = Inches Per Revolution
For example, if you are turning a 6061-T6 rod with a 2-inch diameter using a carbide tool, you would calculate the spindle speed (RPM) like this: RPM = (SFM × 3.82) / Diameter. So, (1200 × 3.82) / 2 = 2292 RPM. I usually start at the lower end of the speed range (around 1000 SFM) and increase it if the cut feels smooth and looks good.
- Step 5: Start Turning. Turn on the lathe and start your first pass with a shallow depth of cut. Keep a close eye on the cutting tool. If you see BUE starting to form, reduce the feed rate or increase the cutting speed. After the first pass, inspect the workpiece’s surface finish. If it is rough, you may need to adjust your tool geometry or your speeds and feeds. For the final finishing pass, use a very shallow depth of cut (0.005-0.010 inches) and a slower feed rate to achieve a smooth, high-quality surface.
- Step 6: Finish and Inspect the Part. Once all turning passes are complete, remove the workpiece from the lathe and trim it to its final length if needed. Then, carefully inspect the part for correct dimensions and surface finish. Use a caliper or micrometer to check that it meets your tolerances. With the right setup, aluminum turning can achieve tolerances as tight as ±0.0001 inches.
What Are the Common Problems in Aluminum Turning and How Do You Fix Them?
Even with the best setup, you might run into issues during aluminum turning. Here are the most common problems and how to solve them, based on years of experience.
Built-Up Edge (BUE)
BUE is when small pieces of aluminum stick to the cutting tool’s tip. This causes a rough surface finish and can accelerate tool wear. It happens because aluminum becomes soft and gummy at cutting temperatures. To fix BUE:
- Increase the cutting speed. Higher speeds reduce the time the aluminum is in contact with the tool, which prevents sticking. For example, if you are getting BUE on 6061-T6 at 1000 SFM, try increasing it to 1200 SFM.
- Use a tool with a positive rake angle. A 15 to 20-degree rake angle reduces cutting forces, which minimizes BUE.
- Apply cutting fluid. Using a coolant or cutting fluid cools the tool and workpiece, reducing friction. A simple 10:1 mix of water and soluble oil is very effective and affordable for aluminum.
Chatter
Chatter is the vibration between the tool and the workpiece. It leaves a wavy or rough surface. It is often caused by an unstable setup or incorrect speeds and feeds. To fix chatter:
- Tighten the lathe and the workpiece. Make sure your lathe is level and that the chuck or collet is holding the part tightly. If the workpiece is long and unsupported, use a steady rest to support it.
- Reduce the depth of cut. A shallower cut reduces cutting forces, which minimizes vibration. If you are using a 0.100-inch DOC and getting chatter, try reducing it to 0.050 inches.
- Adjust the cutting speed. Chatter often happens at specific resonant speeds. Try increasing or decreasing the spindle speed by 10-20% to find a smoother range.
Tool Wear
Tool wear happens when the cutting tool becomes dull. This leads to poor surface finishes and increased cutting forces. It is more common with harder alloys like 7075-T6. To reduce tool wear:
- Use a harder tool material. Switch from HSS to carbide for harder alloys. Carbide is much more wear-resistant at high speeds.
- Apply a coating. TiN or DLC coatings reduce friction and wear. I have found that TiN-coated carbide tools last twice as long as uncoated tools when turning 7075-T6.
- Reduce the feed rate. A slower feed rate puts less load on the tool, extending its life. If you are using 0.010 IPR and the tool wears quickly, try 0.007 IPR.
Conclusion
Aluminum turning is a fundamental machining process that is essential in many of today’s most important industries. By understanding the unique properties of aluminum alloys—from the forgiving 6061-T6 to the high-strength 7075-T6—you can select the right material for your project. Equally important is choosing the correct tools, with the right material (carbide or HSS), geometry (positive rake angles), and coatings (like TiN) to prevent issues like built-up edge. Following a careful, step-by-step process and knowing how to troubleshoot common problems like chatter and tool wear will allow you to produce high-quality, precision parts efficiently and consistently.
FAQ
What is the best aluminum alloy for beginners to start turning?
6061-T6 is widely considered the best alloy for beginners. It is very forgiving, has good machinability, and is less prone to causing built-up edge compared to harder alloys. It is also very common and affordable.
What is the main difference between turning 6061 and 7075 aluminum?
The main difference is that 7075-T6 is significantly harder and stronger than 6061-T6. This means it requires sharper tools (usually carbide), slower cutting speeds, and lighter feeds to machine successfully without causing rapid tool wear.
How do I prevent aluminum from sticking to my cutting tool?
To prevent sticking, you should use a tool with a positive rake angle, run at higher cutting speeds, and apply a good cutting fluid or coolant. Using a coated tool, like one with Titanium Nitride (TiN), can also help reduce friction and prevent adhesion.
Can I use the same speeds and feeds for all aluminum alloys?
No. Different aluminum alloys have different properties and require different parameters. Softer alloys like 1100 can be turned at lower speeds with HSS tools, while harder alloys like 7075 require higher speeds, carbide tools, and more careful control of feeds and speeds.
Discuss Your Projects with Yigu Rapid Prototyping
Are you ready to start your next aluminum turning project? Whether you need a single, complex prototype or a full production run of precision parts, the team at Yigu Rapid Prototyping has the expertise and the advanced CNC machinery to deliver outstanding results. We work with all the common aluminum alloys and can help you optimize your designs for manufacturability, saving you time and money.
Contact Yigu Rapid Prototyping today to discuss your project. Upload your design files for a free, expert quote and design review. Let’s build something great together.