Introduction
If you are a hobbyist or a small business owner asking, “What is urethane mold making, and why should I use it instead of silicone?” you have come to the right place. Simply put, urethane mold making uses a two-part liquid rubber to create reusable molds for replicating objects. These objects can be anything from industrial parts to custom crafts. Unlike silicone, which is flexible but less durable, urethane rubber offers a unique balance of rigidity, strength, and the ability to capture fine details. This makes it ideal for projects where you need to make many copies, often 100 or more, or when you are casting with heavy materials like concrete or metal-filled resins. Whether you want to make garden statues or prototype a new product for your small business, this guide will walk you through everything you need to know, from choosing the right materials to mastering advanced techniques.
What Is Urethane Mold Making, and When Should You Choose It?
Let’s start with the fundamentals. Urethane mold making involves mixing two chemical components, typically labeled Part A (the resin) and Part B (the hardener). This mixture creates a rubbery or semi-rigid material that you pour around your original object, called the “master.” Once the urethane cures and hardens, you have a precise, negative imprint of your object. You can then pour any number of casting materials into this mold—like plastic, wax, or plaster—to create exact copies.
The biggest question most people face is: Why pick urethane over silicone? The answer depends entirely on your project’s specific needs. Here is a clear breakdown to help you decide.
| Factor | Urethane Rubber Molds | Silicone Rubber Molds |
|---|---|---|
| Durability / Lifespan | 100 to 500+ uses. Ideal for high-volume projects. | 20 to 100 uses. Better for small batches. |
| Rigidity / Flexibility | Semi-rigid to rigid. Prevents warping with heavy materials. | Very flexible. Great for undercuts but can warp. |
| Detail Retention | Excellent. Captures fine textures like wood grain. | Superior. Best for tiny details like jewelry engravings. |
| Heat Resistance | 200°F to 300°F. Good for low-heat materials. | 300°F to 500°F. Better for high-heat uses like candle wax. |
| Cost | $35 to $60 per quart. Higher upfront, lower long-term. | $20 to $40 per quart. Lower upfront, higher replacement cost. |
| Best For | Heavy replicas (concrete statues, industrial parts), small-batch production. | Delicate items (resin jewelry, soap), one-off crafts. |
Real-World Example: Concrete Planters
Mike runs a small business making custom concrete planters. He started with silicone molds because they were familiar. After just 15 uses, the silicone began to warp, leaving his planters lopsided and unsellable. Frustrated, he switched to a semi-rigid urethane mold. The result? One hundred and twenty planters later, that same urethane mold still holds its perfect shape. The urethane’s rigidity provided the strength needed to resist the weight and pressure of the concrete, saving Mike time and money on constant mold replacements.
What Essential Materials Do You Need?
Choosing the right materials is the difference between a mold that lasts for 500 uses and one that fails after five. Here is a complete list, organized by purpose, with pro tips to avoid wasting supplies.
1. Urethane Rubber: The Core of Your Mold
Not all urethane rubber is the same. You must pick the type based on your project’s need for rigidity.
- Semi-Rigid Urethane (Shore A 50–70): This is the most popular choice for hobbyists and small businesses. It is flexible enough to demold objects with mild undercuts, like a planter with a lip, but rigid enough to avoid warping. It is great for concrete, resin, or plaster replicas.
- Rigid Urethane (Shore D 30–50): This is for objects with no undercuts, like flat coasters or simple industrial parts. It is ultra-durable and can last for 500+ uses, but you absolutely must use a release agent to prevent the mold from sticking to the master.
- Fast-Cure vs. Slow-Cure: Fast-cure urethane hardens in 1-2 hours, which is good for small, simple projects. Slow-cure urethane takes 4-6 hours. For beginners, slow-cure is better because it gives you more time to mix and pour, and it results in fewer bubbles and better detail.
2. The Master Object: The “Original” You’re Copying
Your master can be almost anything, but it must meet these criteria for a successful mold.
- Non-Porous: Porous materials like wood, unprimed clay, or untreated 3D prints will absorb the liquid urethane. This ruins the mold and can bond it permanently to the master. You must seal porous masters with 2 to 3 coats of a high-quality acrylic primer, letting each coat dry completely.
- Smooth Surface: Any bump, scratch, or imperfection on your master will be faithfully copied into the mold and then onto every single replica. Sand any rough edges with fine-grit sandpaper before you start.
- Reasonable Size: For your first few projects, keep your master small, ideally no larger than 6x6x6 inches. Larger molds require significantly more urethane, which is harder to mix evenly and can be expensive to waste.
3. The Mold Box: Containing the Urethane
You need a sturdy, leak-proof box to hold the liquid urethane while it cures around your master.
- Melamine Board: This is an affordable and popular choice. You can cut sheets of melamine to size and assemble a box that is 1 to 2 inches larger than your master on all sides. Use hot glue to seal the edges; it holds well but can be peeled off later.
- Plastic Containers: Reusing a sturdy plastic food container is a great shortcut. Just make sure it is clean, dry, and tall enough to cover your master by at least half an inch.
- 3D-Printed Boxes: For repeatable, precision work, you can design and print your own mold boxes. This is a great option if you plan on making many molds of a similar size.
4. Release Agents: The Non-Negotiable Step
Urethane is sticky. It will bond aggressively to most materials, including your master, if you do not use a release agent. Never skip this step.
- For Plastic or Metal Masters: Use a petroleum-based release agent. Spray 2 to 3 thin, even coats onto the master, holding the can about 8 inches away. Allow each coat to dry for about 10 minutes.
- For Primed Wood or Clay Masters: Use a wax-based release agent. Apply it with a soft cloth, let it dry to a haze, and then buff it lightly. This creates a physical barrier that the urethane cannot stick to.
- Warning: Avoid water-based release sprays. They can react with the urethane and cause bubbles, ruining your mold.
5. Mixing Supplies: Accuracy is Everything
Urethane requires precise mixing ratios, usually 1:1 or 2:1 by weight. You cannot rely on volume measurements with cups.
- Digital Scale: This is your most important tool. An inexpensive kitchen scale that measures in grams is perfectly adequate for small projects. Always measure by weight.
- Disposable Cups: Use rigid plastic cups. Never use paper or foam cups, as the liquid urethane can dissolve them and cause a messy leak.
- Stir Sticks: Wooden craft sticks or plastic spoons work well. Stir slowly and thoroughly, making sure to scrape the bottom and sides of the cup. Any unmixed liquid will not cure.
How Do You Make a One-Part Urethane Mold? A Step-by-Step Guide for Beginners
Let’s walk through making a simple, one-part urethane mold. This example is for a small concrete planter, with a master size of about 5x5x4 inches. The project will take about 8 hours total, including curing time.
- Step 1: Prepare Your Workspace and Master
- Work in a well-ventilated area. Urethane fumes are stronger than silicone.
- Clean your master thoroughly with soap and water to remove any dust or grease. If your master is porous, make sure you have applied your sealer coats.
- Apply your chosen release agent to the master in multiple thin coats.
- Step 2: Build the Mold Box
- Assemble your mold box. It should be about 1 inch wider and 1 inch taller than your master on all sides.
- Use hot glue to seal all the seams from the inside. This prevents leaks.
- Place your master in the center of the box. You may need to use a small amount of clay on the bottom to hold it in place and ensure it is suspended slightly above the floor of the box. This ensures the urethane flows underneath and captures the entire shape.
- Step 3: Mix the Urethane (The Most Critical Step)
- Check the manufacturer’s instructions for the exact mix ratio. For this example, we will use a common 1:1 ratio by weight.
- Place a clean plastic cup on your digital scale and tare it to zero. Pour in the required amount of Part A.
- Place a second clean cup on the scale, tare it, and pour in the same amount of Part B.
- Pour the contents of Part B into the cup with Part A.
- Stir slowly and deliberately for a full 2 to 3 minutes. Use a figure-8 pattern and make sure you scrape the bottom and sides of the cup. Incomplete mixing is a primary cause of mold failure.
- Step 4: Pour the Urethane and Let It Cure
- Slowly pour the mixed urethane into the mold box. Do not pour it directly onto the master. Instead, pour it into a corner of the box and let it flow gently over the master. This helps minimize bubbles.
- Pour until the urethane completely covers the master by at least half an inch.
- Gently tap the sides of the mold box with your fist or a rubber mallet for about 30 seconds. This helps release any trapped air bubbles that have formed.
- Now, do not touch it. Let the urethane cure for the full time recommended by the manufacturer, typically 4 to 6 hours.
- Step 5: Demold and Finish
- Once cured, carefully disassemble or peel away the mold box.
- Gently pull the flexible urethane mold away from the master. If it resists, use a plastic or wooden spatula to carefully work the edges loose. Never use a sharp metal tool, as it will cut the mold.
- Use sharp scissors to trim away any thin, excess flash from the edges of the mold.
- Your mold is now ready to use. For best results, do a test pour with your final material to ensure all details have been captured perfectly.
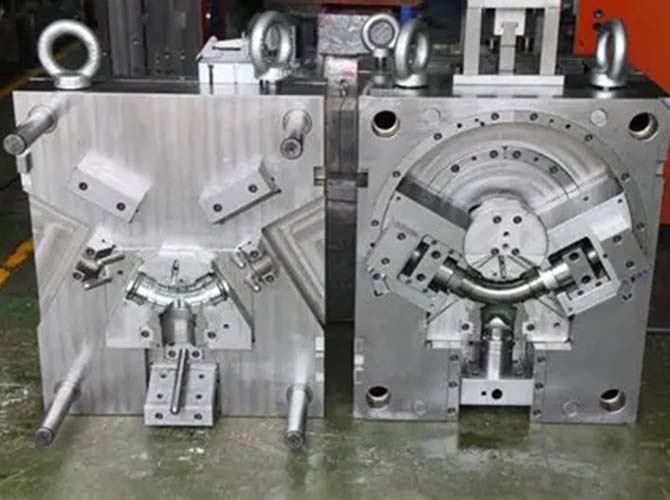
How Do You Make a Two-Part Urethane Mold for Complex Shapes?
For objects with undercuts—like a statue with outstretched arms—or for very large objects, a simple one-part mold will not work. The part would be trapped inside. For these shapes, you need a two-part mold.
- Step 1: Prepare the Master and First Half
- Prepare your master and build a mold box as you would for a one-part mold.
- Apply release agent to the master and the inside of the box.
- Mix and pour urethane into the box, but only fill it halfway up the master. Let this first half cure completely.
- Once cured, use a sharp knife to carve several “V”-shaped notches, called registration keys, into the top surface of the cured urethane. These will align the two halves perfectly later.
- Step 2: Make the Second Mold Half
- Apply a fresh coat of release agent to the surface of the first mold half and to the exposed part of the master. This is critical to prevent the two halves from bonding together.
- Reattach or extend the sides of your mold box so they are tall enough to cover the remaining half of the master.
- Mix a new batch of urethane and pour it into the box, covering the master by half an inch.
- Let this second half cure completely.
- Step 3: Assemble the Two-Part Mold
- Carefully pull the two mold halves apart. You should be able to remove the master.
- Trim any flash from both halves.
- To use the mold, align the registration keys, clamp the two halves firmly together, and pour your casting material through a hole you have created at the top.
What Are Common Urethane Mold Mistakes and How Do You Fix Them?
Even experienced mold makers encounter problems. Here are the most frequent issues and how to solve them.
- Problem: Urethane Won’t Cure (Stays Sticky)
- Cause: This is almost always due to an incorrect mix ratio. If the proportions of Part A and Part B are off, the chemical reaction cannot complete. Other causes are expired urethane or a workspace that is too cold (below 65°F).
- Fix: Always, always use a digital scale to measure by weight. Cups are not accurate enough. Check the expiration date on your materials. And make sure you are working in a warm room, ideally between 70°F and 80°F.
- Problem: Bubbles in the Mold
- Cause: Bubbles are caused by trapping air during mixing or pouring. Stirring too vigorously whips air into the mixture. Pouring directly onto the master also traps air.
- Fix: Stir slowly and deliberately in a figure-8 pattern. Pour the urethane into the lowest corner of the mold box and let it flow over the master. After pouring, tap the sides of the box firmly to release trapped bubbles.
- Problem: Mold Sticks to the Master
- Cause: The most common cause is skipping the release agent or using the wrong type for your master material.
- Fix: You cannot skip this step. For plastic or metal masters, use a petroleum-based release agent. For sealed wood or clay, use a wax-based release agent and apply multiple coats. If the mold is already stuck, you can try gently warming the master with a hair dryer. The heat may slightly soften the urethane, allowing you to work it loose.
What Advanced Tips Help with Small-Batch Production?
If you are moving from a single project to making 50 or more replicas, these tips will save you time and improve consistency.
- Add a Pour Spout and Air Vents: When designing your mold box, create a channel for the material to be poured into. Also, add small air vents at the highest points of the mold. These allow air to escape as you pour, preventing bubbles in your final parts.
- Reinforce the Mold with Fiberglass: For very heavy use, you can reinforce your urethane mold. After pouring the initial layer of urethane, you can lay a piece of fiberglass cloth into the wet material and then brush on more urethane to saturate it. This creates a super-strong, long-lasting composite mold.
- Use a Mold Stand: For large or heavy molds, a simple stand made from wood or plastic will keep the mold level and prevent it from sagging under its own weight or the weight of the casting material.
Conclusion
Urethane mold making is a powerful and accessible skill for anyone looking to create multiple copies of an object, from custom crafts to small production runs. Its key advantage over silicone is durability, especially when casting with rigid or heavy materials like concrete and resin. By understanding the fundamental differences between urethane types, carefully preparing your master, and following a precise mixing and pouring process, you can create molds that last for hundreds of uses. Whether you are a hobbyist making garden ornaments or a small business prototyping a new product, mastering this process will give you the ability to turn your ideas into tangible, repeatable realities.
Frequently Asked Questions
- How many copies can I expect from a urethane mold?
The lifespan of a urethane mold depends on its formulation and what you cast in it. A semi-rigid urethane mold used for casting materials like concrete or resin can easily last for 100 to 500 uses. A more rigid urethane used for simple shapes can last even longer. Proper care and use of release agents are essential for maximizing mold life. - What is the best release agent for urethane molds?
For non-porous masters like plastic or metal, a petroleum-based release spray is the best choice. For sealed porous masters like primed wood or clay, a wax-based release agent (like Partall Wax) is preferred. Never use water-based releases, as they can cause bubbles in the urethane. - Can I make a mold from a master with deep undercuts?
Yes, but you will need to make a two-part mold. The undercuts mean the part cannot be pulled straight out of a single block of rubber. A two-part mold splits the part, allowing you to remove it cleanly. For very complex undercuts, you might even need a mold with more than two parts. - Why are there bubbles in my finished urethane mold?
Bubbles are caused by air trapped during mixing and pouring. The most common causes are stirring too vigorously and pouring the urethane directly onto the master. Always stir slowly and deliberately, and pour the mixture into the lowest part of the mold box, letting it flow gently over the master. Tapping the box after pouring also helps release trapped air. - My urethane didn’t cure. What went wrong?
This is almost always a problem with the mix ratio. You must measure Part A and Part B by weight using a digital scale, not by volume using cups. Other possible causes are using expired urethane or working in a room that is too cold (below 65°F / 18°C).
Discuss Your Urethane Mold Making Project with Yigu Rapid Prototyping
At Yigu Technology, we work with creators of all sizes, from individual hobbyists to growing small businesses. We understand that choosing the right process and materials is the key to a successful project. Our team has extensive experience with urethane mold making and can help you navigate the options. If you are unsure whether urethane is right for your application, need advice on selecting the right Shore hardness, or want to discuss a complex two-part mold design, we are here to help. We can also assist with creating high-quality master patterns for your molds. Let’s discuss your project and find the best path from your idea to a finished product.