Introduction
That moment your 3D print finishes is pure joy. You see your idea made real. But then, you pick it up. You feel the rough lines and ridges. These layer lines mark it as a hobby print. But you can change that. You can turn a raw print into a pro-level part. You can get a finish as smooth as injection-molded plastic. This guide gives you expert methods to do just that. We cover basic sanding, advanced chemical work, and heat tricks. You will find the right way for your skill, project, and goal. Get ready to learn how to turn your rough prototypes into refined pieces.
Why Do Prints Need Smoothing?
To fix the rough look, first know why it happens. The very process that makes 3D printing easy also causes the lines we see. Knowing this helps you pick the best fix. It turns a simple reaction into a smart plan.
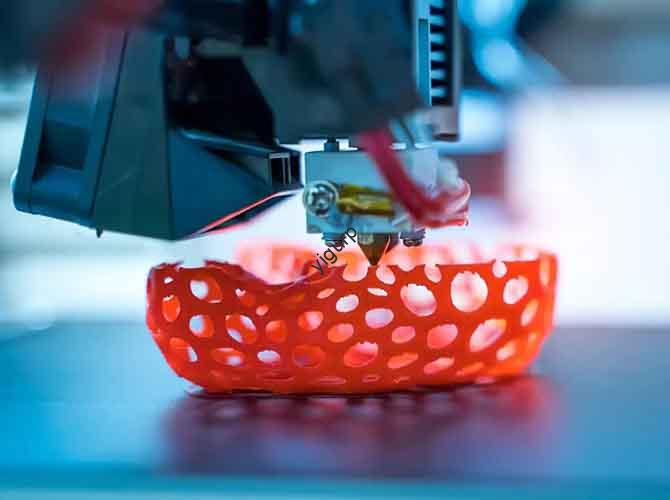
How Does FDM Work?
Fused Deposition Modeling (FDM) builds objects layer by layer. Think of a very precise hot glue gun. It lays down a thin line of melted plastic. Each line is round. When you stack round lines, tiny valleys and peaks form between them. These are the layer lines. A thinner layer height makes smaller lines, but they are almost always there.
What Are Common Flaws?
Layer lines are not the only issue. Smoothing fixes other common problems too.
- Zits or Blobs: Small bumps on the surface. They happen when the nozzle pauses and leaves extra plastic.
- Stringing: Thin hairs of plastic between parts of the model. Caused by plastic oozing from the nozzle as it moves.
- Support Marks: Rough patches left behind after removing support structures.
- Top Surface Gaps: The final layers can look rough or have small holes.
What Tools Do You Need?
Before you start, get your tools ready. The right tools make the job easier, safer, and better. This is your prep guide, sorted by method.
Here is what you need:
| Method | Essential Tools & Products | Optional Helpful Items |
|---|---|---|
| Sanding & Filling | • Sandpaper (120 to 2000 grit) • Sanding block or sponge • Filler (Bondo spot putty or wood filler) • Tack cloth or microfiber towel | • Rotary tool with sanding bits • Needle files for small details • Wet sanding paper |
| Priming & Painting | • Sandable filler primer (spray can) • Acrylic paints • Clear coat (matte, satin, gloss) | • Airbrush for smooth paint • Painter’s tape for masking • Model holder or “helping hands” |
| Chemical Smoothing | • Correct solvent (e.g., Ethyl Acetate) • Glass jar with metal lid (Mason jar) • Paper towels • PPE: Nitrile gloves, safety goggles, respirator | • Small natural-bristle brush for spot work • Wire rack to lift print in jar |
| Heat Treatment | • Variable temp heat gun | • Infrared thermometer to check heat |
How Do You Sand and Prime?
For a pro, paint-ready finish, sanding and priming is the best way. It takes time but gives full control. It works on any PLA print. This skill is key for every maker.
Step 1: Start Sanding
Your first goal is to remove the biggest layer lines. Use low-grit sandpaper (120 to 220 grit). Do not aim for smoothness yet. Just level the high points. Use a circular or cross shape motion. This stops deep scratches. Use a sanding block for even force. Do not press too hard. Friction heat can melt the PLA. For small details, use needle files.
Step 2: Apply Filler
Sanding may not fix deep lines or gaps. Use a filler or spot putty. Apply a thin layer just on the problem spots. Push it into the valleys. Let it cure fully as per the product guide. Then sand it smooth. Start with the same grit you last used.
Step 3: Use Filler Primer
This step is very important. Filler primer fills tiny scratches. It makes one even surface for final sanding. Work in a well-vented area. Shake the can well for one minute. Hold it 6-8 inches from the model. Use light, even sweeps. Apply 2-3 thin coats. Wait 10-15 minutes between coats. Let the final coat cure for a few hours.
Step 4: Wet Sand for Finish
Now, make it glass-smooth. Use wet sanding. Dip high-grit sandpaper (400 grit and up) in water. The water acts as a lube. It stops the paper from clogging. It also washes away dust. Follow this simple grit path:
- For rough prints: Dry sand with 120, then 220 grit. Prime. Wet sand with 400, then 800 grit.
- For standard prints: Dry sand with 220 grit. Prime. Wet sand with 400, then 800 grit. For a mirror finish, go to 1500 or 2000 grit.
Step 5: Paint and Seal
Wipe the model with a tack cloth to remove all dust. Now paint. Use thin, even coats. Build the color slowly. This keeps detail and smoothness. Finally, apply a clear coat. It protects the paint and sets the final sheen (gloss, satin, matte).
Is Chemical Smoothing Safe?
Chemical smoothing offers a fast, glossy finish. It uses a solvent to melt the outer layer, making lines flow together. But it is high-risk. You must respect safety rules. It does not work on all PLAs.
⚠️ Safety First: A Must
The solvents that work on PLA are hazardous. They are often flammable and toxic. Fumes can harm your lungs and brain. Follow these rules always:
- ALWAYS work in a well-ventilated area. Outside is best.
- ALWAYS wear full PPE: A respirator for organic vapors (not a dust mask), nitrile gloves, and safety goggles.
What Chemical Works on PLA?
A common myth is that acetone works on PLA. It does not. Acetone is for ABS. For standard PLA, you need stronger solvents like Ethyl Acetate. These are more hazardous.
A safer choice is a special system. Polymaker PolySmooth filament is made to be smoothed with common isopropyl alcohol (IPA). You use it with their Polysher machine. This is much safer and easier.
How to Do Vapor Smoothing?
This method gives the most even finish. It uses solvent vapor in a sealed jar.
- Gear Up: Put on all your PPE first.
- Prepare Chamber: Use a clean, dry glass jar with a tight lid. Soak a paper towel in solvent. Place it in the jar. Do NOT pour liquid solvent in.
- Lift the Print: Put your print on a wire rack or foil ball inside the jar. This stops it from touching the wet towel.
- Seal and Watch: Close the lid. Watch the print non-stop. The surface will turn from matte to glossy. This takes minutes, not hours. Do not overdo it.
- Vent and Cure: Open the jar in your ventilated area. Take out the print. It will be soft and sticky. Do not touch it. Let it cure for several hours or a full day.
Can You Use Heat?
Heat treatment is a third path. It uses a heat gun to soften the surface so lines merge. It is fast but risky. A moment too long can ruin your print.
How to Use a Heat Gun?
Use a variable temperature heat gun. Set it to the lowest setting. Keep it 6-8 inches away from the print. Use constant, sweeping motions. Never hold it still. Watch the plastic closely. When you see a slight gloss or sheen, move on. This method works best on large, simple shapes. It is bad for fine details, as they will melt fast.
Pros: Fast, no dust, no extra stuff needed.
Cons: High risk of ruin, hard to get even, loses sharp details.
Note on Annealing: Some people bake PLA prints. This is annealing. It is mainly to make parts stronger and more heat-proof. It is not a good way to smooth surfaces. It often causes warping and shrinking.
What Does the Process Look Like?
Let’s see the most reliable method in action. We’ll use a classic Benchy boat model to show each step.
Case Study: Smoothing a Benchy
- The Start: A raw PLA Benchy. You can see clear layer lines on the curved hull, cabin roof, and smokestack. The feel is rough.
- First Sanding: After sanding with 220-grit paper, the lines are less clear. But the whole surface is now dull, hazy, and scratched. This is normal.
- Filler Primer: After two light coats of grey filler primer, the change is big. Most small lines and scratches are gone. The surface is much more even.
- Wet Sanding: Using 600-grit paper with water, we sand the primed surface. The result is very smooth to the touch, like polished stone.
- Final Paint: After a final clean, we apply thin coats of red paint. A gloss clear coat finishes it. The final Benchy looks smooth and shiny, like a store-bought toy.
Which Method Is Best for You?
We have covered many ways. The best choice depends on your project, skill, and risk level.
Here is a simple guide to help you pick:
| Method | Best For | Skill Level | Key Benefit | Major Drawback |
|---|---|---|---|---|
| Sanding & Priming | A perfect, paint-ready finish on any print. | Beginner to Intermediate | Total control & reliable results. | Time-consuming and messy. |
| Chemical Smoothing | A fast, glossy “melted” look on special filaments. | Advanced Only | Speed and unique glossy finish. | EXTREME HAZARD. Needs strict safety. |
| Heat Treatment | Quick smoothing of simple, geometric shapes. | Intermediate | Fast, no extra materials. | Very easy to destroy the print. |
Conclusion
Turning a rough 3D print into a smooth piece is a key skill. You now know the main paths: the controlled craft of sanding, the fast risk of chemicals, and the quick touch of heat. Each has its place. Your choice should match your project needs, safety comfort, and desired look. Start with the foundational method of sanding and priming. It teaches you the most. With practice, you will turn your functional prototypes into display-worthy art. Remember, the finish is what separates a good print from a great one.
FAQ
What is the fastest way to smooth PLA prints?
For speed alone, heat treatment with a heat gun is fastest. But it is also the riskiest and least even. For a balance of speed and a good finish on the right material, using a Polysher machine with PolySmooth filament is a safer chemical option.
Can you sand PLA prints by hand, or do you need tools?
You can sand PLA very well by hand. Using a sanding block and a range of sandpaper grits is enough. Power tools like a rotary tool can speed up the work but raise the risk of melting or removing too much material if you are not careful.
Why did my print get sticky and soft during chemical smoothing?
This means overexposure to the solvent. You left the print in the vapor for too long. The solvent melted too deep into the plastic. Sadly, this damage is often permanent. Next time, watch closely and remove the print as soon as the surface turns glossy.
Discuss Your Projects with Yigu Rapid Prototyping
Do you need flawless, smooth finishes on functional prototypes or end-use parts? Achieving a professional surface often needs more than a hobby setup. At Yigu Rapid Prototyping, we combine expert post-processing techniques with industrial-grade tools. We handle everything from precision sanding and priming to safe chemical treatments, ensuring your parts meet the highest aesthetic and functional standards. Contact us today to discuss how we can help refine your 3D printed projects from rough to remarkable.