Introduction
Small batch die casting prototypes bridge the gap between design and mass production. They let you test product designs, validate functionalities, and prepare for tooling before committing to expensive production molds. But processing them efficiently requires different strategies than high-volume runs. Quick-turn tooling cuts lead time by 30-50% . Low-volume tooling strategies balance cost and performance. Alloy selection must match prototype needs. Process parameters need optimization for consistency. This guide breaks down the entire process—from rapid prototyping to dimensional validation—helping you solve key problems in small batch die casting prototype production.
How Do You Achieve Rapid Die Casting Prototyping?
The core goal of rapid die casting prototyping is getting high-quality prototypes in the shortest possible time. Long lead times delay product launches. Quick-turn solutions solve this.
Key technologies
| Technology | Advantage | Application Scenario |
|---|---|---|
| Quick-turn tooling | Reduces tooling time 30-50% | Urgent projects with tight deadlines |
| Soft-tool die casting | Lower cost than hard tools, easy to modify | Initial design verification |
| Additive-manufactured inserts | Enables complex internal structures | Prototypes with intricate cavities or channels |
| 3D-printed cores | Fast customization, no traditional core-making | Small batches requiring unique core shapes |
| Bridge tooling | Bridges prototype and mass production | Prototypes transitioning to small-volume production |
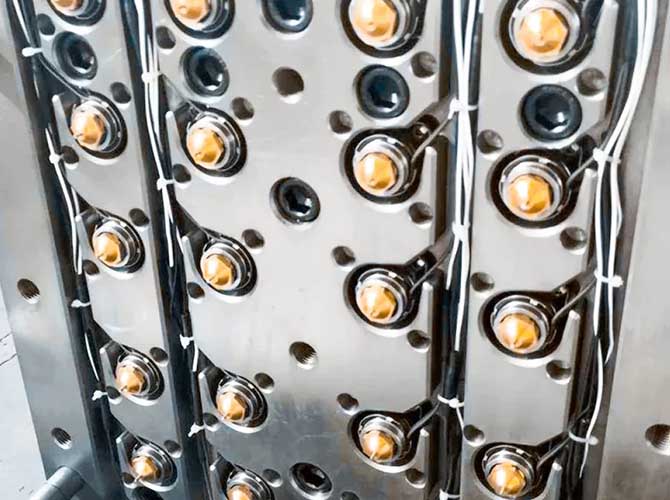
Short-run mold is a key element here. It’s designed specifically for small batch production, ensuring each prototype meets required standards while keeping costs low.
By adopting these rapid technologies, prototype lead time shortens from weeks to days , enabling on-demand casting that aligns with dynamic product development needs.
What Low-Volume Tooling Strategies Balance Cost and Performance?
For small batch die casting prototypes, low-volume tooling is a game-changer. Choosing the right strategy significantly reduces costs without compromising quality.
Tooling materials
P20 aluminum tooling: Cost-effective, good for short-run prototypes, but less durable than steel. Best for 50-100 prototypes for initial testing.
H13 steel inserts: High hardness and wear resistance. Suitable for prototypes requiring multiple runs or using high-temperature alloys.
Tooling designs
Modular die design: Allows easy replacement of parts. Reduces tooling modification costs when adjusting prototype design.
Interchangeable cavities: Enables casting different prototype components with the same base tool. Saves tooling investment.
Family mold: Casts multiple similar prototype parts in one mold. Improves production efficiency.
Unit die and master unit die (MUD) : Simplify mold assembly and disassembly. Quick-change system reduces downtime between prototype runs.
The key to cost-effective tooling lies in matching strategy to requirements . For 50-100 prototypes, P20 aluminum with modular design is wise. For prototypes needing multiple performance tests, H13 inserts with MUD system are more reliable.
| Tooling Material | Best For | Durability |
|---|---|---|
| P20 aluminum | 50-100 prototypes, initial testing | Lower |
| H13 steel | Multiple runs, high-temperature alloys | Higher |
How Do You Select Alloys for Prototypes?
Choosing the right alloy is critical. It must meet the mechanical property requirements of the final product and have good castability .
Common die casting alloys for prototypes
| Alloy | Key Properties | Castability Index | Application |
|---|---|---|---|
| A380 aluminum | High strength, good machinability | 9/10 | Automotive components, electronic housings |
| ADC12 | Excellent castability, good wear resistance | 9.5/10 | Small electronic parts, household appliances |
| Zamak 3 zinc | Low melting point, high precision, good surface finish | 8.5/10 | Hardware, toy parts |
| AZ91D magnesium | Lightweight, high strength-to-weight ratio | 7.5/10 | Aerospace, automotive lightweight components |
Selection factors
Thermal conductivity: Important for heat dissipation parts.
Solidification range: Affects casting quality.
Mechanical property match: Must align with final product performance.
Alloy certification: Ensure meets industry standards.
For automotive engine part prototypes, creep-resistant alloys that withstand high temperature and stress are better.
How Do You Optimize Process Parameters for Consistent Quality?
Even with right tooling and alloy, improper process parameters lead to defective prototypes. Process parameter optimization is key to consistent quality.
Critical parameters and effects
Gate velocity: Too fast causes turbulence and air entrapment. Too slow leads to incomplete filling. Optimal value depends on alloy and part thickness.
Fill time: Short enough to prevent premature solidification. Long enough to avoid defects. Use CFD simulation to predict best fill time.
Injection pressure: Determines prototype density. Too low results in porosity. Too high increases tooling wear.
Die temperature: Affects solidification rate. Uniform temperature ensures consistent part shrinkage.
Melt superheat: Temperature above alloy’s melting point. Proper superheat improves fluidity. Excessive superheat increases shrinkage.
Optimization methods
DOE (Design of Experiments) settings test different parameter combinations to find optimal set. In one project, DOE adjusted slow-shot vs fast-shot phases :
- Slow-shot phase filled runner smoothly
- Fast-shot phase filled cavity quickly
- Result: porosity reduced by 25%
Vacuum assistance removes air from cavity, further improving casting quality.
| Parameter | Too Low Effect | Too High Effect |
|---|---|---|
| Gate velocity | Incomplete filling | Turbulence, air entrapment |
| Fill time | Premature solidification | Defects |
| Injection pressure | Porosity | Tooling wear |
| Die temperature | Inconsistent shrinkage | Slower cycles |
| Melt superheat | Poor fluidity | Increased shrinkage |
What Post-Casting Operations Improve Surface and Function?
After casting, prototypes often need post-processing to meet surface and functional standards.
Common post-casting operations
| Operation | Purpose | Result |
|---|---|---|
| Vibratory tumbling | Removes burrs and sharp edges | Smooth, safe part edges |
| Shot blasting | Improves surface roughness, removes oxide layers | Uniform matte surface |
| Chemical brightening | Enhances surface luster | Bright, reflective surface |
| Electro-polish | Achieves high-gloss finish | Mirror-like surface |
| Powder coat prep | Cleans and treats surface for coating | Good coating adhesion |
As-cast roughness Ra is the starting point. For electronic product housings with high aesthetic requirements, electro-polish reduces Ra to below 0.8μm .
For parts with critical-to-function surfaces like sealing faces, CNC machining allowances are reserved during casting. Precision machining after casting ensures dimensional accuracy.
Define clear cosmetic standards and texture matching requirements at the beginning to avoid rework.
How Do You Validate Dimensional Accuracy?
The final step is verifying that the prototype meets design dimensions and has no internal defects.
Dimensional validation techniques
X-ray computed tomography (CT scanning) : Powerful non-destructive testing. Creates 3D models of the prototype. Enables porosity mapping to detect internal pores and cracks invisible to naked eye.
CMM (Coordinate Measuring Machine) : Precise dimensional measurement. Proper CMM datum setup ensures accurate results.
GD&T (Geometric Dimensioning and Tolerancing) inspection : Verifies geometric features like flatness and perpendicularity meet design requirements.
First-article report: Comprehensive report documenting all inspection results of first prototype. Ensures consistency for subsequent batches.
Shrink factor validation
Different alloys have different shrinkage rates during solidification. By measuring prototype dimensions and comparing with mold design, you can adjust mold size for future runs.
In-die sensors monitor parameters like temperature and pressure during casting, providing data for statistical process control to ensure stable production.
For prototypes with complex assemblies, tolerance stack-up analysis helps avoid assembly issues. If original design data is lost, reverse engineering using CT scanning recreates the design model.
| Technique | Purpose | Benefit |
|---|---|---|
| CT scanning | Internal defect detection | Porosity mapping, 3D models |
| CMM | Dimensional measurement | High precision |
| GD&T inspection | Geometric feature verification | Ensures design compliance |
| First-article report | Document results | Batch consistency |
| In-die sensors | Process monitoring | Statistical control |
Industry Experience: Small Batch Prototyping in Action
An automotive supplier needed 50 prototype engine brackets for testing. Traditional tooling would take 8 weeks and cost $50,000. Using P20 aluminum quick-turn tooling , they had prototypes in 2 weeks at $15,000 . Testing revealed a design flaw—a mounting hole was 2mm off. Modified the tool in 3 days, ran another 50 parts. Final design validated. Production tooling ordered with confidence.
An electronics manufacturer needed 100 phone frame prototypes with complex internal channels. Traditional machining couldn’t create the channels. Additive-manufactured inserts in the die cast mold formed channels during casting. Prototypes in 3 weeks at $8,000 . Design validated, mass production tooling optimized.
A medical device maker needed 20 sensor housing prototypes with zero internal defects. CT scanning revealed porosity in initial runs. Adjusted injection pressure and vacuum assistance . Second run had no porosity. Parts passed all tests. Production approved.
Conclusion
Small batch die casting prototype processing requires strategies different from high-volume production. Rapid technologies like quick-turn tooling and additive inserts cut lead time from weeks to days. Low-volume tooling—P20 aluminum for small runs, H13 steel for multiple tests—balances cost and performance. Alloy selection must match prototype needs—A380 for strength, ADC12 for castability, Zamak 3 for precision, AZ91D for light weight. Process parameter optimization using DOE and vacuum assistance ensures consistent quality. Post-casting operations from vibratory tumbling to electro-polish meet surface and functional requirements. Dimensional validation with CT scanning, CMM, and GD&T inspection verifies accuracy. When executed correctly, small batch die casting prototypes deliver high-quality results rapidly, enabling confident progression to mass production.
Frequently Asked Questions
What’s the difference between soft-tool and hard-tool die casting for prototypes?
Soft-tool uses materials like epoxy or aluminum—cheaper and faster but less durable. Ideal for initial prototypes. Hard-tool uses steel—more durable but costly and time-consuming. Suitable for prototypes needing multiple runs or near-mass production quality.
How to choose between A380 aluminum and ADC12 for prototype casting?
A380 has higher strength and better machinability—great for automotive components needing mechanical performance. ADC12 has excellent castability—perfect for small, complex electronic parts where easy casting is key.
Can CT scanning replace traditional CMM inspection?
No, they complement each other. CT scanning excels at detecting internal defects like porosity and 3D shape analysis. CMM offers higher precision for individual dimensional measurements like hole diameters. Using both ensures comprehensive prototype validation.
What is the typical lead time for small batch die casting prototypes?
With quick-turn tooling, 2-4 weeks is typical for first parts. Traditional tooling would take 8-12 weeks . Additive inserts can further reduce time for complex features.
How many prototypes can I get from a P20 aluminum mold?
P20 aluminum tooling typically lasts for 50-100 shots before wear affects quality. For more parts, consider H13 steel inserts or a production-grade mold.
What causes porosity in die cast prototypes?
Trapped air from turbulent flow, inadequate degassing, or insufficient holding pressure. Solutions: optimize gate velocity, use vacuum assistance, ensure proper degassing, and maintain adequate pressure during solidification.
Discuss Your Projects with Yigu Rapid Prototyping
Ready to develop small batch die casting prototypes efficiently? At Yigu Rapid Prototyping, we specialize in quick-turn solutions for prototype and low-volume production. We use P20 aluminum tooling for cost-effective initial runs and H13 steel inserts for multiple test cycles. Our additive-manufactured inserts create complex internal features impossible with traditional tooling. We optimize process parameters with CFD simulation and DOE to ensure consistent quality. We validate with CT scanning, CMM, and GD&T inspection —documented in first-article reports. Whether you need 10 prototypes for initial testing or 500 parts for market validation, we deliver rapidly with high quality. Contact our team today to discuss your project and see how small batch die casting prototyping drives your product development.