Introduction
You are developing a new product. You need 20 to 50 prototypes that look and work like the final part. They need to fit together, maybe with small gears or snap-fits. So you ask: How accurate is silicone vacuum casting? Can it hold the tight tolerances my design requires? The short answer is yes, for most prototyping needs. Typical accuracy ranges from 0.1mm to 0.2mm. But reaching this level is not automatic. It depends on your master pattern, your materials, and how carefully you control the process. This guide breaks down exactly what accuracy you can expect, what affects it, and how to get the best results for your project.
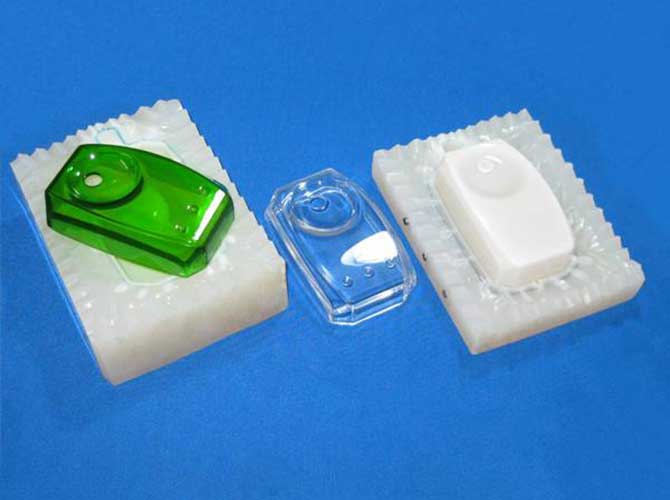
First, a Quick Refresher: What Is Silicone Vacuum Casting?
Before we talk numbers, let’s quickly review the process. Silicone vacuum casting is a method for making small batches of plastic parts. You start with a master prototype. You build a flexible silicone mold around it inside a vacuum chamber. Then, you use that mold to cast copies in liquid resins like PU, ABS-like, or PC-like materials. The vacuum is key—it removes air bubbles so the resin fills every detail of the mold perfectly.
Core Question: What Is the Typical Accuracy?
For most projects, you can expect dimensional accuracy between 0.1mm and 0.2mm. For parts that need to fit together, you can achieve assembly accuracy of ±0.1mm.
Here is how that breaks down for different types of parts:
| Accuracy Range | Best For | Example Part | Why It Matters |
|---|---|---|---|
| 0.1mm – 0.2mm | General prototypes, visual models. | Phone case frame, toy housing. | Part looks right and matches the CAD size. |
| ±0.1mm (assembly) | Parts that must fit together. | Connector port, small gear. | Ensures snap-fits work and parts assemble without gaps. |
| 0.05mm – 0.1mm | High-precision, critical parts. | Medical syringe plunger, sensor housing. | Meets strict safety and performance standards. |
Real-World Example: A company needed 50 prototypes of a new wireless earbud charging case. The lid had to snap shut perfectly. The parts came back with an accuracy of 0.12mm. All 50 lids fit their bases without any adjustment. The process met their needs perfectly.
What Are the 4 Key Factors That Affect Accuracy?
Getting to that 0.1mm accuracy is not guaranteed. Four main factors will determine how precise your final parts are.
Factor 1: The Quality of Your Master Prototype
The master prototype is the template. The silicone mold is a negative copy of it. Every error on the master becomes an error on every single cast part. Garbage in, garbage out.
- Good Practice: For maximum accuracy, use CNC machining. It can hold tolerances of ±0.05mm. For complex shapes, use a high-resolution SLA 3D printer with a layer height of 50 microns or less.
- Bad Practice: Using a low-resolution FDM 3D printer (with 200-micron layers) for your master. The layer lines will be visible, and the part will be undersized or warped. Your cast parts will inherit all these flaws.
Factor 2: The Quality of the Silicone Mold
The mold material itself must be stable.
- Silicone Shrinkage: All silicone shrinks a little as it cures. You need a low-shrinkage silicone, ideally with a shrinkage rate of less than 1%. Cheap silicone can shrink 2% to 3%, which will make your mold smaller than your master.
- The Vacuum Step: You must make the mold under vacuum. If you skip this, air bubbles get trapped in the silicone. These bubbles create bumps or voids in the mold cavity, which then show up as defects on every part.
Factor 3: The Choice of Casting Material
Different liquid resins behave differently when they cure.
- Stable Materials: Rigid resins like PU resin and ABS-like have low curing shrinkage, typically 1% to 1.5%. They hold their shape well and are great for precise parts.
- Less Stable Materials: Soft, rubber-like resins can shrink more, sometimes 2% to 4%. They are perfect for grips and seals, but not for parts that need tight tolerances.
Factor 4: Process Control (Time and Temperature)
Rushing the process or letting the temperature fluctuate will ruin your accuracy.
- Curing Temperature: Keep the curing environment stable at 20°C to 25°C. If it gets too hot (above 30°C), the materials can cure too fast and shrink unevenly.
- Curing Time: Do not demold your parts early. For a standard PU resin, wait at least 4 hours. If you pull it out while it is still soft, it will warp.
5 Practical Tips to Ensure Maximum Accuracy
Here are five things you can do to make sure your parts hit that 0.1mm target.
- Invest in a High-Quality Master: This is the most important step. Spend the extra money on CNC machining or a high-resolution SLA print. A perfect master is the foundation of a perfect replica.
- Use Low-Shrinkage Silicone: Ask your supplier for “precision grade” or “low-shrink” silicone with a shrinkage rate below 1% .
- Never Skip the Vacuum: Use a vacuum chamber for making the mold and for casting the parts. Aim for a pressure of at least -0.095 MPa. This removes bubbles completely.
- Run a Test Shot: Before you cast your whole batch, make 1 or 2 test parts. Measure them with calipers. Compare them to your CAD model. If they are off, you can adjust the process before wasting material.
- Control Your Environment: Cure your parts in a temperature-controlled room. Avoid drafty windows or direct sunlight, which can cause hot and cold spots.
Real-World Examples: Accuracy in Action
Let’s see how different industries use this process.
Example 1: Medical Device (Syringe Barrel)
A medical company needed 30 prototypes of a new syringe barrel. The barrel had to fit a standard plunger with no leaks. This required high precision.
- Master: CNC-machined from aluminum (±0.05mm accuracy).
- Mold: Low-shrinkage silicone (<1%).
- Material: Rigid PU resin (1.2% shrinkage).
- Result: The 30 barrels had an accuracy of ±0.08mm. They passed all fit tests and met ISO standards.
Example 2: Automotive Sensor Housing
A car parts supplier needed 20 prototypes of a small sensor housing that had to bolt onto an engine block.
- Master: High-resolution SLA 3D print (50 micron layers).
- Mold: Vacuum-made silicone.
- Material: ABS-like resin.
- Result: The housings had an accuracy of 0.15mm. They aligned perfectly with the mounting points on the test engine.
Example 3: Consumer Electronics (USB-C Port)
A phone accessory brand needed 40 prototypes of a new USB-C connector port. It had to fit standard cables snugly.
- Master: CNC-machined.
- Mold: Precision silicone.
- Material: High-stiffness PU resin.
- Result: Accuracy was 0.1mm. All 40 prototypes worked perfectly with standard USB-C cables. No loose connections.
Conclusion
Silicone vacuum casting is a highly accurate process for prototyping and low-volume production. For most projects, you can confidently expect 0.1mm to 0.2mm accuracy. This is precise enough for parts that need to fit together, like enclosures, gears, and connectors. To achieve this level of precision, you must focus on three things: a high-quality master, low-shrinkage materials, and strict process control (especially using a vacuum). When done right, this process delivers parts that are not only fast and affordable, but also dimensionally accurate.
FAQ
1. Can silicone vacuum casting achieve accuracy better than 0.1mm?
Yes, it is possible for smaller, simpler parts. To get into the 0.05mm to 0.1mm range, you need to take extra steps. This includes using a CNC-machined metal master (±0.05mm), a premium low-shrink silicone (shrinkage <0.5%), and very stable curing conditions. This level is often required for medical or aerospace components.
2. Does part size affect the accuracy?
Yes, it does. Smaller parts, under 50mm, are easier to keep accurate ( 0.1mm – 0.15mm ). As parts get larger, over 200mm, the slight shrinkage of the silicone and resin adds up. You might see accuracy in the 0.15mm – 0.2mm range for larger parts. With very careful process control, even large parts can stay within 0.2mm.
3. How can I measure the accuracy of my cast parts?
You have two good options:
- Digital Calipers: This is fast and works well for measuring simple dimensions like length, width, and hole diameters.
- 3D Scanner: For complex shapes, a 3D scanner is best. You scan the finished part and compare the digital model (the scan) to your original CAD file. This gives you a color map showing exactly where the part is accurate or where it deviates, often with a precision of ±0.02mm.
4. Which is better for the master pattern, CNC or SLA?
It depends on your part.
- CNC machining is better if your part has simple geometry and you need the absolute tightest tolerances ( ±0.05mm ). It produces a very stable, accurate master.
- SLA 3D printing is better for parts with complex shapes, curves, or fine textures that a CNC machine cannot easily cut. A high-resolution SLA printer (50 micron layers) can produce a master with excellent surface finish and good accuracy, typically around ±0.1mm.
Discuss Your Projects with Yigu Rapid Prototyping
At Yigu Rapid Prototyping, precision is our focus. We have helped hundreds of product teams achieve the accuracy they need with silicone vacuum casting. Whether you need medical-grade precision or robust automotive prototypes, we can guide you through the material and process choices. Not sure what accuracy your project really needs? [Contact Yigu Technology] today. Share your design files and your tolerance requirements. We will give you honest advice and a fast quote.