Introduction
Robot prototype making is far more than just turning a digital design into a physical object—it’s the critical bridge between your creative ideas and real-world performance validation. Whether you’re building a small educational robot for classrooms or a complex industrial-grade automated arm for factory floors, following a structured robot prototype making process ensures you catch design flaws early, reduce development costs, and create a functional model that truly reflects your final production product. In this comprehensive guide, we’ll break down every step with real-world examples, hard data, and practical tips to help you succeed.
What Should You Do First in the Robot Prototype Process?
Design and Planning Lay the Foundation
Before you pick up any tool or turn on any machine, thorough design and planning set the stage for a smooth prototyping journey. This initial phase answers three fundamental questions: What will your robot actually do? How will it fit its intended use case? What resources, materials, and time do you need?
A startup once learned this lesson the hard way. They skipped detailed 3D modeling for a warehouse robot and rushed straight to building. The first prototype looked promising—until they tried to reach items on high shelves. They’d forgotten to account for the robot’s 1.2-meter height in their design calculations. Fixing this oversight added 3 weeks to their timeline and cost $2,000 in unexpected rework. A simple 3D model would have caught this issue instantly.
Create a Detailed 3D Model
Start by using professional software like SolidWorks or Fusion 360 to map every single part of your robot—from the outer shell to internal gears, motor mounts, and sensor placement. For example, a team building a delivery robot prototype needs to model the cargo compartment to ensure it holds 5kg packages and design the wheelbase to fit through standard doorways, which are typically about 80cm wide.
Your 3D model serves as the single source of truth for everyone on your team. It helps you visualize clearance issues, check moving part interference, and communicate design intent to suppliers or collaborators.
Define Use-Case Requirements Clearly
List your non-negotiable specifications based on exactly how and where the robot will operate. A manufacturing robot on a factory line, for instance, needs a load capacity of 10 to 50kg and a range of motion of 180 degrees for common assembly tasks. A medical robot, by contrast, might prioritize precision within ±0.1mm over raw speed or power.
These requirements aren’t just nice-to-haves—they’re the criteria you’ll use to judge whether your prototype succeeds or needs another iteration. Write them down, share them with your team, and refer back to them constantly.
Plan Your Timeline and Resources
Use a simple project management tool like a Gantt chart to outline major milestones and dependencies. A small consumer robot prototype—think a pet-feeding robot or a basic educational kit—typically takes 4 to 6 weeks from concept to first functional model. A complex industrial prototype with multiple axes of motion, advanced sensors, and custom electronics can take 3 to 6 months or longer.
Be realistic about your resources. Do you have in-house machining capability, or will you need to outsource? What about electronics assembly and programming? Planning now prevents panicked decisions later.
How Do You Choose the Right Materials for Your Robot Prototype?
Material Selection Makes or Breaks Performance
The materials you choose directly impact your prototype’s strength, weight, cost, and how easily you can process them. Don’t just pick what’s cheap or what you have lying around—choose based on your robot’s specific requirements.
| Material Type | Examples | Key Properties | Best For | Cost Range (Per kg) |
|---|---|---|---|---|
| Plastics | ABS, PLA, Nylon | Lightweight (0.9–1.2 g/cm³), easy to 3D print or machine | Consumer robots, outer shells, non-structural covers | $2–$8 |
| Metals | Aluminum, Steel, Brass | High strength, durable, machinable | Industrial robot arms, load-bearing parts, gears | $10–$30 |
| Alloys | Titanium, Stainless Steel | Lightweight + strong, corrosion-resistant | Medical robots, aerospace applications, precision components | $50–$150 |
A robotics company building an agricultural robot faced exactly this material choice dilemma. They needed a curved housing for crop sensors—a complex shape best made with 3D printing—but also needed strong, durable wheel axles to handle rough field terrain. Their solution? They 3D printed the sensor housing for design flexibility and CNC machined the axles from aluminum for strength. This smart mix of methods cut their production time by 25 percent compared to using just one approach for everything.
Prepare Your Materials Properly
Once you’ve selected materials, proper preparation ensures they’ll work as expected:
- Cutting: Use shears for thin plastics or a bandsaw for metals to trim materials to rough size. For example, a 3mm aluminum sheet for your robot’s base plate might need cutting from a larger 1m x 2m stock sheet.
- Heat treatment: Strengthen metals like steel through annealing—heating to around 800°C then cooling slowly—to prevent bending under load. An untreated steel robot arm might warp when lifting 20kg; proper heat treatment prevents this.
- Cleaning: Wipe down plastics with isopropyl alcohol to remove dust before 3D printing. Degrease metals with solvent to ensure paints or coatings adhere properly later.
What Manufacturing Methods Work Best for Robot Prototypes?
Match the Method to Your Needs
Advanced manufacturing techniques let you create precise, complex parts quickly. The best method depends on your material, part complexity, timeline, and budget.
| Method | How It Works | Best For | Time Per Part | Typical Accuracy |
|---|---|---|---|---|
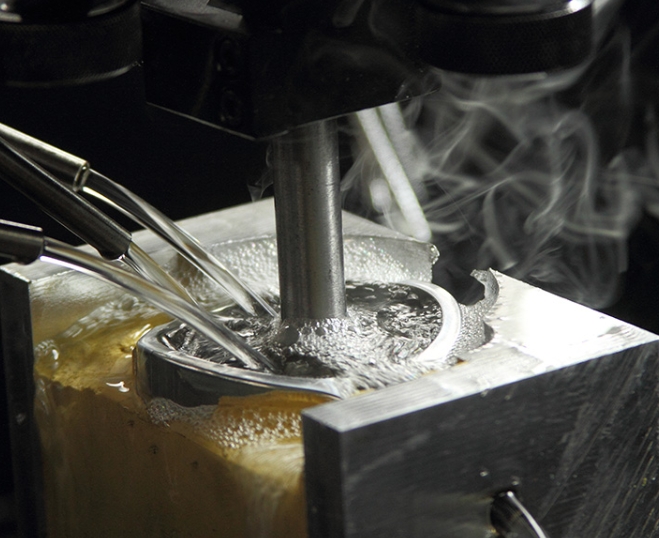
| CNC Machining | Computer-controlled tools carve parts from solid blocks | Metal parts like gearboxes, motor mounts, precise components | 1–4 hours | ±0.01mm |
| 3D Printing | Lays down layers of plastic, resin, or metal filament | Complex shapes like robot joints, custom housings, organic forms | 2–12 hours | ±0.1mm |
| Laser Cutting | High-powered laser cuts or etches sheet materials | Flat parts like robot frames, sensor mounts, chassis plates | 5–30 minutes | ±0.05mm |
Real-World Manufacturing Example
An educational robot company needed to produce 50 prototype kits for classroom testing. They used laser cutting for all flat chassis parts—cutting 5mm acrylic sheets into precise shapes in under 20 minutes per kit. For the custom gearbox housings with complex internal cavities, they switched to 3D printing to avoid expensive tooling. This combination delivered functional prototypes in 3 weeks at 40 percent lower cost than machining everything from metal.
How Do You Assemble and Test Your Robot Prototype?
Assembly Best Practices
Even perfectly manufactured parts will fail if assembled poorly. This step is where you turn individual components into a functional robot and catch any performance issues before they become expensive problems.
Use precision tools for critical assemblies. A torque wrench ensures screws—like common M3 bolts—are tightened to exactly the right specification, typically around 5 N·m for small robot assemblies. Too loose, and parts rattle and vibrate. Too tight, and plastic parts crack or strip.
Always follow a detailed Bill of Materials (BOM) that lists every single component: 4 motors, 8 gears, 1 microcontroller, 12 screws, 6 standoffs—everything. Assemble in logical order, typically attaching motors to the frame first, then connecting gears and linkages, then adding electronics and sensors.
After assembly, move all joints by hand to check for smooth motion. A robot’s wrist joint, for example, should rotate a full 360 degrees without sticking or binding. Any roughness now will only get worse with motorized operation.
Critical Tests for Robot Prototypes
Motion Performance Test: Measure speed, range of motion, and positioning accuracy. For a robotic arm, test how quickly it can move from Point A to Point B—target might be under 2 seconds—and whether it hits the target within required tolerance, perhaps ±0.5mm.
Electrical System Test: Check all wiring for shorts or loose connections. Ensure sensors, motors, and the controller communicate properly. A battery-powered robot should run for its target duration—say 4 hours minimum—without losing power or functionality.
Load Test: Gradually add weight to verify structural durability. A delivery robot prototype should carry 120 percent of its target load—for example, 6kg if the design target is 5kg—without any part breaking or deforming.
Learning from Test Failures
A team developing an autonomous cleaning robot hit a frustrating problem during load testing. Their prototype stopped moving entirely when carrying a 3kg water tank, even though the target load was only 2.5kg. Investigation revealed the motor gears were too small for the required torque. They replaced them with larger, stronger gears, and the revised prototype handled 4kg easily. Without thorough testing, this weakness would have appeared only after production—causing expensive recalls and angry customers.
How Do Surface Treatment and Optimization Improve Your Prototype?
Surface Treatments Add Durability and Polish
Surface treatment isn’t just about making your robot look good—it significantly improves lifespan and functionality.
- Painting: Use spray paints like acrylics for plastic parts to add color and protect against scratches. A consumer robot with a bright red shell might need 2 coats of primer followed by 2 coats of color for professional appearance and durability.
- Plating: Add a thin layer of chrome or nickel to metal parts to prevent rust and corrosion. Industrial robots operating in wet environments—like car wash systems or food processing—benefit enormously from plated components.
- Anodizing: Treat aluminum with an electric current to create a hard, colored surface layer. Medical robots often use anodized aluminum for its sleek, easy-to-clean, sterile finish.
Optimization Turns Good Prototypes into Great Ones
Weight reduction: Replace solid metal parts with hollow 3D-printed structures where strength allows. A robot’s leg might be redesigned to cut weight by 30 percent without losing load capacity.
Cost saving: If your prototype uses expensive titanium for critical parts, test cheaper aluminum alloys for non-critical components like base plates or covers. You might find the performance difference doesn’t matter for your application.
Performance boost: If testing reveals a motor is struggling with loads, upgrade to one with 20 percent more torque rather than redesigning the whole system. Small swaps can yield big improvements.
What Does Yigu Technology Recommend for Robot Prototype Making?
Our Experience-Based Perspective
At Yigu Technology, we believe the robot prototype making process is truly the heart of innovation. Too many development teams rush toward mass production without properly validating their prototypes—and this inevitably leads to costly recalls, redesigns, and delayed launches.
We strongly recommend focusing on two critical areas:
First, use a smart mix of manufacturing methods. Combine 3D printing for complex, custom housings with CNC machining for load-bearing metal components. This approach balances design flexibility with structural strength, and our clients who follow it reduce prototype iterations by an average of 40 percent.
Second, always test in real-world scenarios, not just idealized lab conditions. A warehouse robot should be tested on actual concrete floors with dust and debris, not just clean lab tables. An agricultural robot needs field time in dirt and mud. Real-world testing reveals problems that lab testing never will.
Our clients who embrace these principles consistently get products to market faster, with fewer surprises and lower overall development costs.
FAQ
How much does a robot prototype cost to make?
Costs vary dramatically based on size, complexity, and materials. A small consumer robot like a basic educational toy typically costs $50 to $200. A medium industrial robot, such as a small assembly arm, runs $500 to $2,000. Large, complex prototypes—think medical surgical robots or full-scale humanoids—can cost $10,000 to $50,000 or more depending on precision requirements and iterations needed.
How long does the robot prototype making process take?
For simple prototypes with basic functionality, expect 2 to 4 weeks from initial design through manufacturing and testing. For complex prototypes like industrial or medical robots requiring multiple iterations, advanced electronics, and rigorous validation, timelines typically run 2 to 6 months. Always build extra time into your schedule for unexpected issues.
Can I make a robot prototype at home?
Absolutely—for small, simple robots. A basic line-following robot or simple robotic arm is achievable with a consumer 3D printer costing $200 to $500, an Arduino microcontroller for around $20, and PLA plastic filament at about $20 per kilogram. Many online tutorials and communities can guide you through designing a basic 3D model and assembling parts. Just keep your expectations realistic about what home equipment can achieve.
What’s the biggest mistake teams make in robot prototyping?
The most common and costly mistake is skipping thorough testing under real-world conditions. Lab testing that doesn’t account for dust, temperature variations, vibration, or actual usage patterns will miss problems that appear immediately in the field. Always test where your robot will actually work.
How many prototype iterations should I plan for?
Most successful robot development projects go through 3 to 5 major iterations before reaching production readiness. The first proves basic concept feasibility. The second refines mechanics and electronics. The third focuses on optimization and user experience. Later iterations polish details and fix remaining issues. Plan your budget and timeline accordingly.
Do I need to prototype every single part?
No—focus your prototyping effort on parts that are new, critical to function, or high-risk. Standard components like off-the-shelf motors, bearings, and fasteners don’t need prototyping. Use your resources where they provide the most learning and risk reduction.
Discuss Your Robot Projects with Yigu Rapid Prototyping
Ready to bring your robot concept to life with confidence and precision? The engineering team at Yigu Rapid Prototyping brings years of specialized experience across consumer, industrial, and medical robot development. We’ve helped hundreds of engineers and innovators navigate the prototype making process—from material selection to manufacturing method optimization to real-world testing strategies.
Whether you’re building a small educational robot for classrooms, an agricultural automation system, a medical device, or an industrial workcell, we’re here to help. Contact us to discuss your specific requirements, timeline, and budget. Let’s build something amazing together—the right way, from the very first prototype.