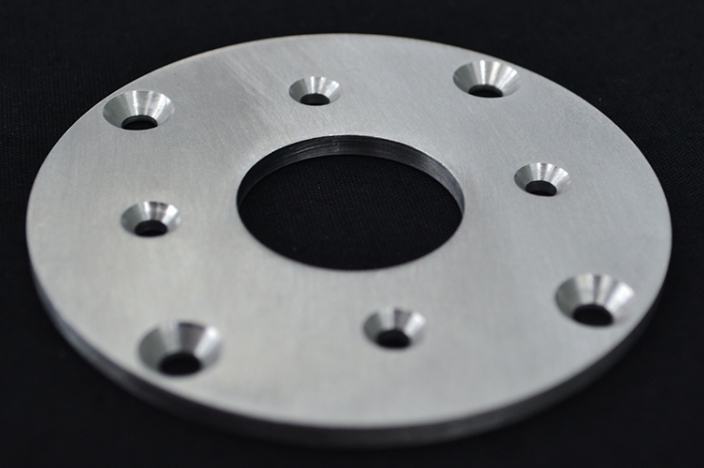
In the world of CNC metal prototype machining, precision is everything. You spend hours perfecting a design, only to find sharp, unwanted ridges on the edges of your finished part. These are burrs.
Burrs are small metal projections formed during cutting, drilling, or milling. If left untreated, they can ruin a part’s fit, damage assembly tools, or even cause injuries. Deburring is the essential post-processing step that ensures your prototype is safe, functional, and professional. This guide explores the best ways to handle burrs and how to prevent them from forming in the first place.
What Are the Best Deburring Methods?
Choosing a deburring method depends on your part’s shape, material, and how many units you need. There is no “one size fits all” solution.
Why Use Manual vs. Automated Methods?
For a single metal prototype, a skilled technician with a hand tool is often the best choice. However, as your volume grows, manual work becomes too slow and expensive. You must weigh the initial tool cost against long-term efficiency.
Comparison of Deburring Techniques
The table below breaks down the most common methods used in modern machine shops:
| Method | Best For | Precision | Efficiency | Cost |
| Manual | Small batches (1-10 parts) | High | Low | Low |
| Punch Press | Simple, flat surfaces | Medium | High | Medium |
| Grinding/Vibration | Large batches (50+ parts) | Medium | Very High | Medium |
| Mechanical/Robotic | Standard shapes | High | Very High | High |
| Chemical | Hard-to-reach internal areas | Medium | Medium | Medium |
| Electrochemical | Medical & Aerospace parts | Highest | Medium | High |
| Laser | Ultra-precision (tolerances <0.001mm) | Highest | Medium | High |
| Ultrasonic | Tiny, delicate components | High | High | Medium |
How Do You Choose the Right Method?
To get the best results without overspending, consider these four critical factors:
What Is the Prototype Material?
Different metals react differently to friction and heat. Aluminum is soft and responds well to ultrasonic deburring. In contrast, stainless steel is much tougher and often requires mechanical grinding or high-powered lasers to remove stubborn edges.
How Complex Is the Part Geometry?
If your design has deep internal holes or narrow slots, a file or brush won’t reach the burrs. In these cases, electrochemical or chemical deburring is better because the liquid solution can reach every hidden corner of the part.
What Is the Production Volume?
If you only need one or two units, manual deburring is the most logical path. However, if you are moving into a bridge production run of 50+ parts, vibratory tumbling (grinding) will save you significant time and labor costs.
What Are the Precision Requirements?
For industries like medical devices or high-end electronics, even a microscopic burr is a failure. For tolerances tighter than 0.005mm, you should rely on laser deburring to ensure the base material remains untouched.
Can You Minimize Burrs During Machining?
The most efficient way to handle burrs is to stop them from appearing. Smart CNC machining strategies can reduce post-processing work by up to 50%.
- Use Sharp Cutting Tools: Dull blades don’t cut; they “plow” the metal. This creates large, heavy burrs. Always use high-quality carbide tools and replace them before they wear out.
- Optimize Feed Rates: Adjusting your cutting speed and depth of cut can change how the metal chips away. For example, a slightly faster feed rate on aluminum can often produce cleaner edges.
- Design for Deburring: If possible, avoid razor-sharp internal corners in your 3D model. Adding a small 0.1mm radius to edges makes the deburring process much faster and more consistent.
Why Is Expert Deburring Critical?
At Yigu Technology, we view deburring as a craft, not an afterthought. For complex, small-batch prototypes, our technicians use precision files to ensure every detail is perfect. For larger runs, we use automated systems to keep costs down and quality high.
By optimizing the machining parameters before we even start the mill, we have helped clients cut their total finishing costs by nearly 40%. We focus on the balance between speed, cost, and precision to ensure your prototype is ready for its final application.
FAQ About CNC Metal Prototype Deburring
Can I skip the deburring process entirely?
No. Burrs interfere with measurement accuracy and assembly. They also create “stress risers” that can cause a metal part to crack under pressure over time.
What is the cheapest way to deburr a single prototype?
Manual deburring is the cheapest for 1-5 parts. It only requires basic tools like sandpaper, scrapers, or files and requires no expensive machinery setup.
Is laser deburring good for copper parts?
Generally, no. Copper is highly reflective. The laser energy often bounces off the surface instead of vaporizing the burr. Electrochemical deburring is a much more effective choice for reflective metals.
Discuss Your Projects with Yigu Rapid Prototyping
Ready to bring your next design to life? Whether you need a single precision prototype or a small production run, our team is here to help. We specialize in high-quality CNC metal prototype machining with professional finishing that meets the strictest industry standards. Contact us today to get a quote and start your project.