Introduction
You’ve designed a great prototype. It works perfectly in your hand. The team loves it. Then you send it to production—and everything falls apart. The walls are too thin for injection molding. Those sharp internal corners can’t be machined. The material you used costs five times more in large quantities.
This scenario plays out every day in companies around the world. A great prototype doesn’t guarantee a great product. That’s where prototyping Design for Manufacturing (DFM) comes in. It’s the practice of designing prototypes with production in mind—not just functionality. By considering manufacturing constraints early, you avoid costly reworks, speed up time-to-market, and ensure your final product is both functional and affordable.
This guide explains everything you need to know about prototyping DFM. You’ll learn the core principles, how to apply them to different manufacturing processes, and see real examples of companies that saved time and money by getting DFM right. Whether you’re 3D printing a concept or machining a production-ready prototype, these rules will help you design for success.
What Is Prototyping Design for Manufacturing?
Prototyping Design for Manufacturing (DFM) means designing your prototype so it can be manufactured at scale without major changes. Unlike traditional prototyping—which focuses only on form, fit, and function—DFM asks three critical questions:
- Can this design be scaled to 100, 1,000, or 10,000 parts without redesigning everything?
- Will the materials and features cause defects like warping, short shots, or tool breakage during production?
- Is the design optimized for cost—or does it have unnecessary complexity that drives up prices?
The goal isn’t to make your design boring or simple. It’s to make sure your innovative ideas are actually possible to manufacture. A beautiful design that can’t be made is just art. A functional design that costs too much to produce never becomes a product.
Why DFM Matters: The Numbers
A 2023 study by the Product Development and Management Association found that teams using prototyping DFM:
- Reduce late-stage design changes by 65%
- Cut production costs by 30% on average
- Bring products to market 40% faster than teams that ignore DFM
These aren’t small improvements. They’re the difference between a profitable product and one that never launches.
Why Is Prototyping DFM Non-Negotiable?
Skipping DFM might save time during prototyping. But it creates three expensive problems later.
1. Late-Stage Design Changes Cost Time and Money
Without DFM, you might create a prototype that works perfectly—but can’t be manufactured. Fixing it after production starts is painful.
Real case: A medical startup designed a 3D printed prototype for a surgical tool. The design had 0.5mm thin walls. The 3D printed version worked fine. But when they tried injection molding, 40% of parts warped during cooling. Fixing the design meant thickening walls to 1.2mm, which required new molds and delayed launch by 8 weeks. Total cost: $15,000 in unexpected retooling.
With prototyping DFM, they would have known that 0.5mm walls are too thin for injection molding. They could have adjusted during prototyping—not after spending money on production tooling.
2. Higher Scrap Rates During Production
DFM helps you avoid features that cause defects. When production runs have high scrap rates, you’re paying for parts that get thrown away.
Real case: A consumer electronics company made a CNC-machined prototype with sharp internal corners (0.2mm radius) . The prototype looked great. But during mass production, CNC tools couldn’t reach those corners cleanly. 25% of parts had rough surfaces and were scrapped. Adding 1mm fillets to the design—a simple DFM rule—would have reduced scrap to 3% and saved $8,000 on a 2,000-part run.
3. Overpriced Production from Unnecessary Complexity
DFM weeds out design features that add cost without adding value. Complexity is expensive—whether it’s extra parts, custom fasteners, or hard-to-machine shapes.
Real case: A robotics company’s prototype had 5 separate parts held together by custom screws. The design worked, but assembly was slow and parts were expensive. Using DFM principles, they merged 3 parts into one and switched to standard M3 screws. Production costs dropped by 20%—from $50 to $40 per unit—with no loss in functionality.
What Are the Core Principles of Prototyping DFM?
These seven principles apply to any manufacturing process. Follow them and you’ll avoid most common production problems.
Principle 1: Reduce Part Count
Every part adds cost—materials, handling, assembly, inventory. Merge parts where possible.
| Before DFM | After DFM | Savings |
|---|---|---|
| Phone case with 3 pieces (back, sides, top) | Single-piece design | Assembly time: 2 minutes → 0, BOM cost down 15% |
| Bracket with 4 stamped pieces | One machined piece | Assembly eliminated, stronger part |
When to apply: Look for parts that touch each other and don’t move independently. Can they be one piece?
Principle 2: Use Standard Parts and Materials
Custom screws, non-standard fasteners, and exotic materials drive up costs and lead times.
| Custom | Standard | Benefit |
|---|---|---|
| 3.2mm custom screws | M3 standard screws | 40% lower cost, available everywhere |
| Proprietary plastic blend | Off-the-shelf ABS | 50% lower material cost, guaranteed supply |
When to apply: Ask yourself—does this really need to be custom, or am I just used to designing this way?
Principle 3: Optimize Wall Thickness
Walls that vary too much cause warping. Walls that are too thin break. Walls that are too thick waste material and increase cycle time.
| Material | Recommended Wall Thickness | Avoid |
|---|---|---|
| Plastic (injection molded) | 1.2mm – 3.0mm | Under 0.8mm, over 4mm without ribs |
| Metal (CNC machined) | 0.8mm minimum | Under 0.5mm for aluminum |
| 3D printed plastic | 1.0mm minimum | Under 0.6mm, overhangs without support |
Real case: A plastic prototype had walls ranging from 0.8mm to 3mm. During injection molding, 20% of parts had sink marks. Standardizing to 1.5mm eliminated the defects completely.
Principle 4: Avoid Unnecessary Complexity
Decorative features, complex curves, and intricate patterns add machining time and cost. If they don’t improve function, consider simplifying.
| Complex Design | Simplified DFM Design | Time Saved |
|---|---|---|
| Decorative grooves on every surface | Smooth surfaces, functional textures only | 30% CNC time |
| Complex organic curves | Simpler curves, standard radii | 25% programming time |
When to apply: Review every feature and ask—does this help the product work, or just look different?
Principle 5: Design for Easy Alignment
Parts need to fit together during assembly. Sharp corners make alignment hard. Chamfers and fillets guide parts into place.
| Without DFM | With DFM | Result |
|---|---|---|
| Sharp edges on mating parts | 1mm chamfers on all mating surfaces | Assembly damage: 5% → 0% |
| Tight press-fit with no lead-in | 0.5mm lead-in chamfer | Assembly time cut by 30% |
Real case: A bracket prototype had sharp edges—assemblers often bent parts while aligning them. Adding 1mm chamfers eliminated assembly damage completely.
Principle 6: Set Tolerances Selectively
Tight tolerances cost money. Only use them where absolutely necessary.
| Feature | Recommended Tolerance | Cost Impact |
|---|---|---|
| Bearing surfaces, precision fits | ±0.01mm | High cost—use only here |
| General dimensions, non-critical | ±0.1mm | Low cost |
| Visual surfaces, clearance holes | ±0.2mm | Lowest cost |
Real case: A sensor prototype specified ±0.01mm tolerance on all edges. Machining took 4 hours per part. After DFM review, they used ±0.01mm only for the sensor mounting hole and ±0.1mm elsewhere. Machining time dropped to 3 hours—a 25% reduction.
Principle 7: Test with Your Target Production Process
Prototyping with 3D printing is fast and cheap. But if you’re planning to use injection molding for production, you need to test with injection molding—or at least follow its rules.
| Prototyping Method | Production Method | Risk |
|---|---|---|
| FDM 3D printing | Injection molding | Miss draft angles, wall thickness issues |
| CNC machining | CNC machining (same) | Low risk—good match |
| SLA 3D printing | Injection molding | Miss material properties, cooling effects |
Real case: A furniture brand prototyped a chair leg with FDM 3D printing. It worked great—light, strong, cheap. But when they switched to injection molding for production, the parts had sink marks and warping. The 3D printed prototype hadn’t revealed these issues. Fixing them required a 6-week redesign and $12,000 in new tooling.
How Do You Apply DFM to Different Prototyping Processes?
DFM isn’t one-size-fits-all. Each manufacturing process has its own rules.
DFM for 3D Printing Prototypes
3D printing handles complex shapes well, but it has limitations.
| DFM Rule | Why It Matters | Example |
|---|---|---|
| Avoid overhangs >45° | Overhangs need supports, which leave marks and add post-processing | A drone frame with 60° overhangs needed supports. Redesigning to 40° eliminated them. |
| Use self-supporting geometries | Lattices and honeycomb reduce material and cost without losing strength | A solid handle used 50% honeycomb infill—40% less material, same strength |
| Choose scalable materials | Use materials that work for both prototyping and production | PLA prototypes hide issues. Nylon PA12 reveals real performance. |
| Minimize supports | Design parts to stand on their own | A cup printed opening-down needed no supports. Opening-up needed many. |
Case study: An aerospace company 3D printed a prototype heat exchanger with internal cooling channels. Using DFM, they:
- Added 3mm holes for powder removal (critical for SLS printing)
- Used Nylon PA12 (scalable to MJF production)
- Avoided overhangs >40°
When scaling to 1,000 parts, they had 0% scrap—no design changes needed.
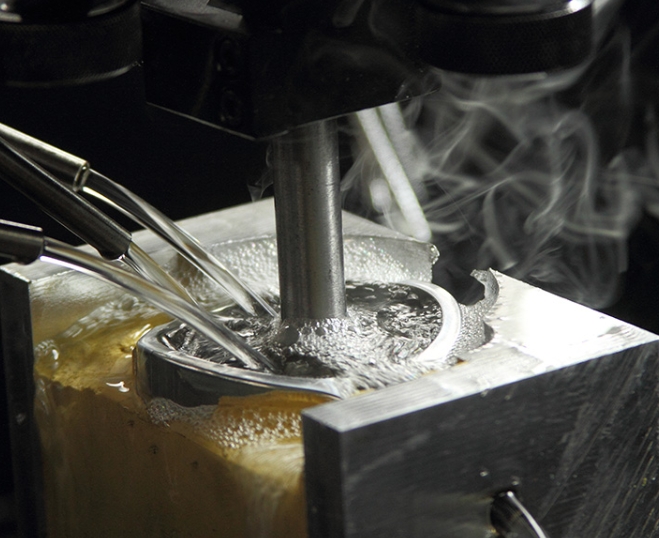
DFM for CNC Machining Prototypes
CNC machining is precise but struggles with certain features.
| DFM Rule | Why It Matters | Example |
|---|---|---|
| Avoid sharp internal corners | CNC tools are round—they leave material in sharp corners | A 0.3mm corner needed sanding. Adding 1mm fillets made it machine-ready. |
| Limit deep cavities | Depth >4× width causes tool deflection | A 20mm deep, 4mm wide cavity deflected. Reducing to 16mm fixed it. |
| Use standard tool sizes | Design for common diameters (3,5,8mm) | 4.2mm holes needed custom bits. 4mm used standard tools. |
| Avoid thin walls | Under 0.8mm for metal warps during machining | 0.6mm walls bent 30% of parts. 1mm walls bent only 2%. |
Case study: A tool manufacturer CNC-machined a prototype wrench with 0.7mm walls and sharp internal corners. During production:
- Thin walls caused 25% warping
- Sharp corners required extra sanding ($2 per part)
Redesigning with 1mm walls and 1mm fillets fixed both issues—saving $5,000 on a 2,500-part run.
DFM for Injection Molding Prototypes
Injection molding has the strictest DFM rules. Follow them or pay the price.
| DFM Rule | Why It Matters | Example |
|---|---|---|
| Uniform wall thickness (±10%) | Uneven walls cause sink marks and warping | Walls from 1-3mm caused 20% sink marks. 1.5mm uniform walls fixed it. |
| Add draft angles (1-2°) | Helps parts release from mold | 0° draft caused 15% parts stuck in mold. 1.5° draft reduced scrap to 1%. |
| Place gates near thick features | Ensures mold fills completely | Gate on thin arm caused 10% short shots. Moving to thick body fixed filling. |
| Avoid undercuts | Undercuts need expensive slides | Undercut for button needed $5,000 slide. Redesign avoided it, saving $3,000. |
Case study: A packaging company’s injection molded prototype had 0° draft and uneven walls. During production:
- 30% of parts stuck in the mold
- 25% had sink marks
Redesigning with 1.5° draft and uniform 1.2mm walls cut scrap to 4% and saved $8,000 in rework.
Prototyping DFM vs. DFA: What’s the Difference?
DFM and DFA are often confused. They’re different but work together.
| Aspect | Prototyping DFM | Prototyping DFA |
|---|---|---|
| Focus | Can the part be manufactured? | Can the parts be assembled? |
| Key goal | Reduce production defects and cost | Reduce assembly time and labor |
| Example rule | Use uniform wall thickness | Place screws on same side to avoid flipping |
| When to apply | Early—designing individual parts | Mid—designing how parts fit |
How they work together: A furniture company used DFM to design a table leg with 1mm fillets (easy to CNC machine) and DFA to place all screws on the top surface (easy to assemble). Result: Production cost dropped 25%, assembly time fell from 10 minutes to 5 minutes.
How Do You Run a Prototyping DFM Check?
You don’t need expensive software. Follow these five steps.
Step 1: Define Your Production Process
Will you use 3D printing, CNC machining, or injection molding for mass production? Your DFM rules depend on this. A design optimized for 3D printing might fail in injection molding.
Step 2: Check Material Feasibility
Is your prototype material available in production quantities? Is it cost-effective?
- PEEK: Great for prototypes, but $100/kg—too expensive for 10,000 parts
- Nylon PA12: $15/kg, works for both prototyping and production
- ABS: $3/kg, perfect for high-volume consumer products
Step 3: Review Key Features Against DFM Rules
For 3D printing:
- Are overhangs under 45°?
- Can you eliminate supports?
- Is infill optimized?
For CNC machining:
- Are internal corners rounded (≥1mm radius)?
- Are walls ≥0.8mm (metal) or ≥1.5mm (plastic)?
- Are cavities within 4:1 depth-to-width ratio?
For injection molding:
- Are walls uniform (±10% variation)?
- Are draft angles 1-2°?
- Are there undercuts that need slides?
Step 4: Test for Scalability
Can you make 100 parts with this design? 1,000? 10,000? Will costs drop as volume increases, or are there fixed costs (like custom tools) that won’t scale?
Step 5: Use DFM Tools for Validation
Platforms like Xometry’s instant quoting engine offer free DFM feedback. Upload your CAD file and get automatic flagging of issues like:
- Thin walls
- Unmachinable features
- High-cost design choices
Real case: A startup uploaded their sensor prototype CAD to Xometry. The DFM tool flagged:
- 0.6mm walls (too thin for injection molding)
- No draft angles (parts would stick)
Fixing these during prototyping saved $12,000 in late-stage changes.
Conclusion
Prototyping Design for Manufacturing (DFM) isn’t about limiting your creativity. It’s about making sure your creative designs can actually become real products. The data proves it works: 65% fewer late-stage changes, 30% lower production costs, and 40% faster time-to-market.
The core principles are simple:
- Reduce part count
- Use standard parts and materials
- Optimize wall thickness
- Avoid unnecessary complexity
- Design for easy alignment
- Set tolerances selectively
- Test with your target process
Apply these rules differently for each manufacturing method. 3D printing loves complex shapes but hates steep overhangs. CNC machining delivers precision but struggles with sharp internal corners. Injection molding scales beautifully but demands uniform walls and draft angles.
The worst time to discover a manufacturing problem is after you’ve paid for production tooling. The best time is during prototyping—when changes are cheap and fast. That’s what prototyping DFM gives you: the confidence that your design won’t fall apart when it hits the factory floor.
Whether you’re designing medical devices, consumer electronics, or industrial components, DFM turns prototypes into products. Design with manufacturing in mind from day one, and you’ll save money, time, and headaches all the way to launch.
Frequently Asked Questions
Do I need to use the same manufacturing process for prototyping and production?
It’s not mandatory, but it’s highly recommended. If you prototype with 3D printing but plan to use injection molding, you might miss DFM issues like thin walls or missing draft angles. For critical parts, use the same process. For less critical parts, 3D printing is okay if you follow DFM rules for your target process.
Can prototyping DFM make my design less innovative?
No—DFM helps you keep innovative features while making them manufacturable. For example, a lightweight lattice structure is innovative and allowed in DFM—you just need to design it for your process (like self-supporting patterns in 3D printing). DFM eliminates unnecessary complexity, not innovation.
When should I start thinking about DFM?
From day one. The moment you start sketching or modeling, consider how your design will be made. Early DFM thinking is cheap. Late-stage DFM fixes are expensive.
What’s the most common DFM mistake?
Thin walls. Designers often make walls too thin to save material or weight, not realizing that thin walls warp, break, or fail to fill during molding. Check wall thickness against process-specific minimums before finalizing any design.
How do I know if my tolerances are too tight?
Ask two questions: Does this feature mate with another part? Does it affect performance? If no to both, use loose tolerances (±0.2mm or more). Only tighten tolerances where function demands it.
Can I get DFM feedback before paying for prototypes?
Yes. Many manufacturing platforms offer free DFM analysis when you upload CAD files. Xometry, Protolabs, and others provide instant feedback on potential issues. Use these tools early and often.
What’s the difference between DFM for prototyping vs. production?
The principles are the same, but prototyping gives you room to test and iterate. Use prototypes to validate your DFM assumptions. If a feature survives multiple prototype rounds without issues, it’s probably ready for production.
How do I balance DFM with design aesthetics?
Good DFM doesn’t mean ugly products. It means understanding the tradeoffs. If a curved surface adds machining time, decide if the aesthetic value is worth the cost. Sometimes it is. Sometimes it’s not. DFM gives you the information to make that decision consciously.
What materials are easiest to work with for DFM?
For plastics: ABS, Nylon, and Polycarbonate are well-understood and widely available. For metals: Aluminum 6061 and Stainless Steel 304 are standard. These materials have predictable behavior and established DFM guidelines.
Can DFM help with sustainability?
Absolutely. DFM reduces waste by minimizing scrap, optimizing material use, and designing for longer product life. Fewer defective parts means less material in landfills. Efficient designs use less energy to produce.
Discuss Your Projects with Yigu Rapid Prototyping
At Yigu Technology, we’ve built our entire process around prototyping Design for Manufacturing (DFM) . We don’t just make prototypes—we make sure your prototypes are ready for production. Every design that comes to us gets reviewed by engineers who understand what works at scale.
Why Yigu for DFM-focused prototyping:
- Engineering-first approach: Our team reviews every CAD file for manufacturability before we cut any material. We flag issues early and suggest fixes—often before you even know there’s a problem.
- Multi-process expertise: We work with 3D printing (MJF/SLS), CNC machining, and injection molding. We know the DFM rules for each and apply them to your specific needs.
- Production mindset: We don’t just ask “can we make this prototype?” We ask “can we make 10,000 of these without changing the design?” That’s the DFM difference.
- Free DFM feedback: Upload your design, and we’ll provide detailed manufacturability analysis—often within hours. No cost, no obligation, just expertise.
- Medical-grade quality: ISO 13485 certified processes for medical device prototyping. We understand regulated industries and their DFM requirements.
Real results from Yigu clients:
- A medical device company saved $15,000 in tooling changes after our DFM review caught thin-wall issues
- A robotics startup reduced per-unit costs by 20% by consolidating parts based on our recommendations
- A consumer electronics brand cut assembly time by 50% with our DFA suggestions
Ready to make your prototype production-ready? Contact Yigu Technology today. Share your design, and we’ll provide DFM feedback, a detailed quote, and a timeline—all tailored to your target manufacturing process. Let’s build something that works beautifully at scale.