Introduction
Getting a product from concept to market is a race against time. You need to test your ideas, find flaws, and prove that your design works—all before investing in expensive production tooling. This is where rapid prototype machining becomes essential.
Rapid prototype machining is the process of turning digital designs into physical models quickly. Unlike traditional prototyping, which could take weeks or months, modern methods deliver parts in days or even hours. But speed alone isn’t enough. The process must also ensure that your prototype accurately represents the final product’s form, fit, and function.
This guide breaks down the entire rapid prototype machining process into clear, actionable steps. You will learn how to prepare your designs, choose the right materials, select the best manufacturing method, and refine your prototype through testing and feedback. Each section includes practical tips and real data to help you avoid common pitfalls and move your project forward efficiently.
By the end, you will have a complete roadmap for turning your idea into a physical prototype that you can hold, test, and improve—all while saving time and money.
How Do You Prepare a Design for Rapid Prototyping?
The design phase sets the foundation for everything that follows. A well-prepared digital model makes machining faster, reduces errors, and cuts costs. Rushing this step almost always leads to rework later.
What Should You Include in Your CAD Model?
Your journey starts with Computer-Aided Design (CAD) software. Programs like SolidWorks, AutoCAD, or Fusion 360 let you create detailed 3D models of your product. But a good CAD file for prototyping is more than just a pretty picture.
Your model must include:
- Exact dimensions: Every length, width, height, and hole diameter must be specified.
- Tolerances: Indicate how much variation is acceptable for critical features. For parts that will assemble with others, tolerances of ±0.1mm are common.
- Surface finishes: Specify if certain faces need to be smooth, textured, or left as-machined.
- Draft angles: If your part might eventually be molded, adding slight angles (1-3 degrees) to vertical walls helps with ejection.
According to industry data, investing time in accurate CAD models reduces post-machining adjustments by up to 40% . That means fewer headaches and lower costs down the line.
How Do You Choose Materials and Methods Early?
Your material choice affects everything—how the prototype looks, how strong it is, and which machining method you can use. Think about what your prototype needs to prove.
Ask yourself:
- Does it need to be strong? For load-bearing parts, consider aluminum (CNC machined) or ABS plastic (3D printed or machined) .
- Does it need to be flexible? Look at nylon or TPU (flexible filament) .
- Does it need to be clear? PMMA (acrylic) or clear resin are good options.
- Does it need to withstand heat? PEEK or stainless steel might be necessary.
Match your material to the prototype’s purpose. A phone case prototype for visual approval can be cheap resin. A gear prototype for functional testing needs something tougher, like machined 6061 aluminum.
What Common Design Mistakes Should You Avoid?
Even experienced designers make errors that complicate prototyping. Watch out for these pitfalls:
- Ignoring machining limitations: Designing walls thinner than 0.5mm for metal or 0.8mm for plastic can lead to breakage during machining.
- Forgetting tolerances: Parts that need to fit together must have specified tolerances. Without them, machinists guess—and guesses often lead to bad fits.
- Designing impossible internal features: Deep cavities with tight corners may require special tools that increase cost. Consider if the design can be simplified or assembled from multiple parts.
- Not considering orientation: How the part sits in the machine affects surface finish and strength. Discuss this with your prototyping partner early.
How Do You Prepare Materials for Machining?
Once your design is ready, the next step is preparing the material. Different prototyping methods require different material forms. Using the wrong form can damage equipment or ruin your prototype.
What Material Forms Work for Each Method?
| Machining Method | Required Material Form | Common Materials | Preparation Tips |
|---|---|---|---|
| CNC Machining | Solid blocks, sheets, or rods | Aluminum, brass, steel, ABS, nylon, acetal | Cut material slightly larger than final part (add 5-10mm allowance for holding and cutting). |
| 3D Printing (FDM) | Filament on spools | PLA, ABS, PETG, TPU, nylon | Keep filament dry. Moisture causes steam bubbles and poor layer adhesion. Store in sealed bags with desiccant. |
| 3D Printing (SLA) | Liquid resin in bottles | Standard resin, tough resin, clear resin, castable resin | Shake bottles well before use. Filter resin if particles are visible. |
| 3D Printing (SLM) | Metal powder | Stainless steel, titanium, aluminum alloys | Powder must be sieved to remove clumps. Handle with care—metal powder is flammable and hazardous. |
| Silicone Molding | Liquid resins (two-part) | Polyurethane resins, epoxy resins | Mix components exactly per manufacturer’s ratio (often 1:1 by weight or volume). Air bubbles must be removed by vacuum degassing. |
How Do You Verify Material Quality?
Before machining starts, take a moment to check your materials:
- For metal blocks: Look for visible flaws like cracks, rust, or inclusions. Impurities can dull cutting tools and ruin surface finish.
- For filaments: Check diameter consistency. Variation beyond ±0.05mm can cause under-extrusion or jams.
- For resins: Ensure they are not expired. Old resin may not cure properly.
- For powders: Sift to break up clumps. Clumps cause uneven layers and weak spots.
How Do You Choose the Right Manufacturing Method?
This is the heart of rapid prototype machining. Your choice of method determines how fast you get parts, how much they cost, and what quality you can expect.
What Are Your Main Options?
CNC Machining
- How it works: A computer-controlled machine removes material from a solid block using rotating cutting tools.
- Speed: 1-3 days for most parts.
- Cost: (50 to )500+ per prototype, depending on complexity and material.
- Best for: Precision parts, metal prototypes, functional testing where strength matters.
- Key advantage: Highest accuracy—tolerances as tight as ±0.005mm are possible.
3D Printing
- How it works: Parts are built layer by layer from plastic, resin, or metal powder.
- Speed: 4-24 hours for most plastic parts.
- Cost: (20 to )200 per prototype.
- Best for: Complex geometries, organic shapes, rapid iterations, visual models.
- Key advantage: No setup cost. Great for one-offs and design exploration.
Silicone Molding (Urethane Casting)
- How it works: A silicone mold is made from a master pattern, then used to cast multiple copies in resin.
- Speed: 3-7 days (includes mold making).
- Cost: (10 to )80 per prototype for small batches (5-50 units).
- Best for: Small batches of identical parts, simulating injection-molded plastics.
- Key advantage: Low per-part cost for quantities above 5-10 units.
How Do You Decide?
Use this simple decision tree:
- How many parts do you need?
- 1-2 parts: 3D printing or CNC machining (depending on material).
- 3-20 parts: CNC machining (if metal) or silicone molding (if plastic).
- 20-100 parts: Silicone molding or rapid injection molding.
- What material is required?
- Metal: CNC machining or metal 3D printing (SLM).
- Engineering plastic (ABS, nylon): CNC machining or FDM 3D printing.
- Flexible material: 3D printing with TPU or silicone molding.
- Clear material: CNC machining in acrylic or SLA 3D printing with clear resin.
- How complex is the geometry?
- Simple, prismatic shapes: CNC machining is fast and accurate.
- Complex internal features, lattices, organic curves: 3D printing is the only practical choice.
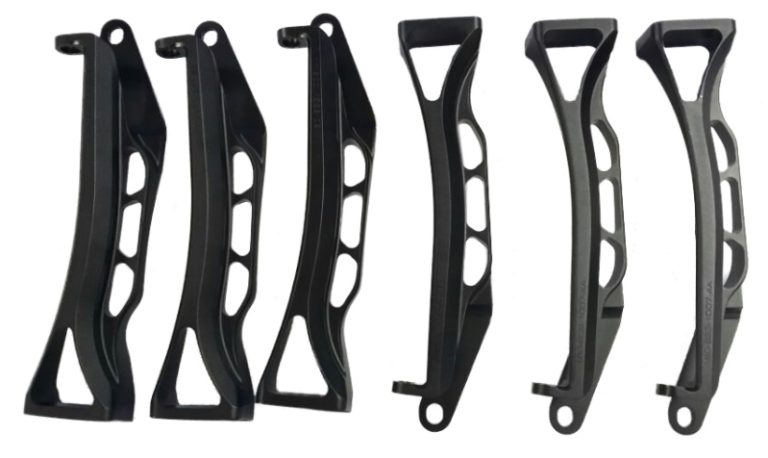
Real-world example: A drone startup needed a prototype frame. They wanted to test the fit of electronics and the strength of the arms. They chose SLA 3D printing for the first iteration because they needed the complex curved shape and hollow channels for wiring. The part was ready in 18 hours for $120. After testing, they found the arms needed more stiffness. The second iteration used CNC machining in aluminum for the arms only, bonded to a 3D-printed central body. This hybrid approach gave them functional data without machining the entire complex part.
What Post-Processing Steps Refine Your Prototype?
Parts fresh from the machine often have minor flaws—rough surfaces, tiny burrs, or a raw appearance. Post-processing turns these raw parts into prototypes that look and feel like final products.
How Do You Clean and Smooth the Surface?
Step 1: Cleaning and Deburring
- For CNC parts: Use a deburring tool or fine file to remove sharp edges. This takes 5-10 minutes per part.
- For 3D prints: Remove support structures with pliers or flush cutters. Sand the attachment points smooth.
- For cast parts: Trim any flash (thin excess material) along the mold parting line with a knife or scissors.
Step 2: Sanding
- Start with coarse sandpaper (80-120 grit) to remove obvious layer lines or tool marks.
- Progress to finer grits (240, 400, 600, up to 2000 grit) for a smooth finish.
- For plastics, wet sanding with water prevents clogging and produces a better surface.
Step 3: Polishing
- For a glossy finish, use a buffing wheel with polishing compound.
- For clear parts (acrylic or clear resin), flame polishing or vapor smoothing can restore optical clarity.
What Surface Treatments Add Function or Beauty?
Painting
- Apply primer first to fill small imperfections.
- Use spray paint or airbrush for an even coat.
- Drying time: 2-4 hours at room temperature. Baking at low heat (50-60°C) speeds curing.
Powder Coating
- For metal prototypes that need a durable, colored finish.
- Electrostatic powder is applied and then cured in an oven.
- Provides better scratch and corrosion resistance than paint.
Electroplating
- Adds a thin metal layer (chrome, nickel, gold) to the surface.
- Improves wear resistance and gives a premium look.
- Can extend prototype lifespan by 30% in wear testing .
Anodizing
- For aluminum parts only.
- Creates a hard, oxide layer that resists scratches and corrosion.
- Available in colors like black, red, or clear.
How Do You Verify That Your Prototype Works?
A beautiful prototype is useless if it doesn’t function correctly. Inspection and testing confirm that your part meets design requirements.
What Inspection Tools Confirm Dimensional Accuracy?
| Inspection Type | Tools Used | Acceptance Criteria |
|---|---|---|
| Basic measurements | Calipers, micrometers | All critical dimensions within specified tolerance (often ±0.1mm for general parts). |
| Precision measurement | Coordinate Measuring Machine (CMM) | For tight tolerances (±0.01mm or better). CMMs provide detailed reports. |
| Surface quality | Surface roughness tester, visual inspection | No scratches, bubbles, or tool marks. Roughness Ra ≤ 0.8μm for visible surfaces. |
| Thread verification | Thread gauges | Screws and nuts should engage smoothly without binding. |
What Functional Tests Should You Perform?
Mechanical Testing
- Fit test: Assemble the prototype with other components. Gaps should be ≤ 0.2mm for a good fit.
- Motion test: For moving parts (hinges, slides), cycle them repeatedly. Aim for 1000+ cycles without failure or excessive wear.
- Strength test: Apply expected loads. Does the part bend, crack, or deform?
Environmental Testing
- Temperature: If the product will be used outdoors or near heat sources, test from -20°C to 60°C (typical consumer range).
- Humidity/Water: For waterproof products, test to IPX4 (splash resistant) or higher ratings.
- Chemical resistance: Wipe with common chemicals (cleaners, oils) to check for damage.
Real-world example: A company developing a new electric skateboard prototype tested the enclosure by mounting it to a vibration table. After 2 hours of simulated road vibration, a mounting boss cracked. The design was revised to add fillets and increase wall thickness. The second prototype passed the test. Finding this issue before production saved an estimated $30,000 in tooling rework.
How Do You Revise and Optimize Based on Testing?
Few prototypes are perfect on the first try. The revision phase is where you turn test failures into design improvements.
How Do You Analyze and Fix Problems?
When a prototype fails, don’t just guess at the fix. Follow a structured approach:
- Identify the root cause:
- Material issue: Was the material too weak? Too brittle? Wrong for the application?
- Design flaw: Is there a stress concentration? A wall too thin? A sharp corner that should be radiused?
- Machining issue: Was a tolerance not held? Surface too rough? Internal stress from machining?
- Update the CAD model:
- Fix the geometry based on your findings.
- Add radii to sharp corners to reduce stress.
- Increase wall thickness in weak areas.
- Adjust tolerances if parts didn’t fit.
- Adjust the machining process:
- If 3D printing, try different orientation for better strength.
- If CNC machining, adjust feeds and speeds for better surface finish.
- If casting, check mix ratios and curing conditions.
- Re-machine and retest:
- Prioritize critical fixes first.
- Test the revised prototype against the same criteria.
Industry data shows that each round of prototype revision improves design maturity by about 25% . Most projects need 1 to 2 revision cycles to meet all requirements. Complex products may need more.
How Do You Deliver the Prototype and Gather Feedback?
The final step is getting your prototype into the hands of stakeholders—whether that’s your own team, investors, or potential customers. Their feedback closes the loop and guides the next steps.
What Should You Include with the Delivery?
A professional delivery builds trust and shows that you’ve done your homework.
- The prototype itself: Pack it carefully with foam, bubble wrap, or a custom case to prevent shipping damage.
- Test report: Include dimensional inspection data and functional test results. This proves the prototype meets specifications.
- Photos: Document the prototype from multiple angles, especially if it will be used for marketing or investor presentations.
- Instructions: If the prototype has moving parts or requires assembly, include simple instructions.
How Do You Collect Useful Feedback?
Don’t just ask “What do you think?” Ask specific questions that guide improvement.
- For form: “Does the size and shape feel right in your hand?” “Is the button placement comfortable?”
- For function: “Did it perform as expected?” “Was it easy to use?”
- For appearance: “Does the color and finish match your expectations?” “Does it look like a premium product?”
Record feedback in a shared document (Google Docs, Trello, or a simple spreadsheet) so everyone can see what changes are planned for the next iteration.
Conclusion
Rapid prototype machining is more than just making a model. It is a structured process that moves your product from concept toward reality through careful design, smart material selection, precise manufacturing, and thorough testing.
The steps are clear:
- Design your part with manufacturing in mind, including all details and tolerances.
- Prepare materials that match your prototype’s purpose and your chosen method.
- Choose the right manufacturing method—CNC machining for precision, 3D printing for complexity, silicone molding for small batches.
- Post-process to refine appearance and function.
- Inspect and test to verify that the prototype meets requirements.
- Revise based on test results, turning failures into improvements.
- Deliver and gather feedback to guide the next steps.
Each step builds on the last. Skipping or rushing any of them increases the risk of costly mistakes later. But following the process systematically helps you catch problems early, when they are cheap to fix, and move confidently toward mass production.
Remember: The goal of rapid prototype machining is not just a part. It is knowledge—knowledge that your design works, that it can be made, and that it will satisfy your customers. That knowledge is the most valuable output of the entire process.
Frequently Asked Questions
How long does the entire rapid prototype machining process take?
It depends on complexity and method. A simple 3D-printed part can go from CAD file to finished prototype in 24 hours. A complex CNC-machined metal part might take 3-5 days. Silicone molding for small batches typically takes 5-7 days because mold making adds time. Always add buffer time for revisions—most projects need at least one revision cycle.
Can I use the exact same material for the prototype and the final product?
Often, yes. If your final product uses aluminum, ABS, or nylon, you can prototype in those materials using CNC machining or 3D printing. For materials that are hard to machine (like carbon fiber composites), you may need to prototype with a similar material that machines more easily, then validate the final material later.
How much does rapid prototype machining cost?
Costs vary widely. A small 3D-printed plastic part might cost (20 to )50. A medium-sized CNC-machined aluminum part might cost (200 to )500. Complex metal parts with tight tolerances can exceed $1,000. Get quotes from multiple providers and ask for breakdowns of setup time, material cost, and machine time.
What if my prototype fails testing? Should I start over?
No—failure is part of the process. Analyze why it failed, fix the CAD model, and make a revised prototype. This is much cheaper than discovering the same problem after production tooling is built. Most successful products go through multiple prototype iterations before final design freeze.
Can I make multiple identical prototypes for user testing?
Yes. For small quantities (5-20 units), silicone molding is often the most cost-effective method. For larger quantities (20-100 units), consider rapid injection molding using aluminum tools. For metal parts, CNC machining multiple units is possible but can be expensive—consider if the test really needs metal, or if a plastic simulation will suffice.
Discuss Your Projects with Yigu Rapid Prototyping
Navigating the rapid prototype machining process requires experience, the right equipment, and a partner who understands your goals. At Yigu Rapid Prototyping, we have helped hundreds of companies—from solo inventors to Fortune 500 manufacturers—turn their ideas into physical reality.
Our team brings decades of combined experience in CNC machining, 3D printing, silicone molding, and rapid tooling. We do not just run parts. We consult with you on design for manufacturability, material selection, and the most efficient path to your goal. Whether you need a single concept model in 24 hours or 50 identical parts for user testing, we deliver consistent quality with clear communication every step of the way.
We believe in transparency. You will know exactly what your prototype will cost, how long it will take, and what to expect at each stage. No surprises. Just parts that meet your specifications and help you move forward with confidence.
Ready to start your next project? Contact Yigu Rapid Prototyping today for a free consultation and quote. Let’s build something great together.